Page 58 © Boule Medical AB, March 2018. Article no. 1504496
7. Menu Structure and Advanced Setup
Advanced Parameter Setup
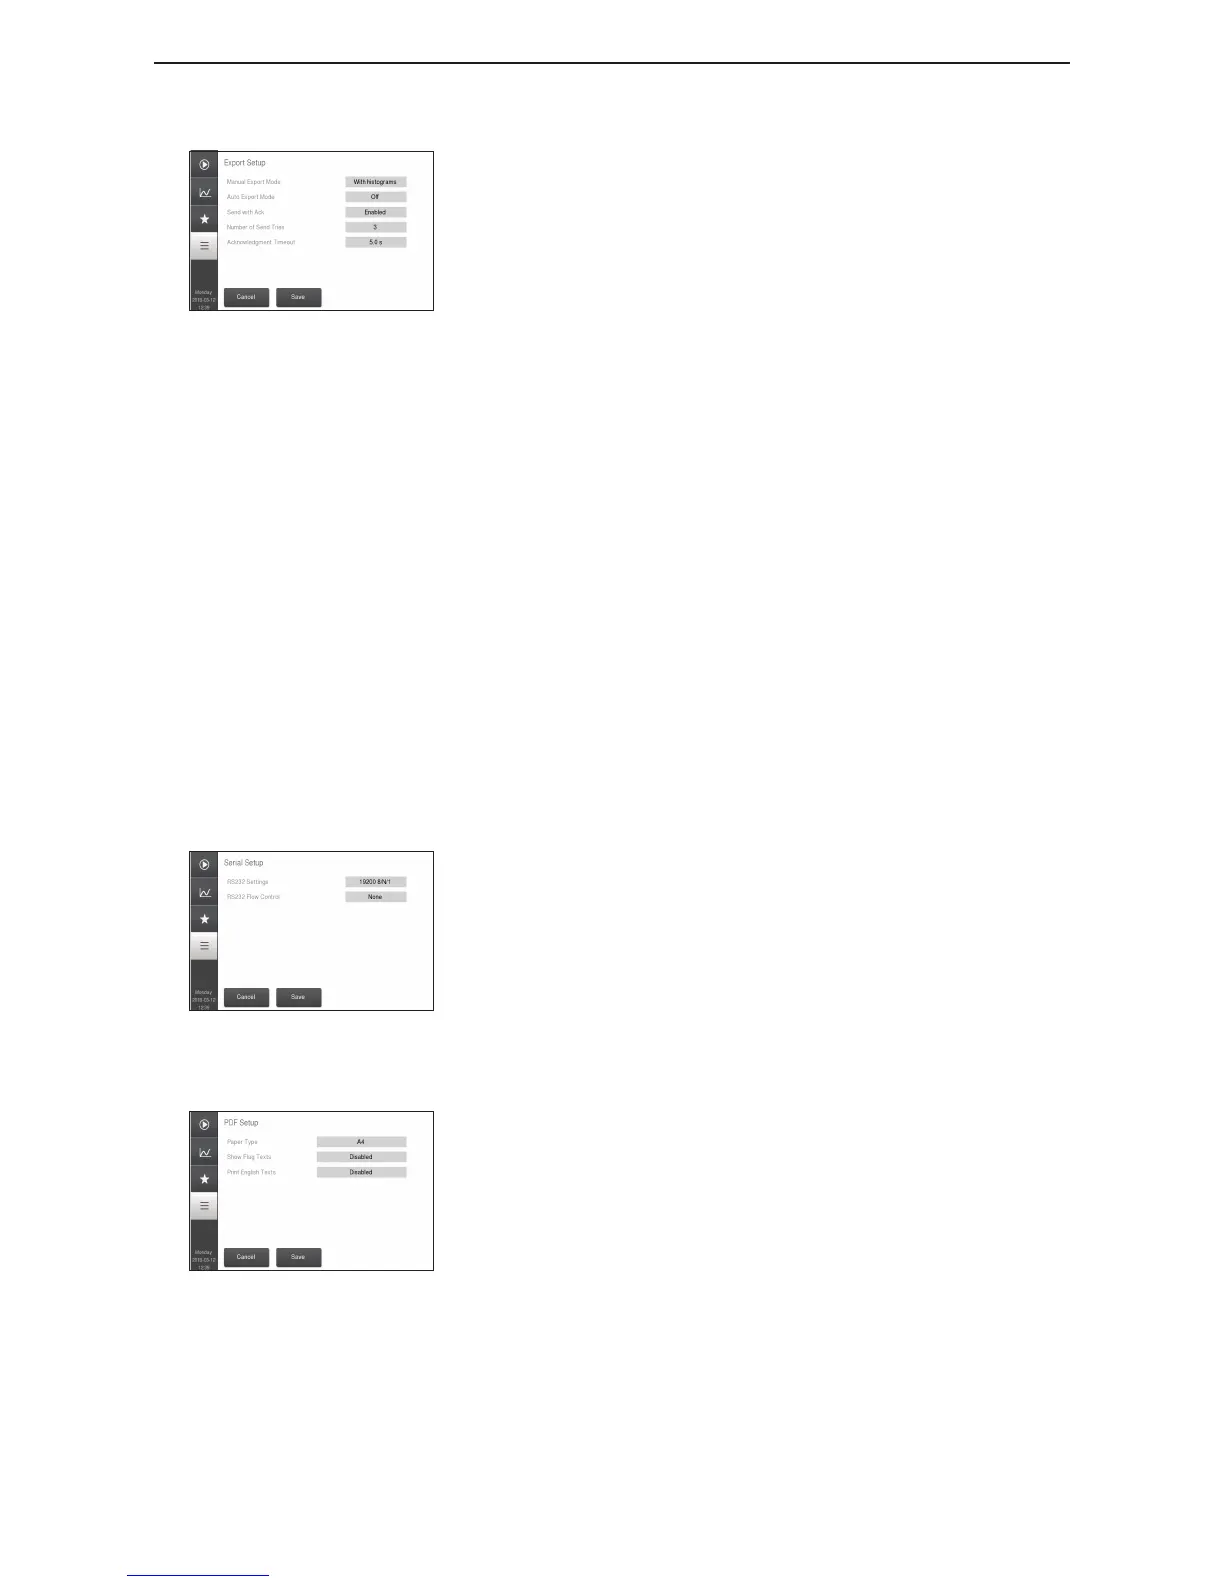
Figure 93: Export Setup
Export Setup
General settings for export of data can be found here.
Manual Export Mode – Setup the manual export mode of
samples by either selecting Without histograms or With
histograms, and then press Save.
Auto Export Mode – To automatically export sample results
after analyzing a sample choose either Without histograms
or With histograms, and then press Save.
Send with Ack – If the host computer should send a message
acknowledging the successful transfer of data during export,
set Send with Ack to Enabled and then press Save.
− When Enabled and the analyzer does not receive the
acknowledgment before Acknowledgment Timeout,
the instrument resends the data for Number of Send
Tries before reporting an error to the user.
Number of Send Tries - To change the number of tries to
export data, choose Number of Send Tries, and then set
from 1 to 5
− To save, select and then press Save.
Acknowledgment Timeout - To change the amount of time
before timeout, choose Acknowledgment Timeout, and
then set from 1 to 30 seconds.
− To save, select and then press Save.
Figure 94: Serial Setup
Serial Setup
If Send by USB-to-RS232 has been Enabled, the RS232
communication setup can be done here.
To setup RS232 baud rate, choose RS232 Settings button,
choose baud rate, and then press Save.
RS232 Flow Control – To setup RS232 ow control, choose
RS232 Flow Control button, choose ow control, and then
press Save.
Figure 95: PDF Setup
PDF Setup
This function allows user to change paper formats, settings,
show ag texts, header/footers, print enlish text for PDF.
For header text – set header type to Text, then go to Edit
PDF Header and set Header Line 1-4 to desired text.
For header/footer image - insert a USB memory with a
header image max 500x110 pixels named header.xx (chosen
le format) - or footer.xx for footer image. Set header type
to Image. Set Edit PDF Header, Header Image Alignment to
desired alignment (Left, Center, Right). Set Header Image
File to User image and press Edit PDF Header Image from
USB Storage and the image le will be uploaded.


 To Next Page