Room Scheduling System • Room Agent Installation and Configuration 26
Assign service accounts —
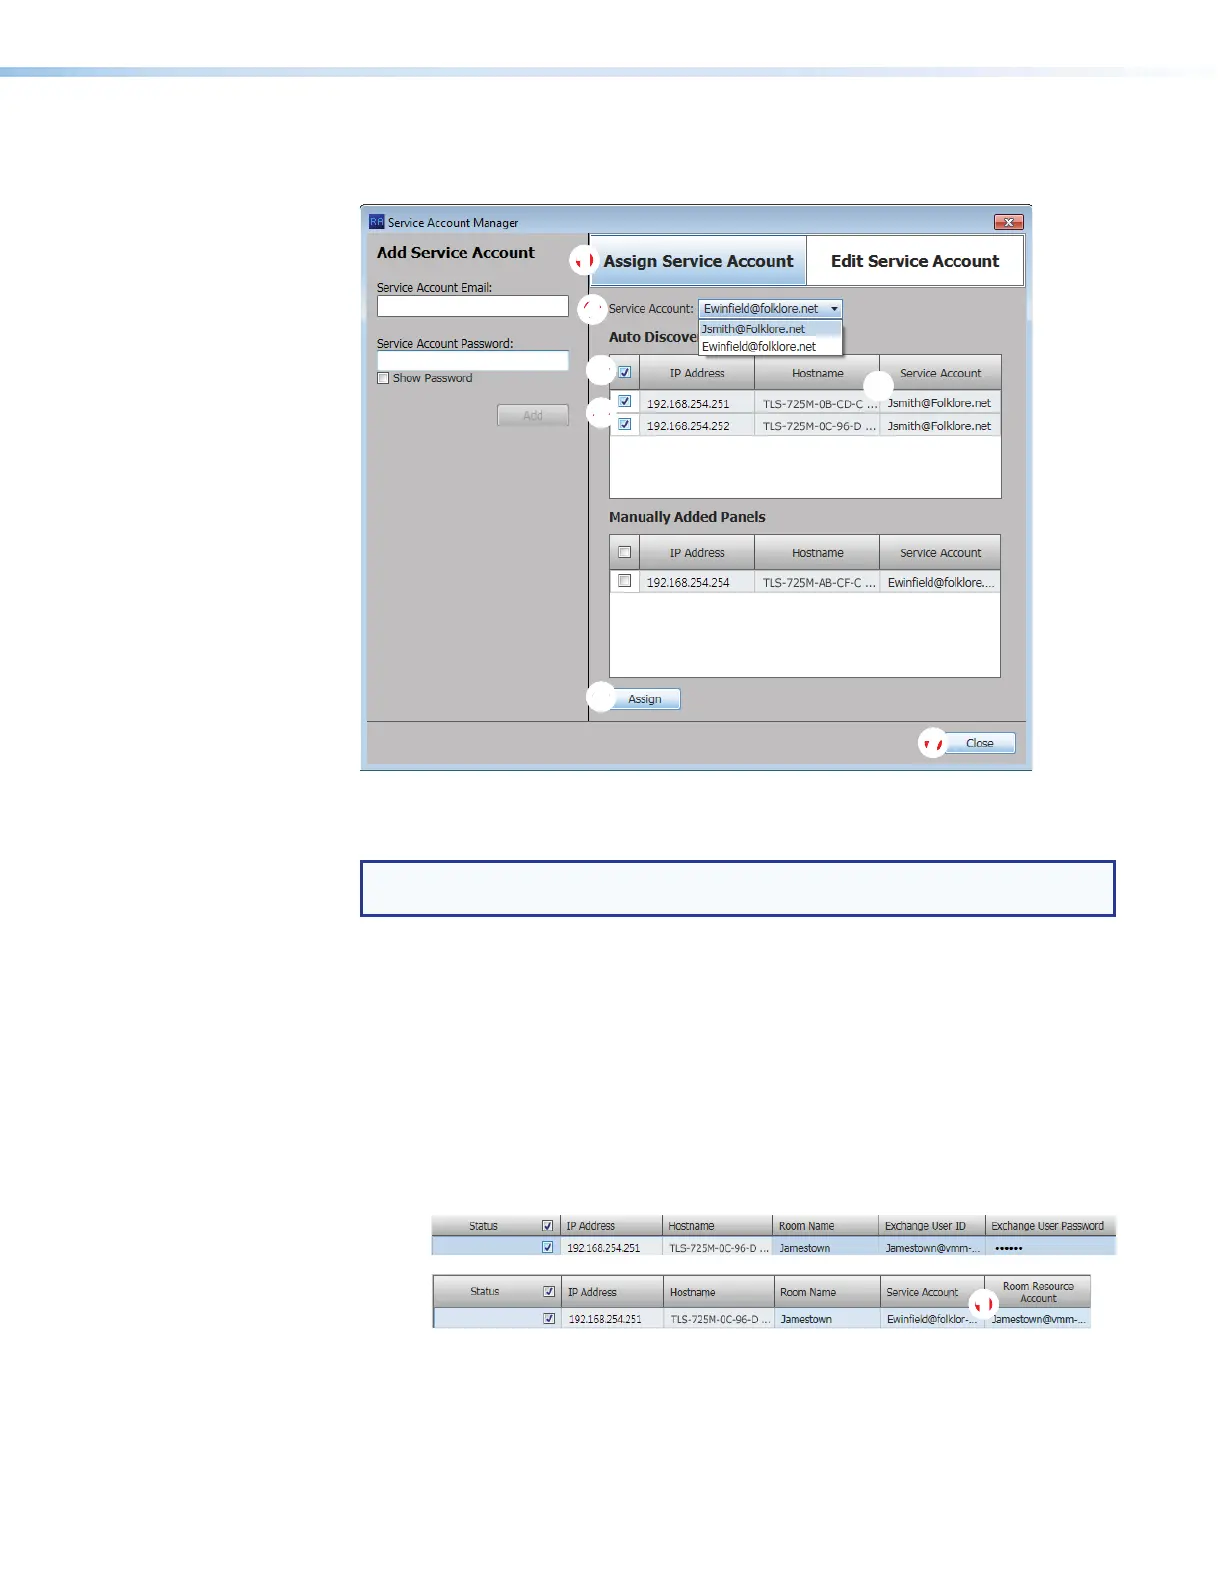
1. If necessary, click the Assign Service Account tab (see figure 24,
1
).
1111111111
44
44444444
22
22222222
55
55555555
66
66666666
77
77777777
33
33333333
Figure 24. Assign Service Accounts
2. Select (check) one or more panel IP Address checkboxes (
2
).
TIP: Select either the Auto Discovered Panels or Manually Entered Panels
checkbox (
3
) to select all panels in that pane.
3. Select the desired service account among the entries in the Service Account
drop-down list (
4
).
4. Click Assign (
5
). The selected Service Account is assigned to the designated panels
(
6
).
5.
Repeat steps 2 thr
ough 4 to assign other service accounts to other panels.
6.
Click Close (
7
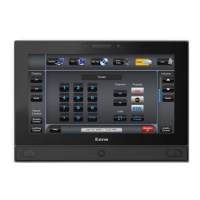
). The Service Account Manager dialog box closes and the Room
Agent software returns to the Panel Configuration Window displayed. For the panels
with service accounts that are enabled, the normal Exchange User ID and Exchange
User Password columns are titled Service Account and Room Resource Account
(see figure 25).
1111111111
Service Accounts
Not Enabled
Service Accounts
Enabled
Figure 25. Display With Service Accounts Enabled and Not Enabled
7. For each panel, enter the e-mail address used as the fully qualified room resource in the
Room Resource Account column (see figure 25,
1
).