Room Scheduling System • Room Agent Installation and Configuration 43
Room Occupancy tab
NOTES:
•
This scr
een is always selectable and behaves as described, but only TLS 520M,
TLS 725M, and TLS 1025M scheduling panels, and TLP Pro 520M touchpanels
have the digital I/O connectors necessary to connect the OCS 100 Occupancy
Sensors.
•
See
Occupancy Sensor Configuration on page 63 for an overview of connecting
the occupancy sensors to compatible panels.
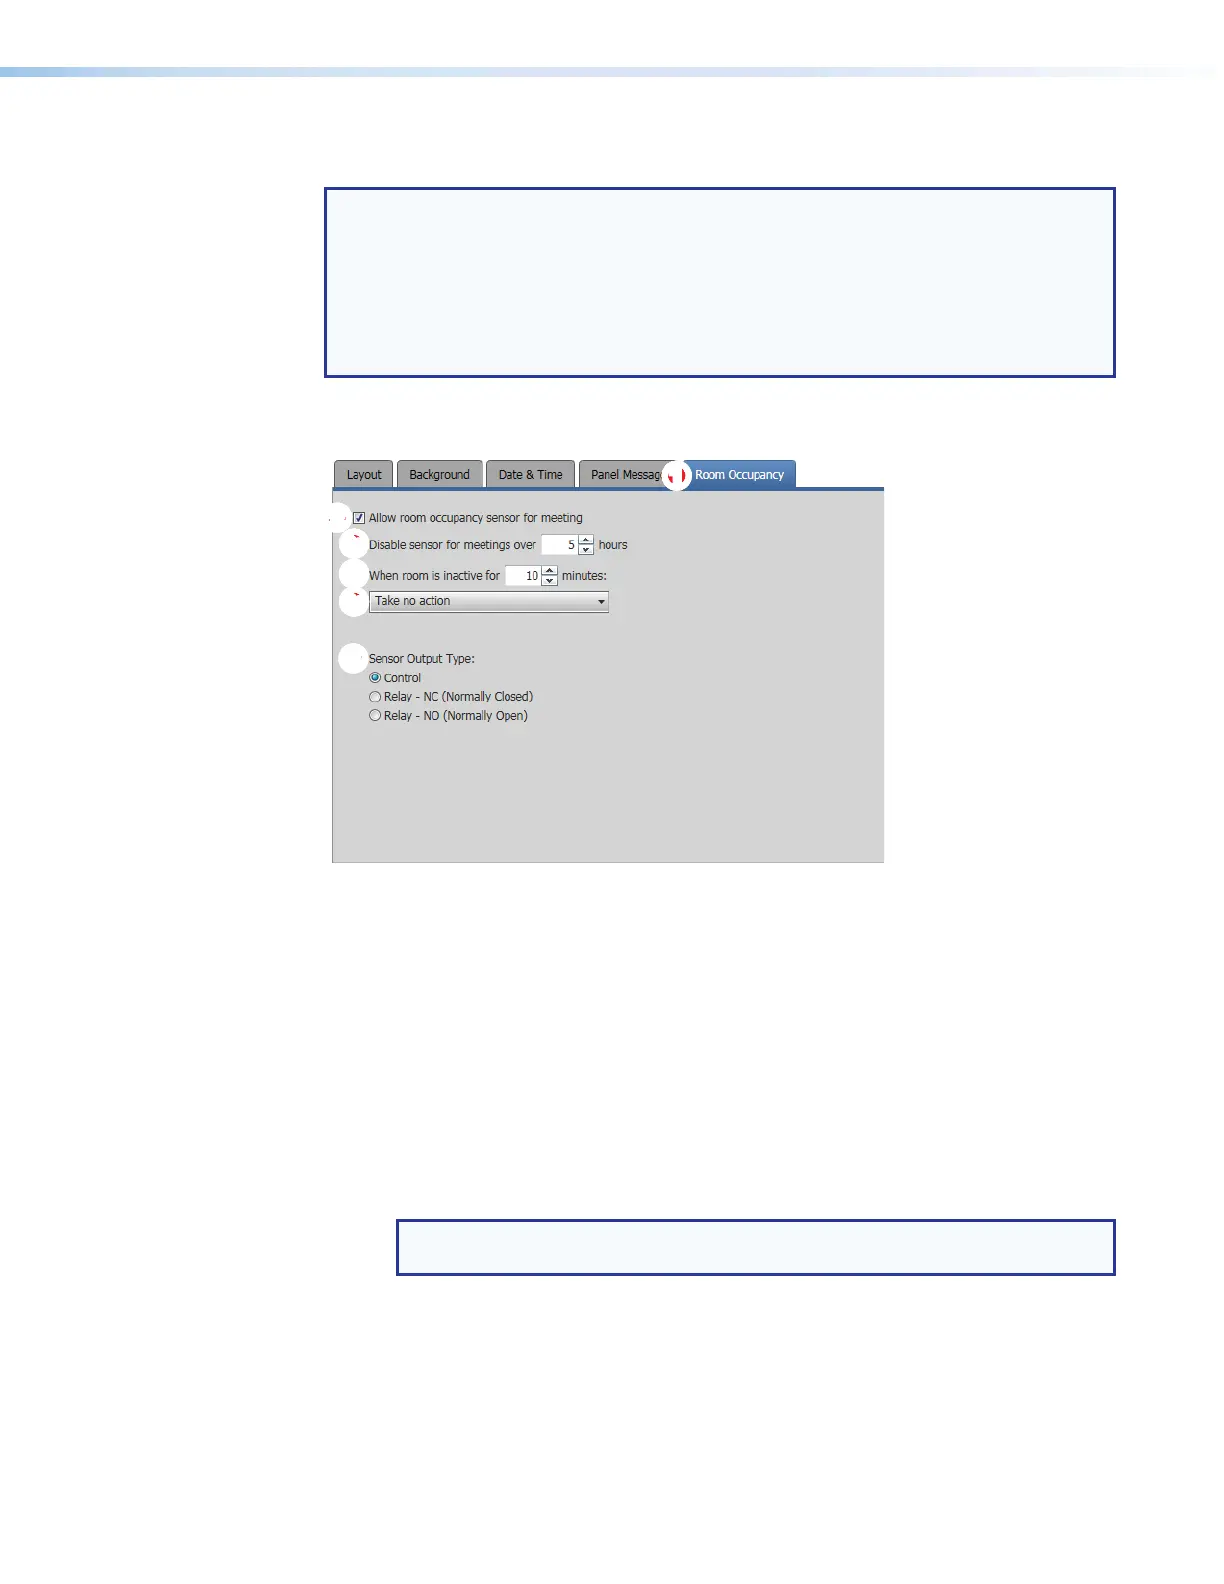
If necessary, click the
Room Occupancy tab (see figure 45,
1
) to access the settings for
rooms equipped with occupancy sensors.
1111111111
ÕÕÕÕÕÕÕÕÕÕ
ÖÖ
ÖÖÖÖÖÖÖÖ
××
××××××××
33
33333333
Figure 45. Panel Design Pane, Room Occupancy Tab
2
Allow room occupancy sensor for meeting checkbox — Check and uncheck this
box to enable and disable the use of room occupancy sensors to determine if a meeting
has started.
If checked, additional controls (see
Õ
through
×
) become available to control how the
sensors function.
Õ
Disable sensor field — Use the scroll buttons or type a value into this field to
disable the sensors for longer meetings.
Ö
When room is inactive field — Use the scroll buttons or type a value into this field
to set a time of room inactivity after the scheduled start time, after which the room
may be released for another meeting (as defined in
×
). This field may not contain
0 minutes.
NOTE: This counter begins after the sensor has changed state to indicate the
room is unoccupied.
×
When room is inactive drop-down list — Use this drop-down list to select
between Take no action (leave the room reserved) and Release room (make the
room available for other users).