NOTES:
• If you lose track of the input and output associated with a specific button, let
the mouse rest over one of the tie buttons for a moment. A field pops up (as
shown on figure 69) that identifies the input and output for that button.
• To tie an input to all outputs, click that input number.
4. Click the Take button to make the configuration changes or the Cancel button to
abandon the configuration changes.
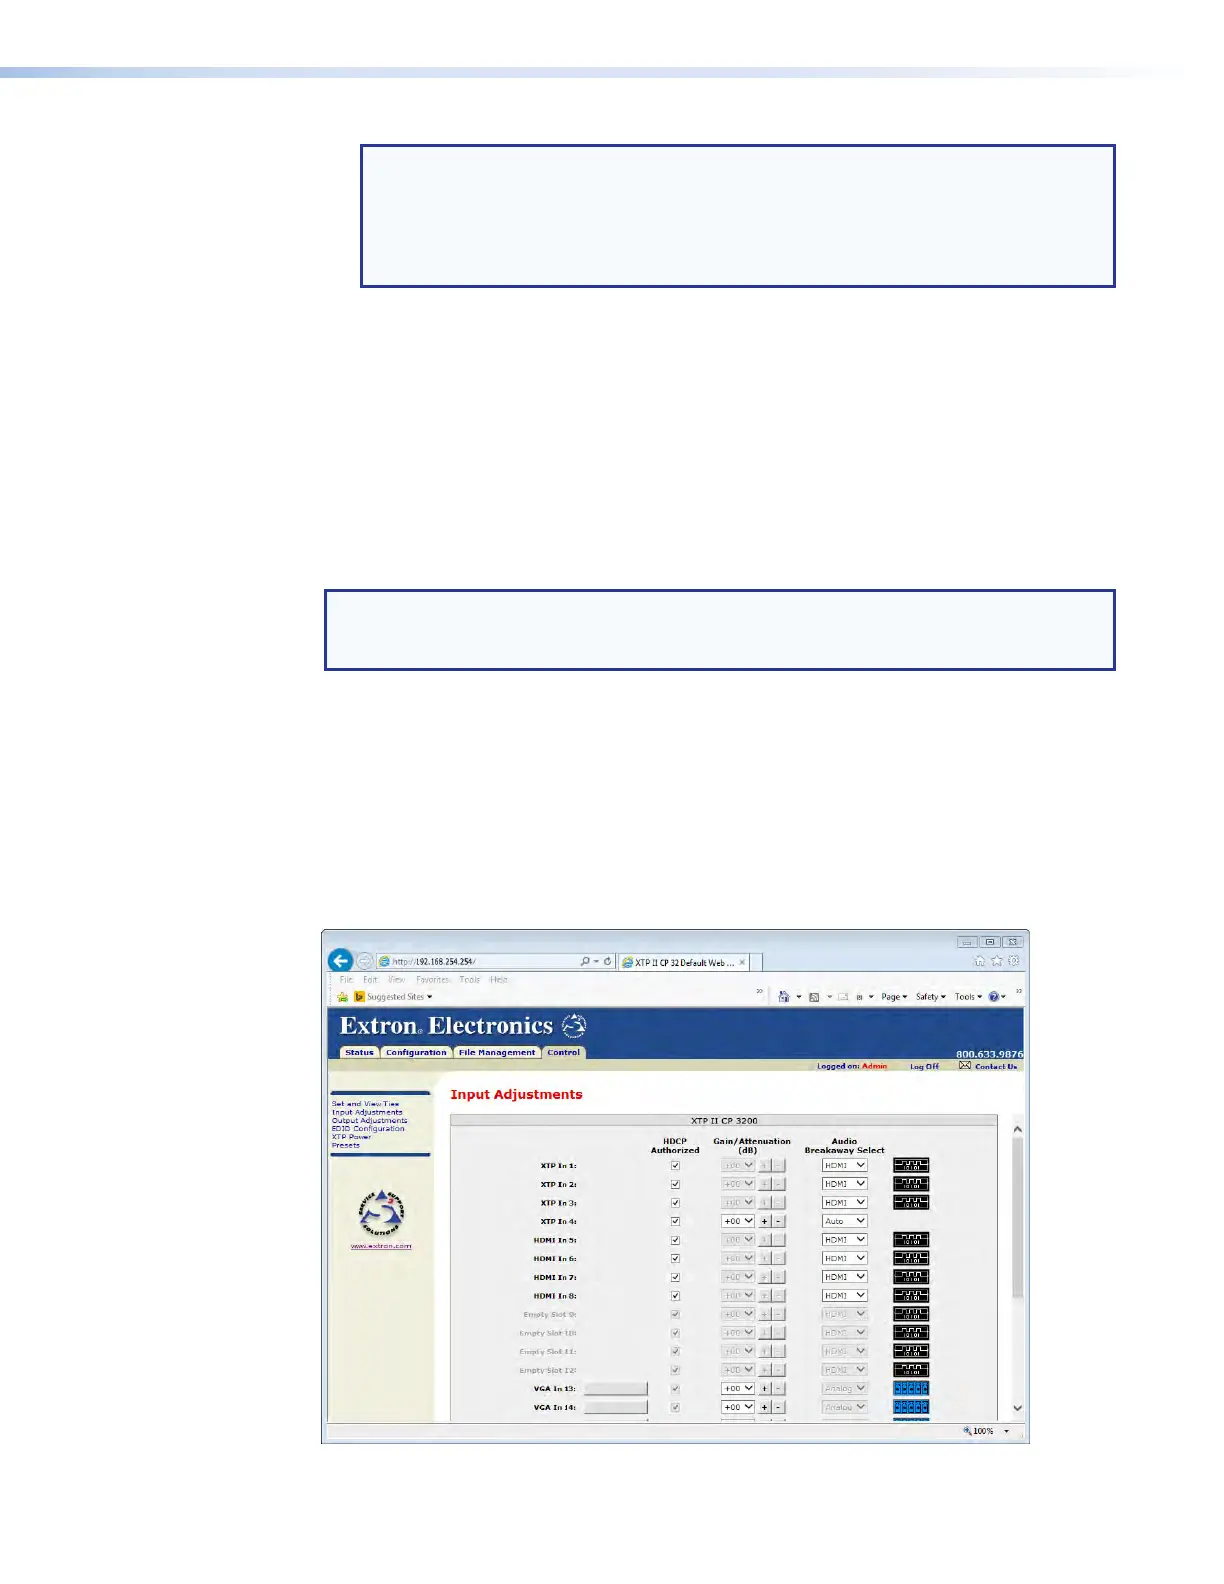
Input Adjustments Page
The Input Adjustments page (see figure 70) is a central location for changing how
input video and audio are processed and switched. Access the page by clicking the Input
Adjustments link on the left of the Set and View Ties, Output Adjustments, EDID
Configuration, XTP Power, or Presets page.
The page tailors the options available for selection for the input boards installed. Options
that are not compatible with an input type are unavailable for selection.
NOTE: All options are available for selection for XTP CP 4i (XTP input) boards. If the input
to an endpoint connected to the XTP board is compatible with the option, the
adjustment is made. The Input Adjustments page indicates the change regardless.
Possible adjustments include:
• Auto Image — Available for inputs on XTP CP 4i VGA (analog video) boards.
• HDCP Authorized — Available for inputs on XTP CP 4i, XTP CP 4i HDMI, and
XTP CP 4i DVI Pro boards.
• Gain/Attenuation — Available for inputs on all boards. Unavailable if HDMI is
selected in the Audio Breakaway Select drop-down list.
• Audio Breakaway Select — Available for inputs on XTP CP 4i, XTP CP 4i HDMI, and
XTP CP 4i DVI Pro boards.
Figure 70. Input Adjustments Page
XTP II CrossPoint 1600, 3200, and 6400 Switchers • HTML Operation
136