EasyManua.ls Logo

FAAC E145 - User Manual

FAAC E145
56 pages
Print Icon
To Next Page IconTo Next Page
Loading...
E145
E145

Other manuals for FAAC E145

Questions and Answers

  • M
    Mrs. Katherine WhiteJul 27, 2025
    What to do if FAAC Control Unit gate won't open after pulse?
    • J
      jenniferjensenJul 27, 2025
      If your FAAC Control Unit gate isn't opening after receiving an OPEN pulse, verify that the safety devices and STOP are connected to the negative and that their corresponding LEDs are ON. Also, check the photocells for proper alignment and engagement. Finally, ensure the SETUP has been completed correctly; repeat the setup process if needed.
  • S
    Sally SchmidtAug 2, 2025
    Why FAAC Control Unit gate won't close?
    • D
      David DunlapAug 2, 2025
      If your FAAC Control Unit gate is not closing, make sure the photocell wiring and alignment are correct. Also, check that there is no OPEN signal active. Finally, verify which function logic has been selected (automatic or semi-automatic).
  • D
    Dr. Nicole HernandezAug 8, 2025
    How to troubleshoot FAAC Control Unit board that doesn't turn on?
    • A
      aedwardsAug 8, 2025
      If your FAAC Control Unit board isn't turning on, first ensure that the board is receiving 230V~. Next, check if fuse F1 is intact.
  • J
    Janet LewisAug 14, 2025
    What to do if FAAC Control Unit gate doesn't reverse upon obstacle?
    • L
      Laura StephensAug 14, 2025
      If your FAAC Control Unit gate isn't reversing when it encounters an obstacle, ensure that the encoders on the motors are enabled. Also, check the obstacle detection sensitivity.
  • A
    Amy MitchellAug 19, 2025
    Why FAAC Control Unit gate doesn't reverse when photocells are engaged?
    • V
      Victor WilsonAug 19, 2025
      If the FAAC Control Unit gate does not reverse when the photocells are engaged, verify that the traditional photocells are correctly wired and that the BUS photocell configuration is correct (if present). If necessary, repeat the acquisition of the BUS-2EASY devices.

Summary

CE DECLARATION OF CONFORMITY

WARNINGS FOR THE INSTALLER

General Safety Obligations

Essential safety guidelines and obligations for installers of the automated system.

MEANING OF THE SYMBOLS USED

TECHNICAL SPECIFICATIONS

PREPARING FOR INSTALLATION

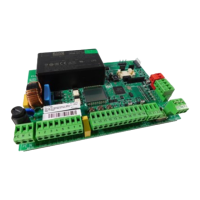
BOARD LAYOUT

ELECTRICAL CONNECTIONS

J1 - Mains Power Supply

Connection details for the main power supply to the J1 terminal.

J2 - Motors and Flashing Lamp

Instructions for connecting motors and the flashing lamp to the J2 terminal.

J3 - Low-Voltage Accessories

Connection of low-voltage accessories, inputs, and outputs to the J3 terminal.

J12 - Programmable Outputs

Configuration of programmable outputs and electric locks on the J12 terminal.

J6;J12 - Limit Switch and Gatecoder

Connecting limit switches and gatecoders to the J6 and J12 terminals.

J10 - BUS-2 EASY Accessories

Connecting BUS-2EASY accessories to the J10 connector.

BUS-2 EASY Photocell Setup

Details on connecting and configuring BUS-2EASY photocells.

BUS-2 EASY Encoder Setup

How to connect and assign addresses to BUS-2EASY encoders.

Other Connectors (J5, J14, M1 A)

Information on connecting XF, Decoder/Minidec/RP, and X-COM modules.

Fail Safe Function

Configuration of the Fail Safe safety feature for photocell operation.

PROGRAMMING

Basic Programming Functions

Step-by-step guide for basic programming functions via the board interface.

Advanced Programming Functions

Detailed guide for advanced programming functions via board or PC/MAC.

WORK TIME LEARNING AND SETUP

BUS-2 EASY DEVICE INSTALLATION

BUS-2 EASY Device Entry

Step-by-step procedure for entering BUS-2EASY devices into the system.

TIME LEARNING - SETUP

TESTING THE AUTOMATED SYSTEM

MEMORISING THE RADIO CODE

SLH;SLH LR Radio Controls

Procedure for memorizing SLH/SLH LR radio controls.

LC;RC Radio Controls (433 MHz)

Procedure for memorizing LC/RC radio controls operating at 433 MHz.

DS Radio Controls

Procedure for memorizing DS radio controls using dip-switches.

DELETING THE RADIO CONTROLS

START-UP

Checking the LEDs

Verifying LED status in relation to input states for proper operation.

SIGNALLING ERRORS AND ALARMS

Errors

Table of error codes, their meanings, and solutions for system malfunctions.

Alarms

Table of alarm codes, their meanings, and solutions for non-critical issues.

TROUBLESHOOTING

MANAGING CONFIGURATION FILES (J8 USB)

Board Software Upgrade

Procedure for updating the board's application software via USB.

Configuration and Timer Upgrades

Procedures for upgrading board configuration and timer settings via USB.

File Download Operations

Saving board configuration, timer, and radio code files to USB.

FUNCTION LOGICS

Semiautomatic and Step-by-Step Logics

Details on Semiautomatic, Step-by-Step, and Automatic Safety logics.

Other Automatic and Special Logics

Details on Automatic, Timer, Mixed, and Dead-man logics.

FAAC E145 Specifications

General IconGeneral
Power Supply230V AC (+6% -10%) 50 (60) Hz
Operating Temperature-20°C to +55°C
Operating Voltage24V DC
Output Current10A
Number of Outputs2
Max Accessories Power24V DC 0.5A
HousingABS

Related product manuals