Remote modules. RIO5, RIOW and RIOR series.
CNCelite
8058 8060
8065 8070
4.
RIOW REMOTE MODULES. (CANOPEN PROTOCOL).
Installation of the modules.
ꞏ56ꞏ
REF. 2107
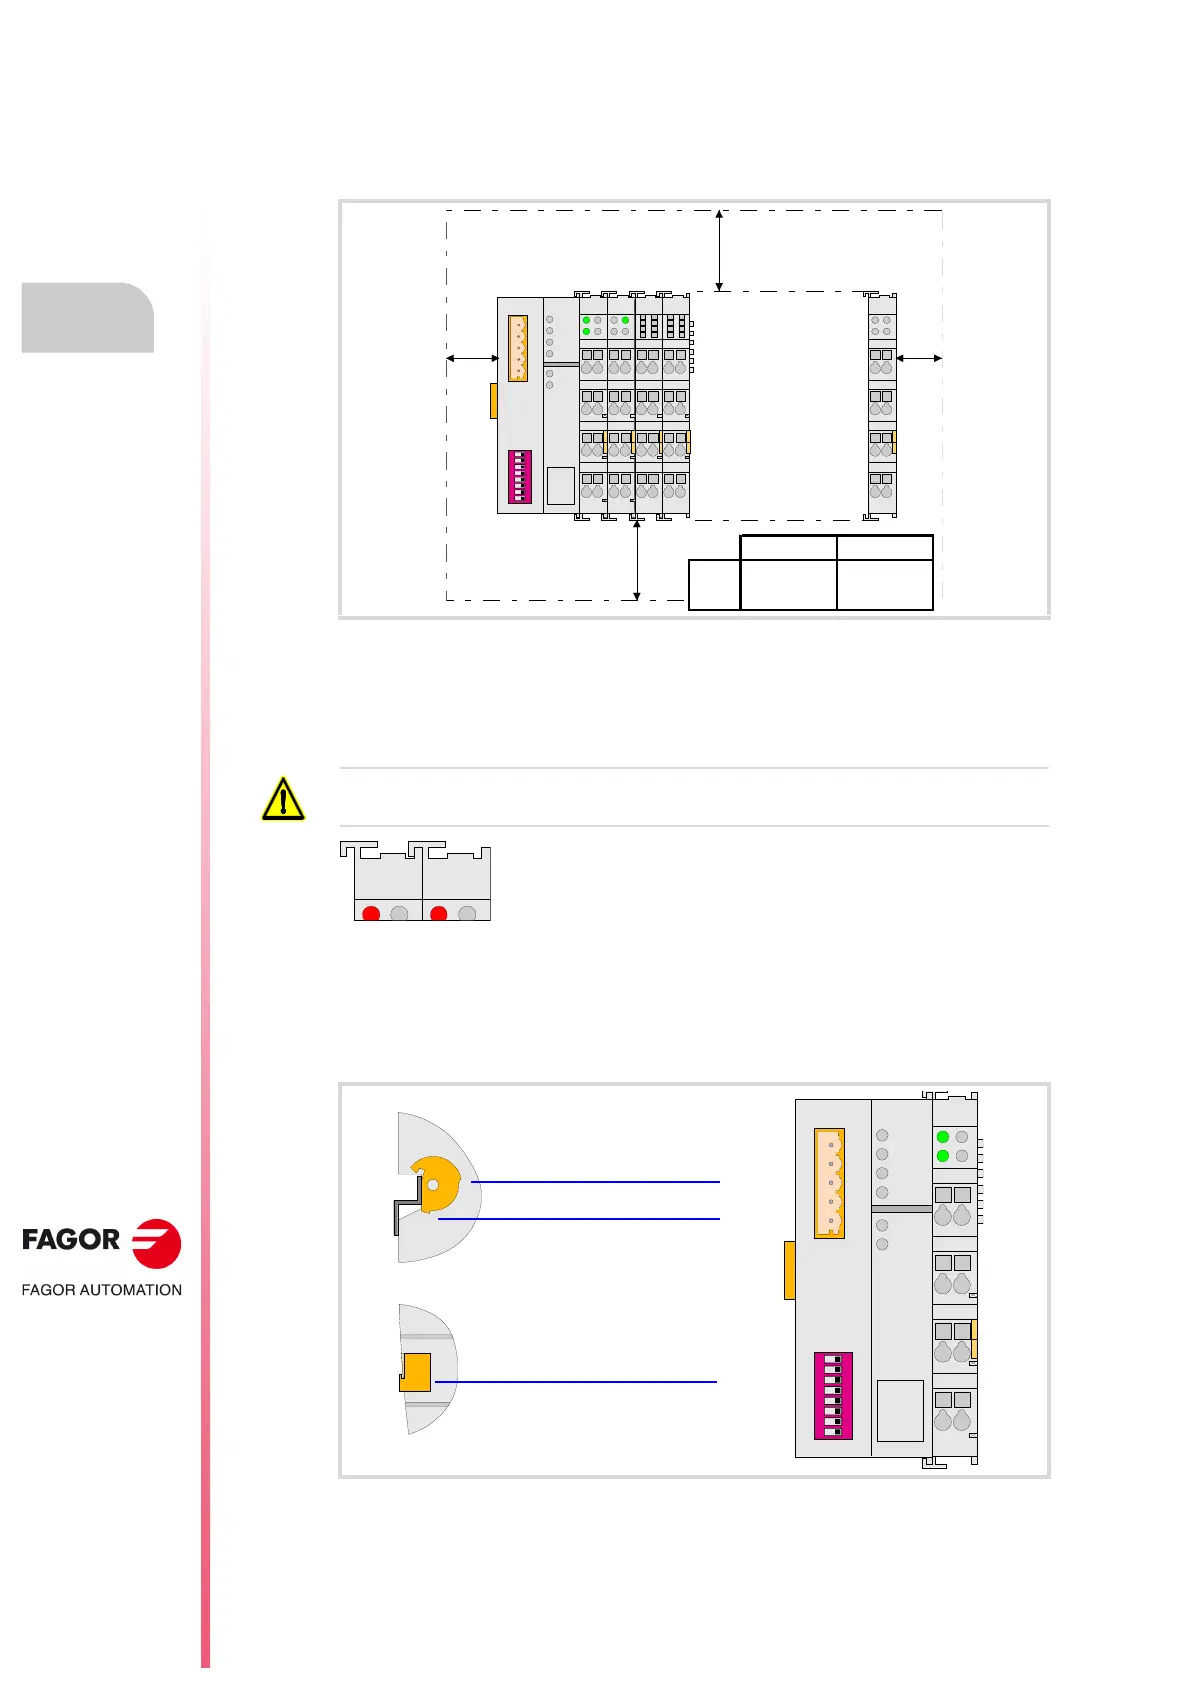
Clearance recommended around a group.
It is recommended to leave a gap between the group and the adjacent elements (other
groups, cable carrying channels, enclosure walls, etc.) for better ventilation and easier
handling of the unit later on.
How to mount and dismount the modules.
Since the communication between the modules is done through the six-pin connector on the
side of the modules, they must be latched to each other.
Always mount the modules from left to right beginning with the leading module and always
ending the group with the end module (last). To fix the leading module, once mounted on
the rail, push onto the top groove of the locking disk located on the left side of the module.
To free the module and be able to remove it from the rail, push on the bottom groove of the
locking disk. To help remove a module from the rail, pull the unlocking tab located on the
right side of the module.
48
15
26
37
C
A
D
B
56781234
ON
STOP
RUN
TX
RX
Overflow
I/O
24V 0V
48
15
26
37
C
A
D
B
48
15
26
37
C
A
D
B
48
15
26
37
A
B
C
D
E
F
G
H
48
15
26
37
A
B
C
D
E
F
G
H
A A
B
B
mm inch
A
20 0,787
B
35 1,378
Do not touch the side pins of the bus to avoid soiling them, damaging them and any possible
electrostatic discharges that could damage the module.
To ensure that the modules are joined together, they have some tabs
on top and at the bottom. To join the modules together, slide each
module onto the previous one, from top to bottom, making sure that
the tabs latch onto each other.
Push to fix the module.
Push to remove the module.
Unlocking tab.
48
15
26
37
C
A
D
B
56781234
ON
STOP
RUN
TX
RX
Overflow
I/O
24V 0V
 Loading...