VEK MNH Operating Manual v1.3 en
9 Commissioning
Assembly and electrical connection
• The system is not in use.
• The work must be carried out by qualified specialists.
• All available cables are firmly attached to the terminal block.
• The terminal blocks are sited in the input and output sockets of the same colour.
• The detector is firmly mounted on the top hat rail.
Tools for the system
• Always observe the manufacturer’s instructions!
• No tools are required to commission the system.
Commissioning the detector
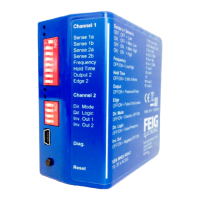
1. Define the settings with the DIP switches.
2. Switch the power supply to the detector on.
The VEK MNH series detectors automatically run a test of the induction loops as well as a frequency
alignment.
The detector is ready for operation when the blue LEDs are continuously lit. There is more
information in the section on LED indicators.
3. Start up all components of the system (observe the manufacturer’s instructions).
4. Carry out a functional test of the system (observe the manufacturer’s instructions).
The detector is ready for continuous operation.
Customizing the detector’s settings
The device settings can be changed during operation using the DIP switches.
The detector can be customized using the software Detector Tool via USB interface.
Read more about the configuration in the chapters about the DIP switches and the Detector Tool.
 Loading...