5. Maintenance and conversion
5−21
Festo P.BE−MPA−EN en 0910d
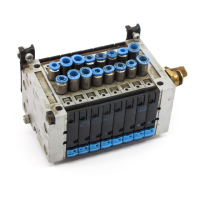
3. Screw the sub−bas e s together. Tighten the screws in the
sequence 1, 2, 3as shown in the diagram by hand.
Thentighten the screws with a torque of to 1.8 Nm (±10%).
1
2
2
1
3
Fig.5/8: Connecting plate fittings
4. Mount the MPA−S valve terminal onto the fastening
surface (see chapter 2 Mounting onto a wall" or
Mounting onto an H−rail").
5. Then install the pneumatic and electrical connections
(seechapter 3 Installation, connecting the MPA−S
valveterminal").
 Loading...