17
ESPAÑOL FRANÇAIS
DEUTSCH
ENGLISH
ITALIANO
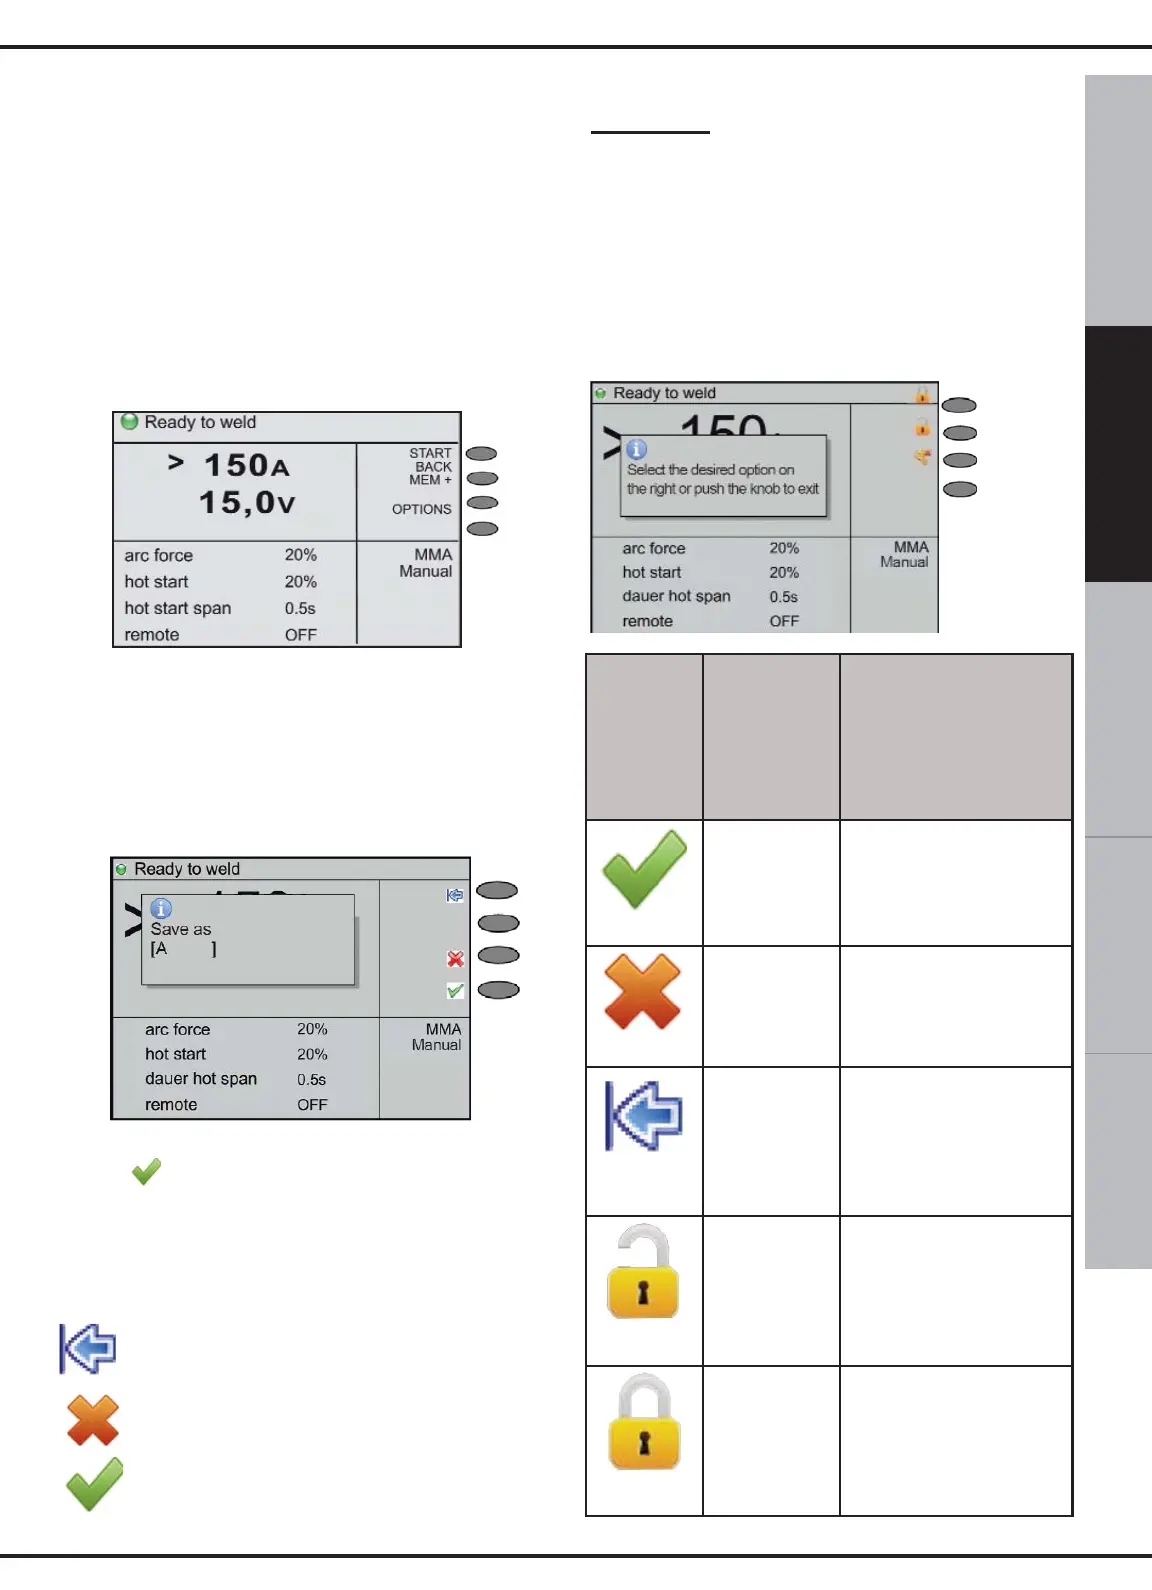
14. MEMORISING THE WORK POINT
As illustrated in the previous paragraphs, the
welder allows for a notable personalisation
of the work point (when used both manually
and synergically). The work point for a
workpiece can be saved in the memory and
rapidly recalled at a later date. To save a
work point follow the instructions below:
1. Set the appropriate parameters for the
welding mode required.
2- Press the MEM+ button (4 of fig 1).
3- Turn switch 10 (fig 1), chose the first letter
of the name with which you want to save the
work point.
4- Press switch 10 to confirm the selected
letter.
5- Repeat steps 2 and 3 to complete the name.
6- Confirm the name by pressing the button
again . From this moment onwards the
work point will be memorised with its own
name and displayed with the other welding
procedures.
Meaning of the back :
sp button: cancels the previous letter
inserted.
Cancel: cancels the operation.
OK: confirms the name of the work
point.
Appendix:
titles/button symbols/function buttons
and pop-up notifications
In the following figure and table, you will find
the descriptions of the principal title/button
symbols/function buttons and pop-up
notifications, with regard to error messages
that may appear on the display:
F1 key
F2 key
F3 key
F4 key
Symbol
Position
on
display
Description
F4 key
If information needs to be
entered by the user, this
button must be pressed to
confirm the data
F3 key
Press this button in the
event user data is requi-
red and you need to can-
cel the operation;
F1 key
In the event there is a
request for the user to
enter data, use this but-
ton to cancel the last digit
entered;
F1 key
When the keyboard lock
function is activated, using
switch 10 (fig.1), this but-
ton must be pressed to
deactivate the lock.
F1 key
When the keyboard lock
function is activated,
using switch 10 (fig.1),
this button must be pres-
sed to activate the lock.