Installation and Setup Guide
11
Chapter 3 - Getting Started
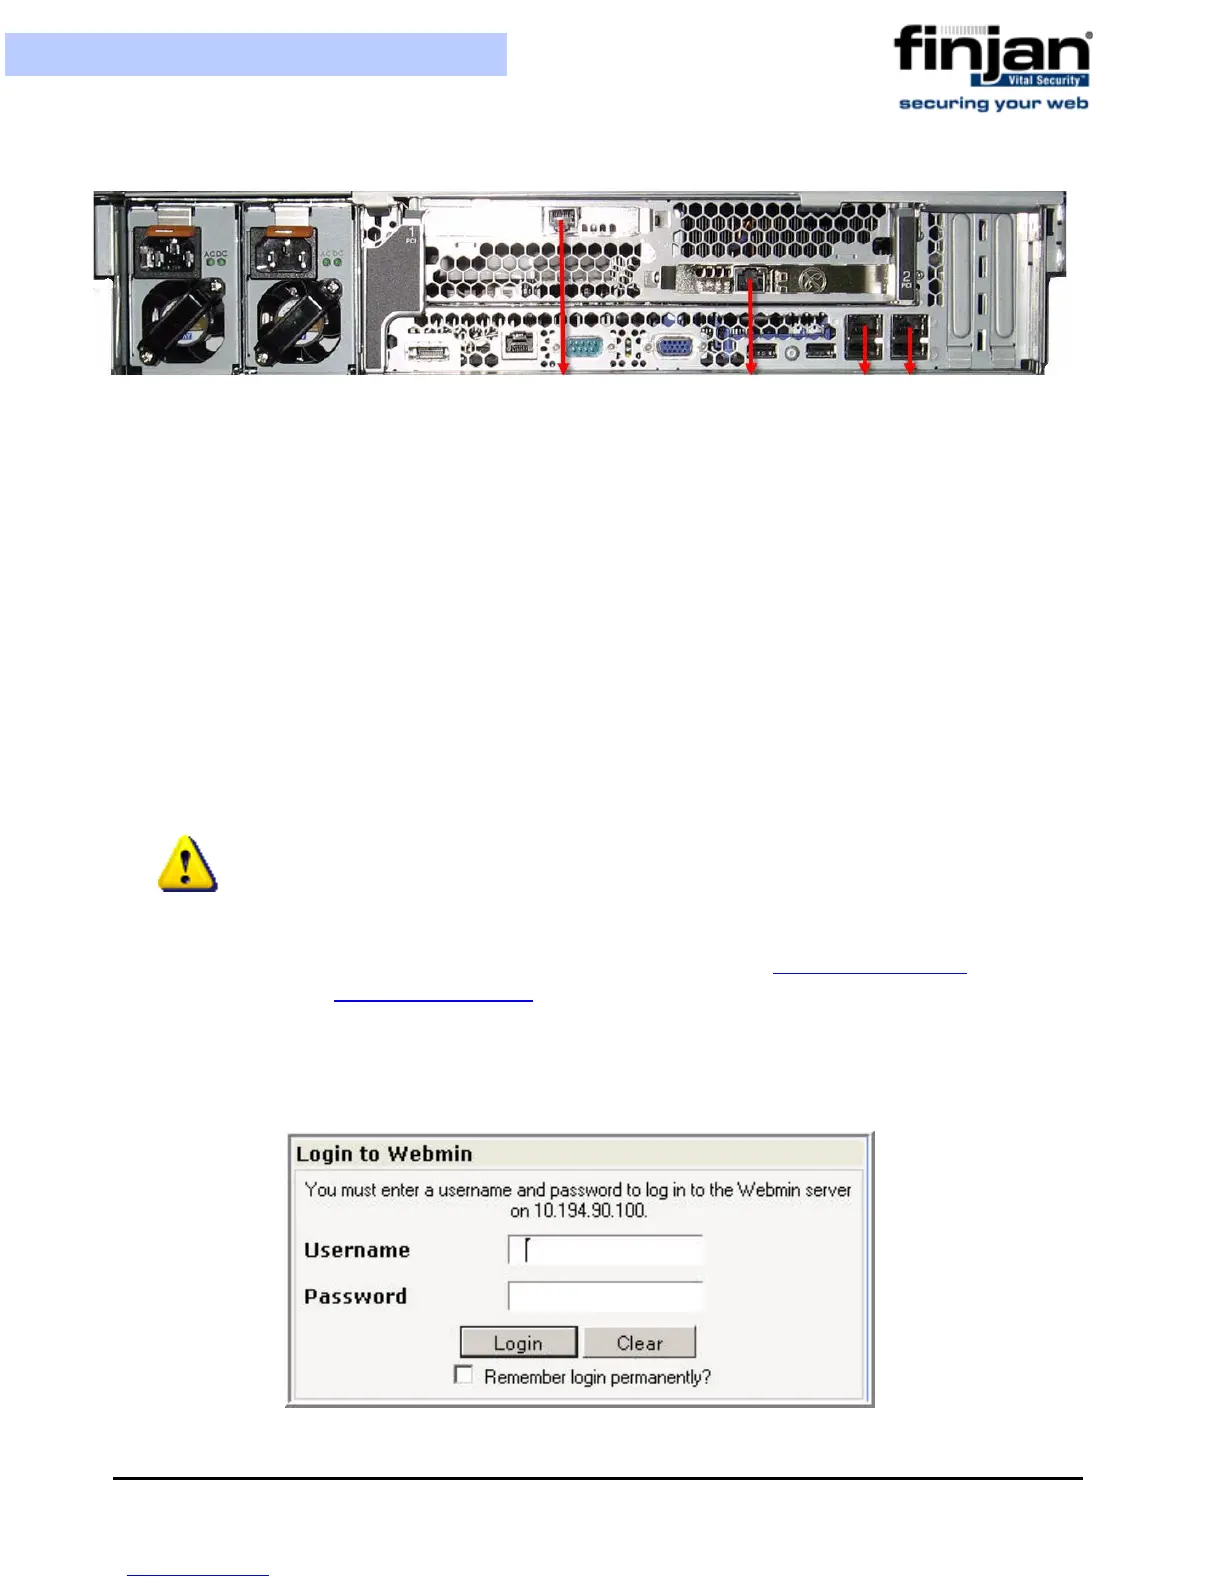
GE3 GE2 GE1 GE0
Figure 3-1: NG-6000 Back Panel, Network Interfaces
To access the Vital Security Setup Console in NG-1000:
1. Plug in the power cable and switch the appliance on.
2. Connect a PC directly to the appliance’s FE5 port (the left-most port) using a
crossover cable, or, using a standard Ethernet cable, connect the appliance’s FE5
port to a hub or switch that is on the same network segment as the PC. CAT5e
cables (or better) are recommended.
3. The default IP of the FE5 interface is 10.0.5.1, and its default netmask is
255.255.255.0.Configure the TCP/IP settings of your PC so that it is on the same
logical network subnet as the appliance’s FE5 interface. For example, configure the
IP on the PC as 10.0.5.101 and the PC’s netmask as 255.255.255.0
Continue for all appliances as follows:
4. Open your browser and enter the following address: https://10.0.5.1:3012 (for NG-
1000 ) or
https://10.0.3.1:3012 (for NG-5000 /NG-6000). A certificate warning pops
up.
5. Click Yes to close the warning. The Vital Security Setup Console login window is
displayed.
Figure 3-2: Setup Console Login
IMPORTANT: Do not set the PC’s IP to 10.0.5.1, as this will result in an IP
conflict with the appliance.
 Loading...
