17
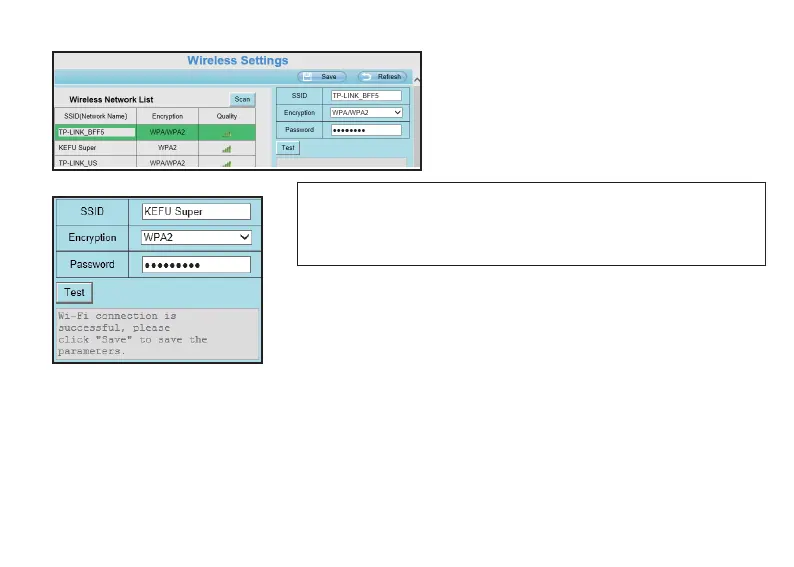
Step 2. Connect to the WiFi network
Select one wireless network that you want
your camera connect to, and type
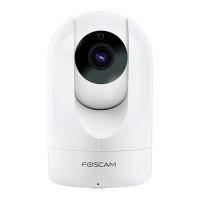
according password, then click Test buon.
4.2 Storage
NOTE: Huntvision products can only support 2.4 GHz WiFi connecon,
please make sure that the Wireless Network you selected is 2.4 GHz; If
your WiFi router is a dual band router, please check and make sure that the
SSID you are going to connect is the 2.4Ghz one.
Aer tesng successfully, you can click Save buon to complete the
WiFi configuraon for your camera.
Now you can unplug the Ethernet cable from your camera; Aer
unplugging the Ethernet cable, you will need to wait for seconds unll a
voice prompt, “WiFi connecon Succeed” .
Huntvision products support several storage methods for you to store your video recordings and snapshots.
Huntvision P2/P4 supports Micro SD card, and you can find the SD card slot in the camera; The storage
supports maximum 128GB.
● Once you insert a Micro SD card on your camera, all your alarm recordings will be stored at this Micro SD
card automacaly; This is a default seng, and you can change the storage locaon from a web browser.
4.2.1 SD Card