F3D3 Series Service Manual Refrigeration / Section 4.4.1
Questions? Call Franke Technical Support Group For Your Area. Copyright 2012 Franke, Inc. All rights reserved.
4.4.1 Checking For Leaks Using Nitrogen
F3D3 & F3D3S Models ONLY
If a leak is very small or intermittent and difficult to detect, the
system can be leak-checked by pressurizing with nitrogen.
NOTE: Follow this procedure before checking for a leak in the
cold wall Evaporator. See Section 4.4.2 for Evaporator.
1) Separate the high side from the low side by cutting the
copper lines going into the walls of the freezer cabinet.
2) Pinch and solder the cut lines on the high side or add
additional access fittings to pressurize the refrigeration
system except the evaporator.
3) To use an electronic leak detector, add a few ounces of
R-404A to act as a tracer gas.
4) Pressurize the high side and the compressor with
nitrogen through access fittings to an equalized
maximum of 150 PSIG [10.5 Bar]. IMPORTANT: A test
pressure higher than 150 PSIG is not recommended for
the compressor shell. (See Photo 3)
5) Use an electronic leak detector or application of a soap
solution to locate any and all leaks. Places to check
carefully include:
The pressure relief valve
Fittings and seams on the receiver tank
All solder joints
Access fittings (with and without caps on)
6) If a leak cannot be found and the test pressure appears
to be steady, record the test pressure, plus room
temperature and cabinet inside wall temperature.
7) Leave the unit pressurized for 24 hours.
PSIG/Bar PSIG/Bar
°F / °C °F / °C
°F / °C °F / °C
8) Record the pressures and temperatures again at the end
of the test period. A pressure drop of more than 10 PSIG
[.7 Bar] within 24 hours indicates that there is a leak
somewhere and a more careful search is required.
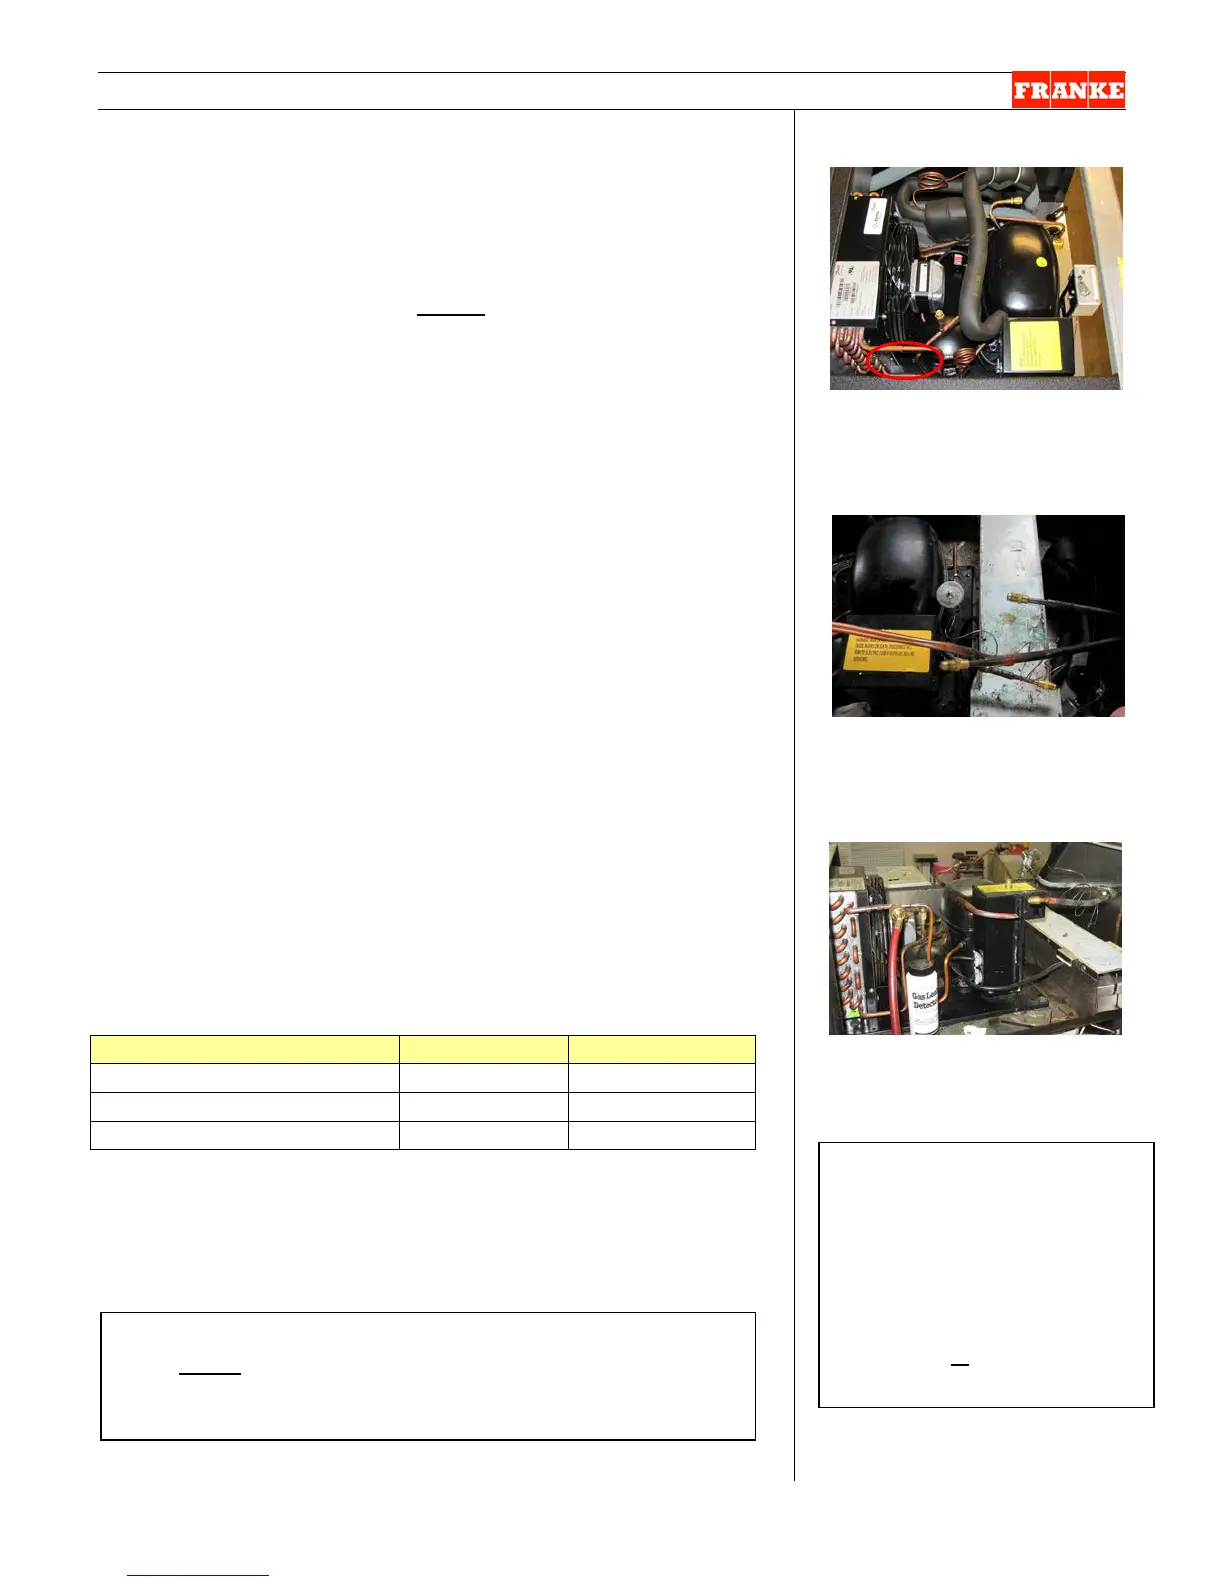
[Photo 1] – from above-right
Cut the copper lines going down
into the freezer cabinet.
[Photo 2] – from right side
Pinch & solder high side lines or
use access fittings on both high
& low (evaporator) side.
[Photo 3]
Add a few ounces of R-404A
refrigerant & pressurize to 150
PSIG [10.5 Bars] with nitrogen.
Rev. 1 11/2012
Tubing cutter
Crimping tool or pliers
Two-four access fittings
Torch, solder, etc.
Manifold Refrigeration
Pressure Gauge
Electronic Refrigeration Leak
Detector or
Liquid leak-detection soap
NOTE: Do not use an electronic leak detector to locate
leaks inside the freezer evaporator housing. The foam
insulation used inside the evaporator housing contains
HFCs, which will generate false readings.