Step 3: aPower
Marker pen
Level
43mm
(1.75in)
Marker pen
Level
≤500mm
(19.6 in)
Wall InstallationFloor Installation
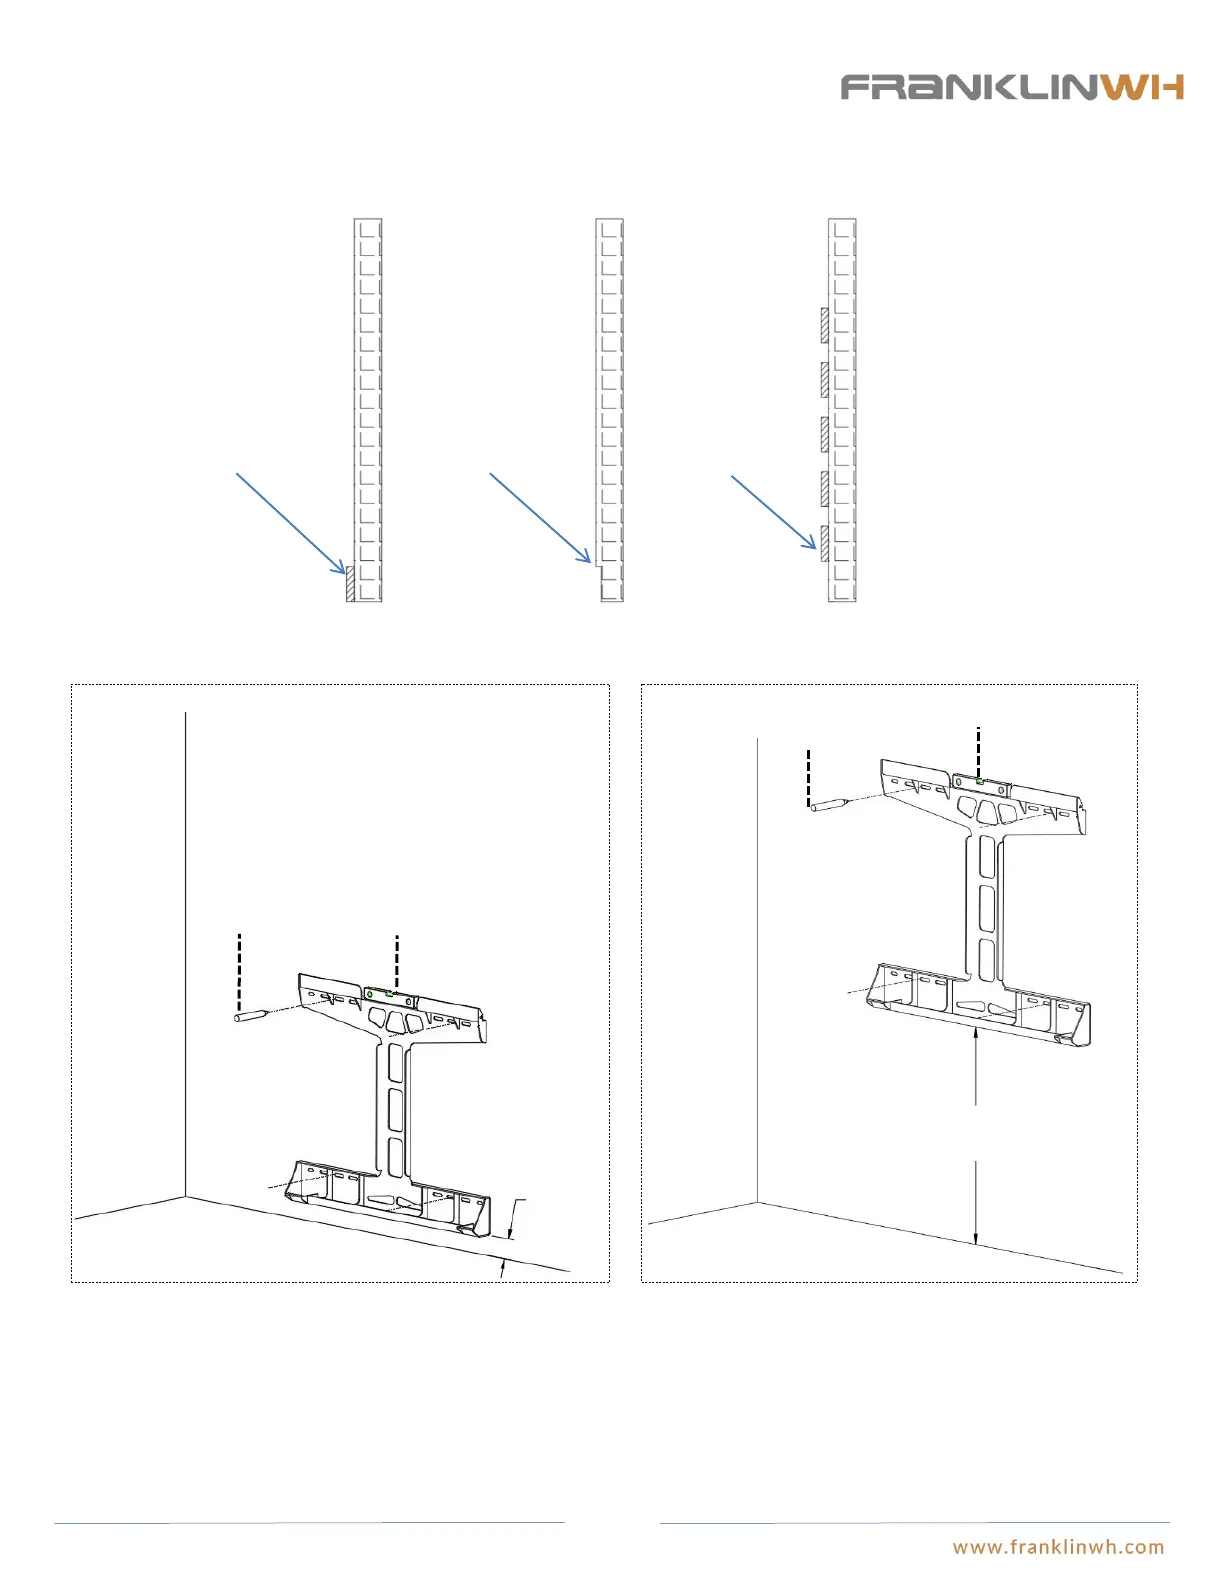
● The height of mounting brackets depend on the installation type of aPower: floor mounted or wall mounted installation. Two
scenarios below illustrate differences in the height of mounting bracket over the floor.
Scenario 1: Floor installation (recommended)
① Place the mounting bracket at the planned installation position,
Support the mounting bracket at the bottom using a 1.75 inch-
thick wood block.
② Use a spirit level to adjust the installation angle.
③ Make marks at the mounting holes where the fasteners will
be used.
● Examine the smoothness of wall. If the wall is not smooth enough, the mounting brackets may not completely fit with the wall
because of the gaps. Plasterboards will be needed to fill the gaps to ensure all parts of the mounting bracket are well supported by the
wall and the installation inclination is less than ±2°.
Skirting Sunken Wall decoration
Scenario 2: Wall installation
① Two installers will be needed to complete the installation. One
installer supports the mounting bracket, keeping the bracket at the
desired position on the wall. Adjust the bracket height so that
there is 19.6 inch clearance between the bracket bottom and the
floor. Adjust the bracket angle using a spirit level.
② The other installer marks the mounting holes where the
fasteners will be used.
25