Wood Studs
(spaced at 12, 16, 20 or 24 inches)
If anchoring directly into wood studs, use at
least four (one in each corner) 1/4
wood screws with washers, of sufficient
length for at least 2
1/2 in. embedment into
the studs.
Wood Studs
(spaced at 12, 16, 20 or 24 inches)
If anchoring to blocking between wood
studs, use minimum 2 x 4 in blocks, end
nailed into studs with two 16d nails or toe
nailed into studs with four 8d nails. Use at
least four (one in each corner) 1/4
wood screws with washers, of sufficient
length for at least 2
1/2 in. embedment into
the blocking.
If anchoring to plywood wall material, the
plywood must be minimum 1/2
Use at least four (one in each corner) 1/4
inch diameter wood screws with washers, of
sufficient length to penetrate at least 1/4 inch
beyond the backside of the plywood.
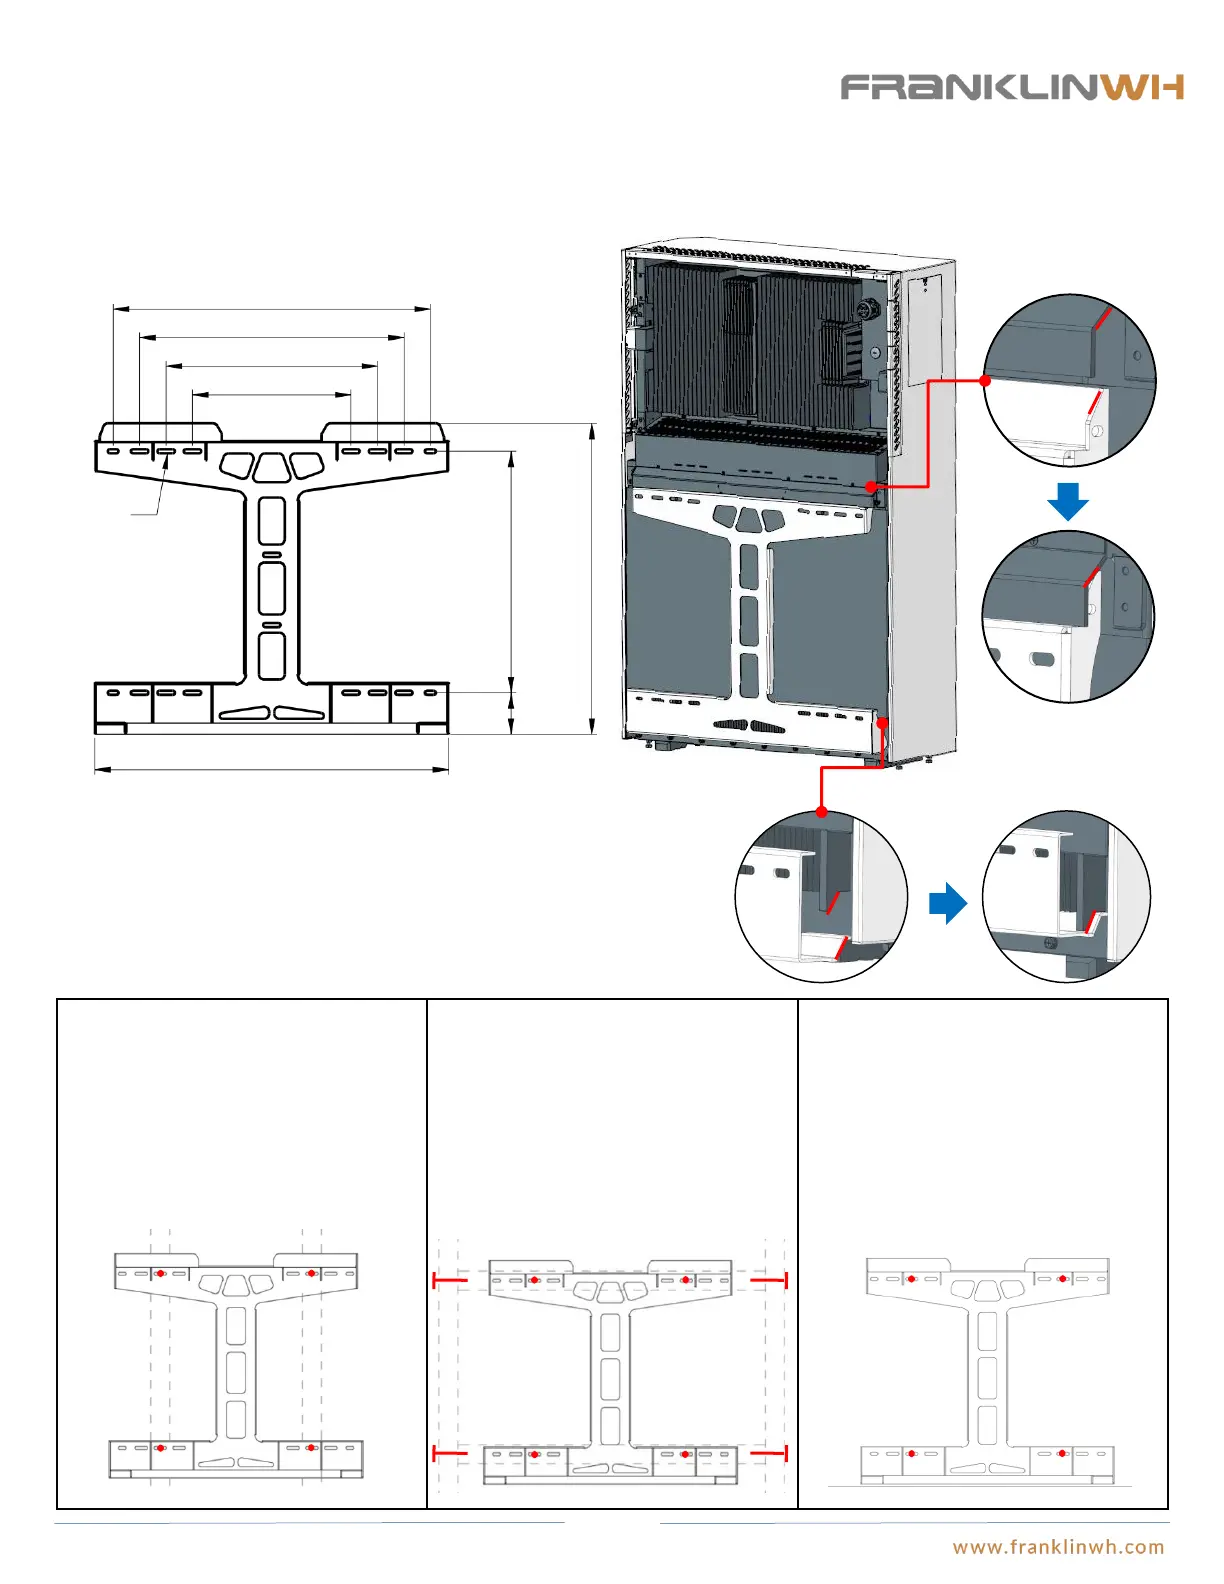
Step 3: aPower
aPower Mounting brackets
● The mounting bracket couples mates with the installation hangers on the back of aPower through a wedged structure to keep
aPower tightly in position. Mounting brackets are required for both floor mount and wall mount installation. Mounting brackets
should be fastened to the wall at a minimum of 4 points.
Snap joint
Snap joint
● The installer needs to choose the fasteners and required installation holes
depending on the type of wall. The following details are general
recommendations and should cover most installation conditions. Please
refer to local applicable regulations for selection of fasteners and bolts.
Mounting bracket has the mounting holes spaced at 12/16/20/24 inches on
center in the horizontal direction.
8mm
(0.31 in)
609.6mm (24 in)
508mm (20 in)
406.4mm (16in)
304.8mm (12 in)
465mm
(18.3 in)
598.6mm
(23.5 in)
80mm
(3.1in)
680(26.8 in)
23