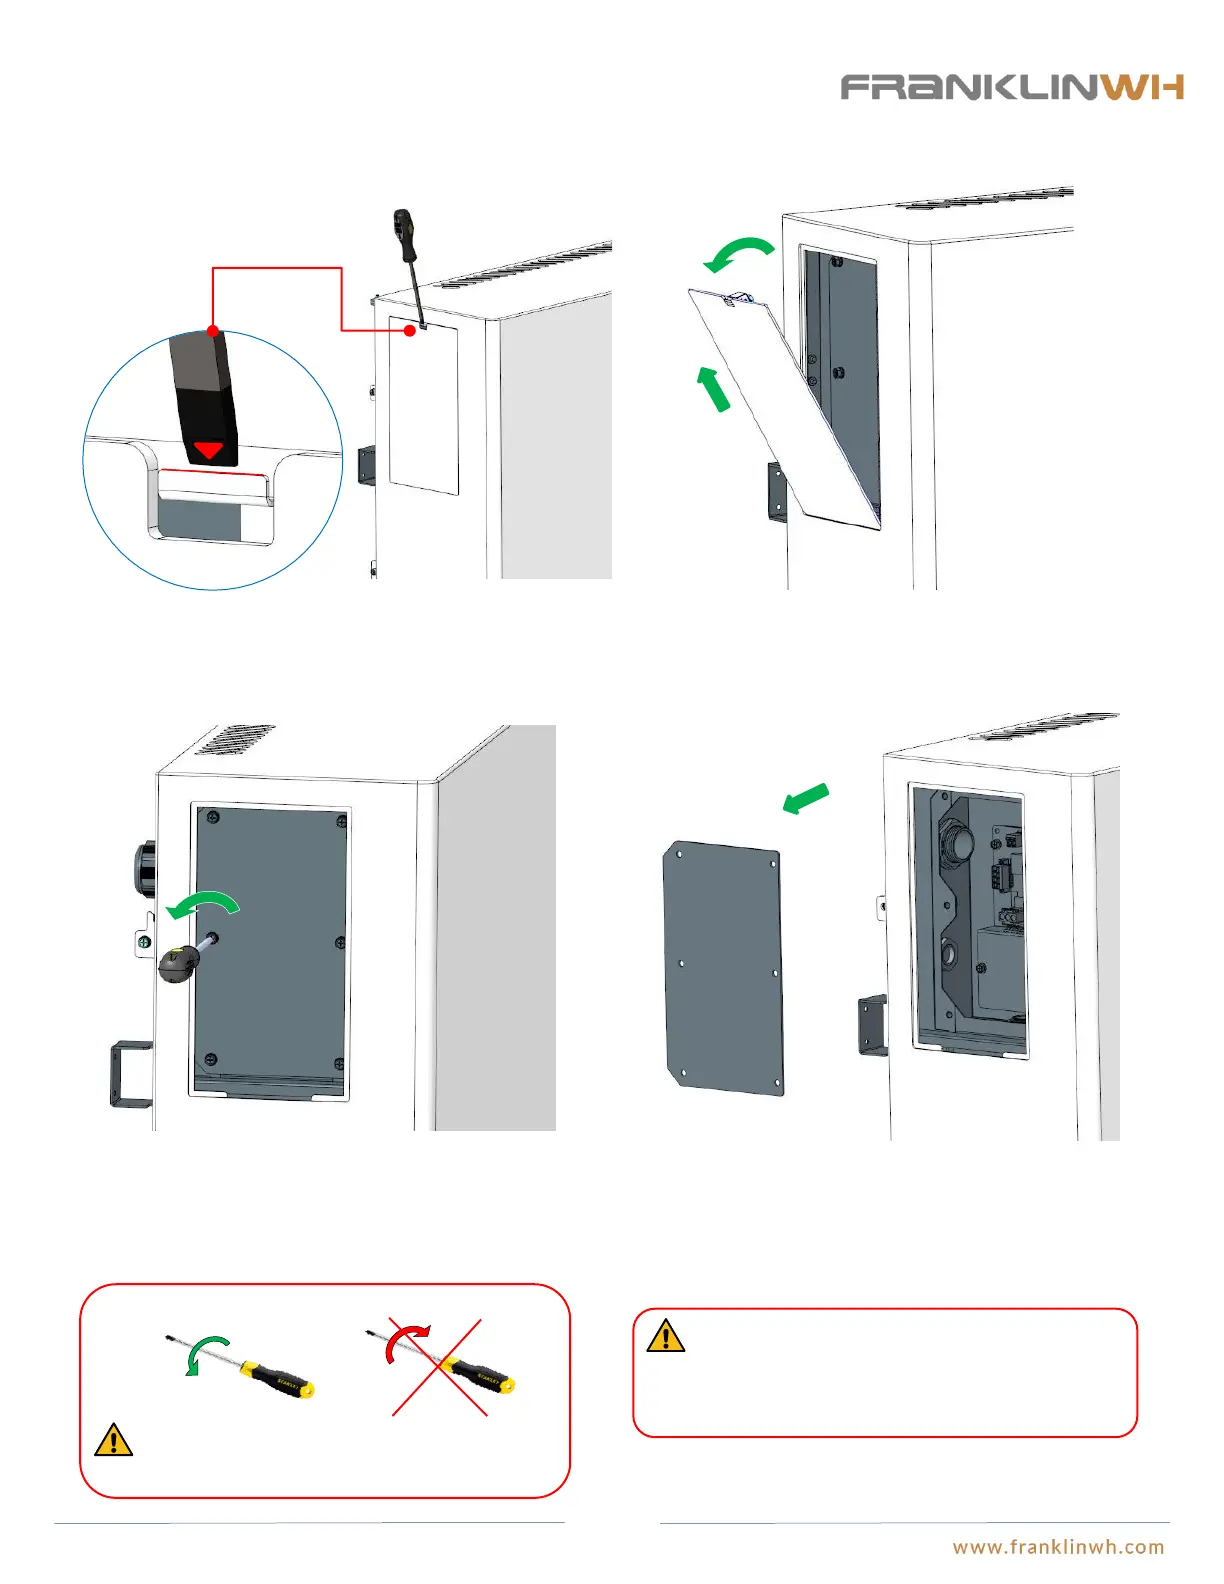
Step 5: Electrical Conduits
Open the wiring panel’s cover on aPower unit casing
1. Use a 1/4”X4” flat head screwdriver and insert it into the snap
joints.
2. Turn its counterclockwise by about 30°, and then lift the
exterior cover board on the wiring closet.
About
30°
Remove
3. Turn the 6 screws on the internal panel on the wiring closet
counterclockwise, using a #3X4” Phillips head cross
screwdriver.
WARNING: Be careful not to strip the heads or
threads of the screws.
WARNING: There is a unique SN on the nameplate
on the internal cover board, and the SN must
correspond with the aPower equipment. Any mistake
will lead to void warranty.
4. Remove the internal panel cover and label the board to the
equipment. This is very important because the nameplate of
aPower must correspond to the aPower. If there are multiple
aPowers installed mixed up covers may affect the product
warranty.
36