Part number 550-142-950/0122
114
FreeStyle
®
series
2
wall mount gas-fired water boiler – boiler manual
38 Maintenance (continued)
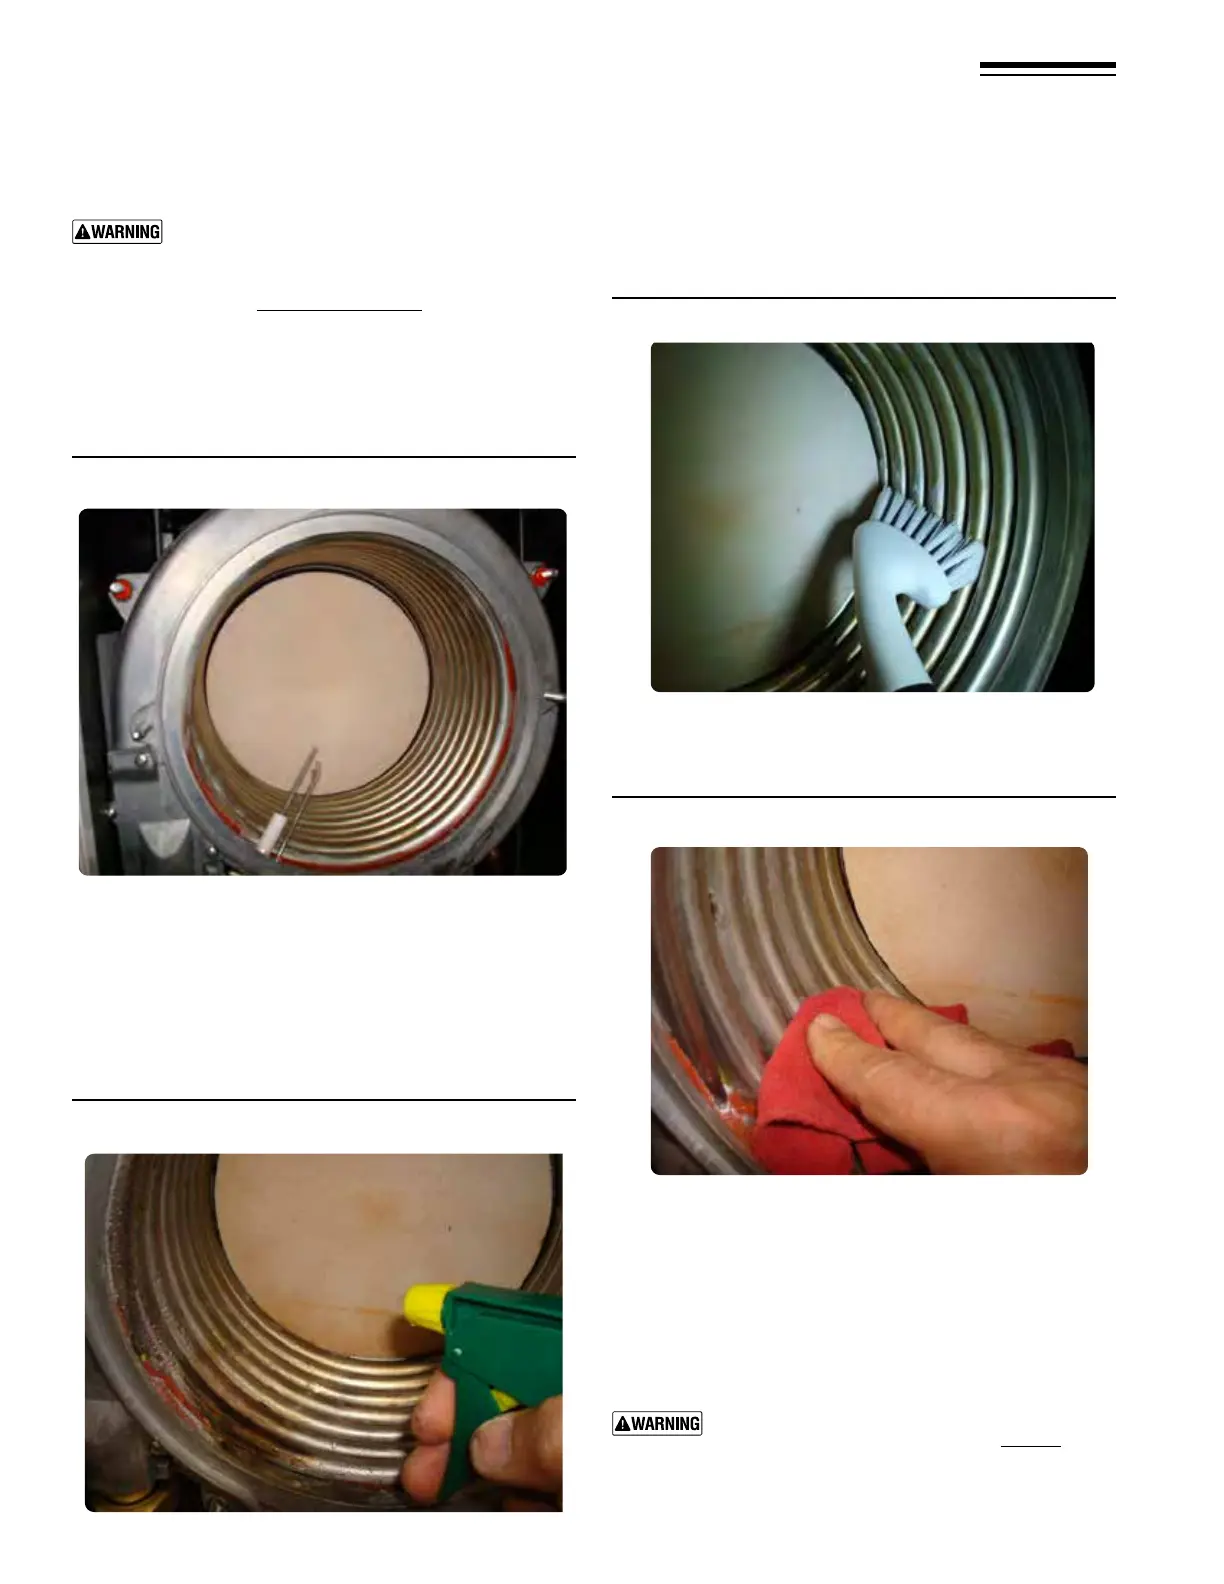
Figure 149 Inspecting and cleaning heat exchanger
Inspect and clean the heat exchanger
Wait until heat exchanger/boiler is cooled down
before proceeding. Failure to do so can cause
severe injury.
1. See Figure149 and Figure153,page115.
2. Use a 10mm wrench or socket to remove the ve (5) nuts that
secure the burner cover plate to the heat exchanger.
3. Remove the heat exchanger cover plate, gasket, burner and
its gasket.
4. Inspect the refractory for any damage, replace if necessary.
5. Remove ignitor.
6. Before using water to clean the heat exchanger, remove the
control module. Label wires if they are not labeled. Set aside.
Remove all connectors and wire harnesses from the control
module and then remove the screw securing it to the bracket.
7. Use a vacuum cleaner to remove any accumulation on the
heating surfaces. is includes removing any pieces of refrac-
tory that may have dropped into the exchanger.
Figure 150 Cleaning the heat exchanger
Figure 151 Cleaning the heat exchanger
Figure 152 Cleaning the heat exchanger
11. Dry with a clean rag.
12. Reinstall the spring.
13. Reinstall the burner, the burner gasket and ignitor.
14. Reinstall exchanger cover plate and gasket to heat
exchanger.
15. Tighten the heat exchanger cover plate’s ve (5) 10mm
nuts using a torque wrench. e nuts must be secure,
but the torque must not exceed 20 inch-pounds
Perform a complete start-up procedure when put-
ting the boiler back into service. See page75 and all
instructions for start-up and verication. Include a
soap suds leak test on all interior and exterior gas
piping aer starting the boiler.
8. Lightly spray clean water on all of the boiler coils and
clean any residue o with (plastic only) brush. (Be
careful not to damage back refractory wall).
9. Wipe any residue o coils with a clean rag.
10. Spray clean water, to nish ushing combustion
chamber.


 To Next Page