40
Establishing a
Connection via
WLAN
There are two options for connecting the Ohmpilot to an existing WLAN network:
Connecting via WPS (WiFi Protected Setup)
1. Press the button on the Ohmpilot 1x. The blue LED ashes (once) for as long as the
WPS is active.
2. Press the WPS button on the router within 2 minutes.
3. If the blue LED on the Ohmpilot is now lit steadily, the connection to the network was
successful.
4. The inverter automatically searches for the Ohmpilot, with the search process taking
up to 5 minutes. If the red LED is unlit and the green LED is ashing, the Ohmpilot is
working correctly.
Connecting via access point and manual conguration of the WLAN
Settings
1. Press the button on the Ohmpilot 2x. The blue LED ashes (twice) for as long as the
WLAN access point is active (30 minutes). Before the access point is opened, a
search for available WLAN networks is carried out.
2. Activate the "Ohmpilot" WLAN network on your smart device or PC.
3. Enter the website http://192.168.250.181 or http://ohmpilotW.local in the browser.
Alternatively, the Fronius Solar.web app can also be used to search for the Ohmpilot
in the network.
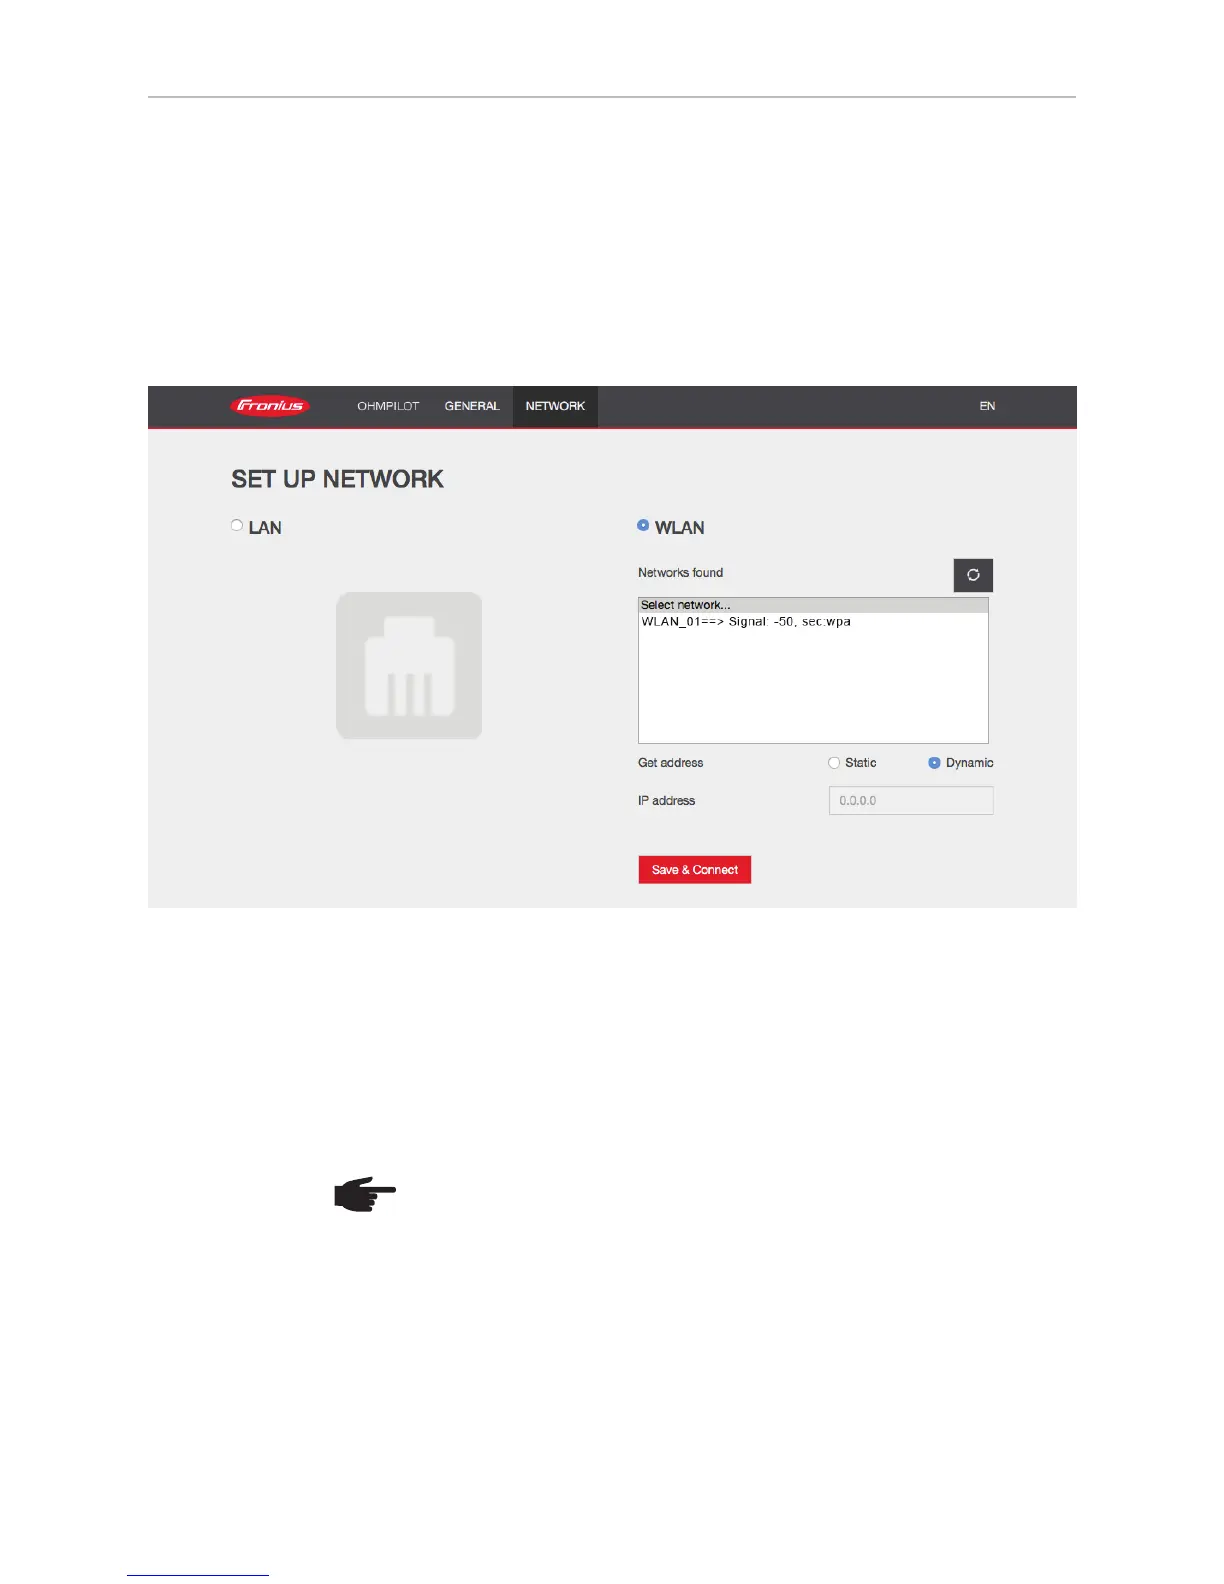
4. Select the required network in the WLAN network tab.
NOTE! If the required WLAN network is not listed, end access point mode by
pressing the button again and repeat the process.
5. Click "Save & Connect", and enter the WLAN password.
6. If the blue LED on the Ohmpilot is now lit steadily, the connection to the network was
successful.
7. The inverter automatically searches for the Ohmpilot, with the search process taking
up to 5 minutes. If the red LED is unlit and the green LED is ashing, the Ohmpilot
is working correctly.