EasyManuals Logo

Fronius TransTig 210 Service Manual

Fronius TransTig 210
44 pages
To Next Page IconTo Next Page
To Previous Page IconTo Previous Page
Page #19 background imageLoading...
Page #19 background image
19
EN-US
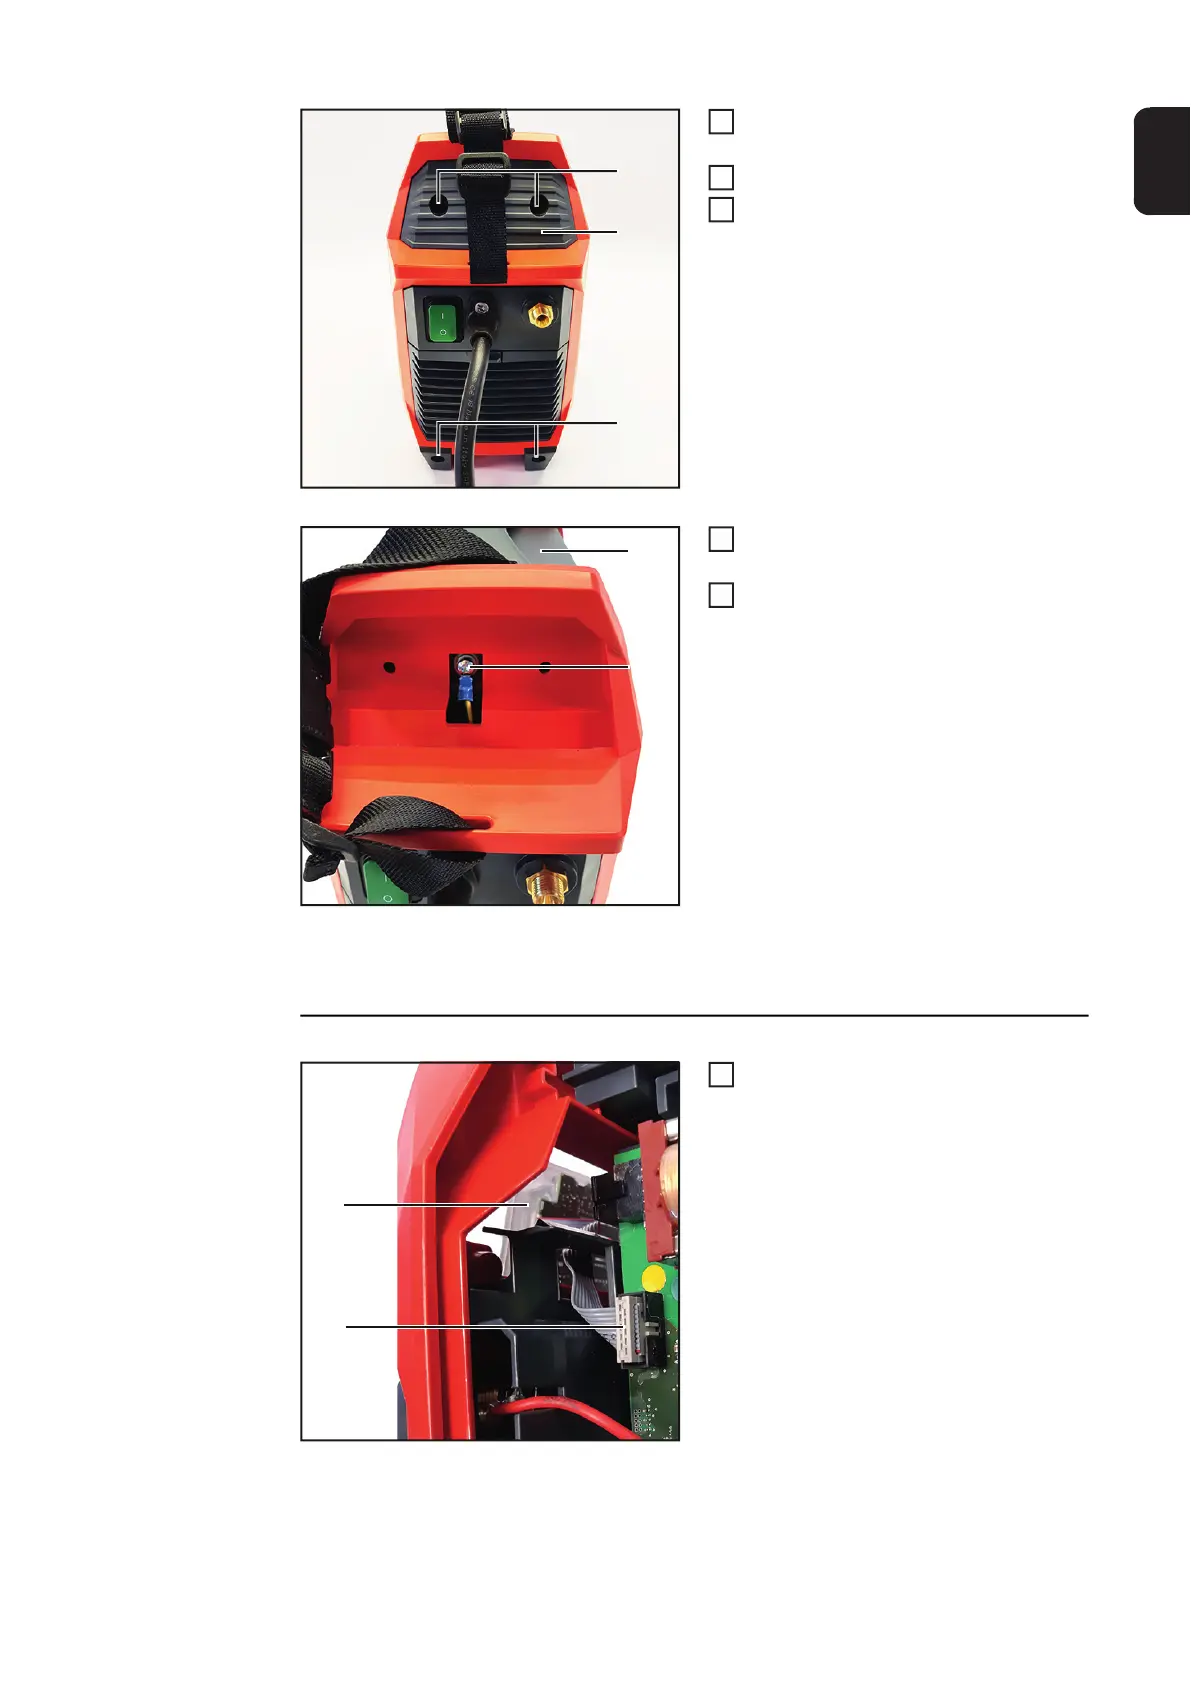
Remove 4 5x18 TX25 screws (4) and
remove the housing feet.
Remove cover (5).
Disconnect the carrying strap.
Remove the M4x8 TX20 screw (6)
from the grounding cable.
Remove the casing (7).
IMPORTANT!
The handle is attached to the casing via 4 5x10 screws.
Disconnect the ribbon cable (8) from
the control panel (9) and remove the
control panel.
(4)
(5)
(2)
(4)
4
5
6
(7)
(6)
7
8
(9)
(8)
9

Other manuals for Fronius TransTig 210

Questions and Answers:

Question and Answer IconNeed help?

Do you have a question about the Fronius TransTig 210 and is the answer not in the manual?

Fronius TransTig 210 Specifications

General IconGeneral
BrandFronius
ModelTransTig 210
CategoryWelding System
LanguageEnglish

Related product manuals