45
EN-US
With intermediate lowering, the welding current is lowered to the set lowering current I-2
during the main current phase.
- To activate intermediate lowering, push the torch trigger forward and hold it in this po-
sition
- Release the torch trigger to resume the main current
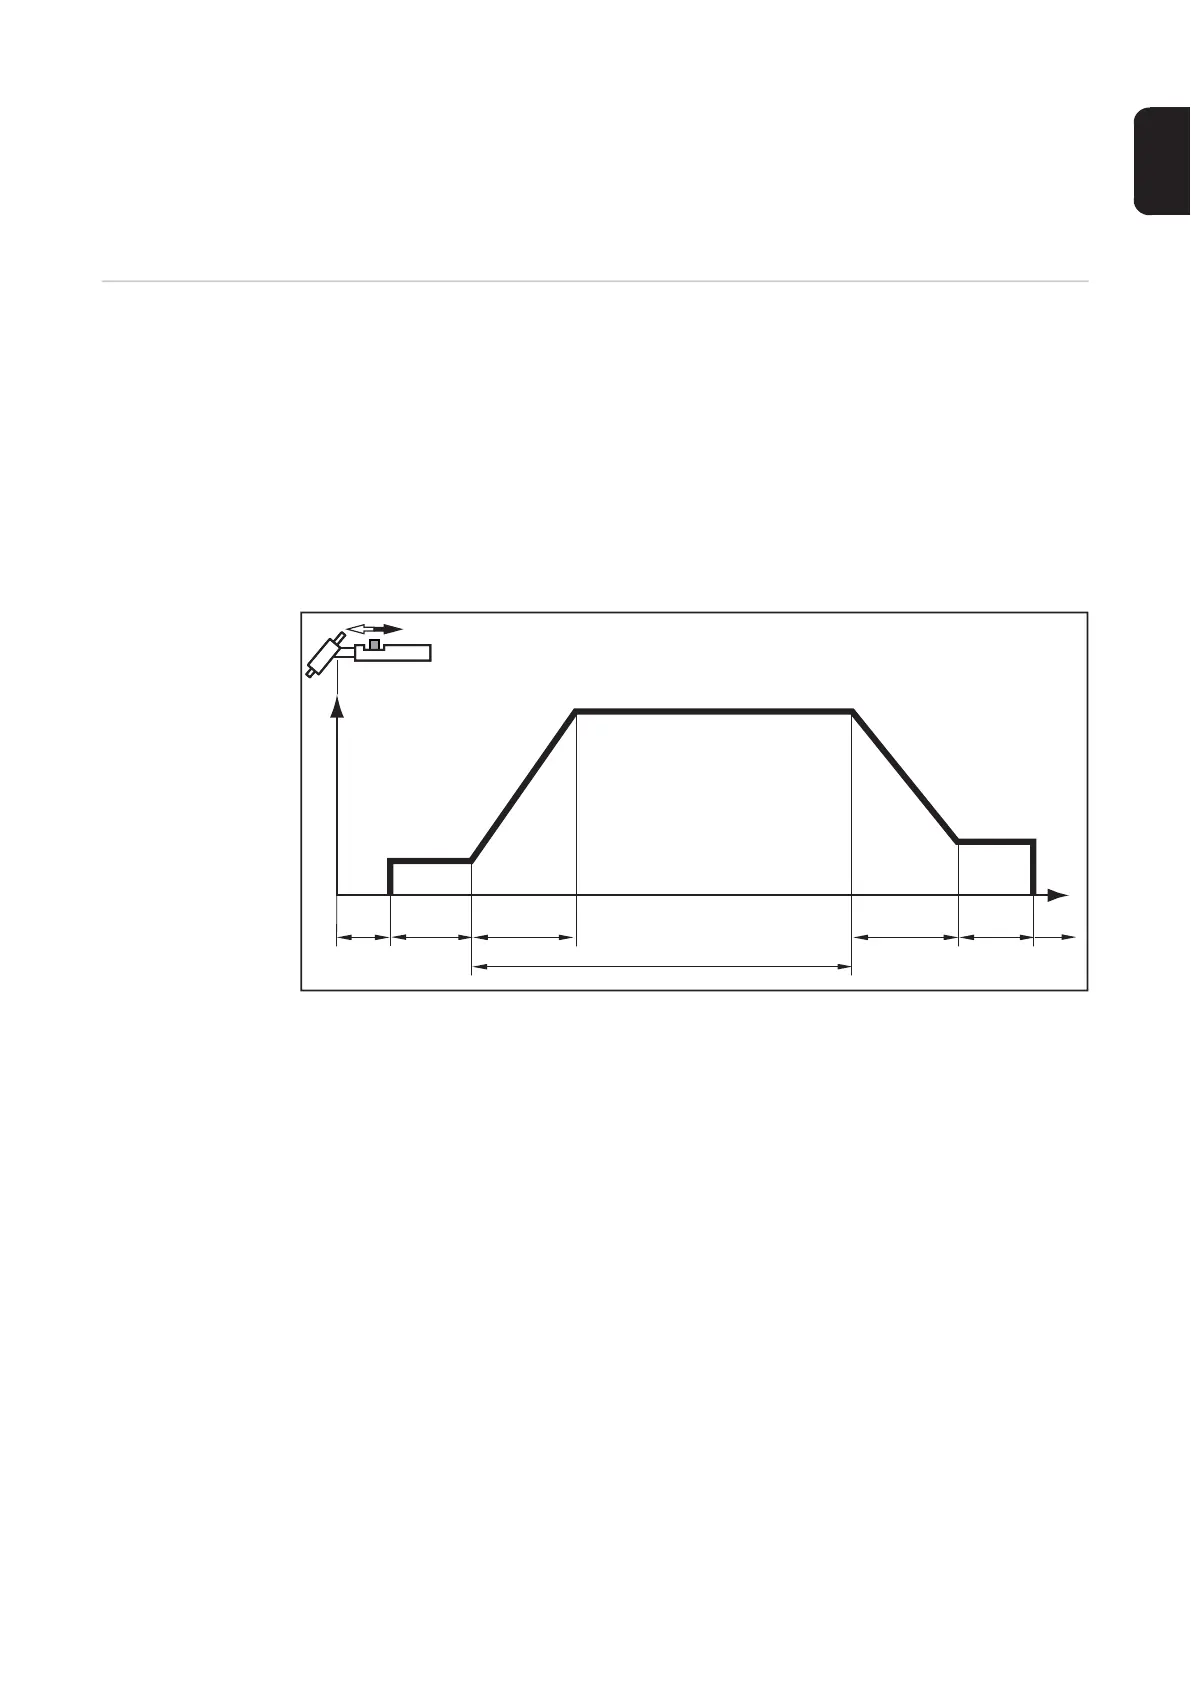
Spot Welding If a value has been set for the setup parameter SPt, then 2-step mode operating mode is
the same as spot welding operating mode. The spot welding special display illuminates on
the control panel.
- Welding: Briefly pull back the torch trigger
The duration of welding corresponds to the value that was entered for the setup pa-
rameter SPt.
- Premature ending of the welding process: Pull back the torch trigger again
When using a foot remote control, the spot welding time begins when the foot remote con-
trol is pressed. Foot remote controls cannot be used to adjust the power.
I
t
I
1
GPr t
up
t
down
SPt
GPo
I
S
t
E
I
E
t
S