CHAPTER 6: OPERATING INSTRUCTIONS
6-1
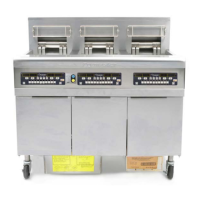
6.1. After Fryer(S) Have Been Installed At Frying Station:
NOTE: If you need to relocate a fryer installed with legs, remove all the weight from each leg before
moving. If a leg becomes damaged, contact your service agent for immediate repair or
replacement.
1. Close fryer drain valve(s) and fill frypot with water to the bottom oil level line on the rear wall of
vessel.
2. Boil out frypot(s). See Boil Out instructions on this page.
3. Drain, clean, and fill frypot(s) with cooking oil. See Section 6.3, Filling With Shortening.
4. Check thermostat calibration on fryers with solid-state controller.
6.2 Boiling Out The Frypot:
WARNING
Never run water through built-in filtration system
Clean frypot(s) as follows before filling with cooking oil for the first time and
at least once a month thereafter:
1. Before switching the fryer(s) ON, close the frypot drain valve(s), fill empty frypot with mixture of
cold water and Frymaster Fryer 'N' Griddle Cleaner. Other heavy-duty low sudsing degreaser
compounds may also be used. Follow instructions on bottle when mixing.
2. Press fryer ON/OFF switch to the ON position.
3. Set thermostat knob to 200°F (93°C).
4. Allow the solution to simmer for 45 minutes to one hour. Do not permit the water level to drop
below the bottom oil-level line in frypot during boil-out operation.
5. Carefully monitor the fryer during this time to prevent solution from boiling over.
CAUTION
Do not leave fryer unattended. The boil out solution may foam and overflow if fryer is left unattended.
Press ON/OFF switch to the OFF position to control this condition.
6. Turn the fryer ON/OFF switch(es) to the OFF position.