10-5
10.5 Replace Heating Element
10.51 Surface Ship
1. Remove temperature probe per Section 10.4, Steps 1-5, and step 8.
2. Unplug element wire plugs from rear of contactor box. It may be necessary to pull the contactor
box forward to reach the connectors.
3. Remove the heating element wires from the connector. Press down on either side of the connector
while pulling up on the top portion. The connector will open from the top, releasing the wires.
Pull all wires from the connector, noting wire locations in the connector for re-assembly.
4. Remove the temperature probe clamp. Set temperature probe and bracket components aside.
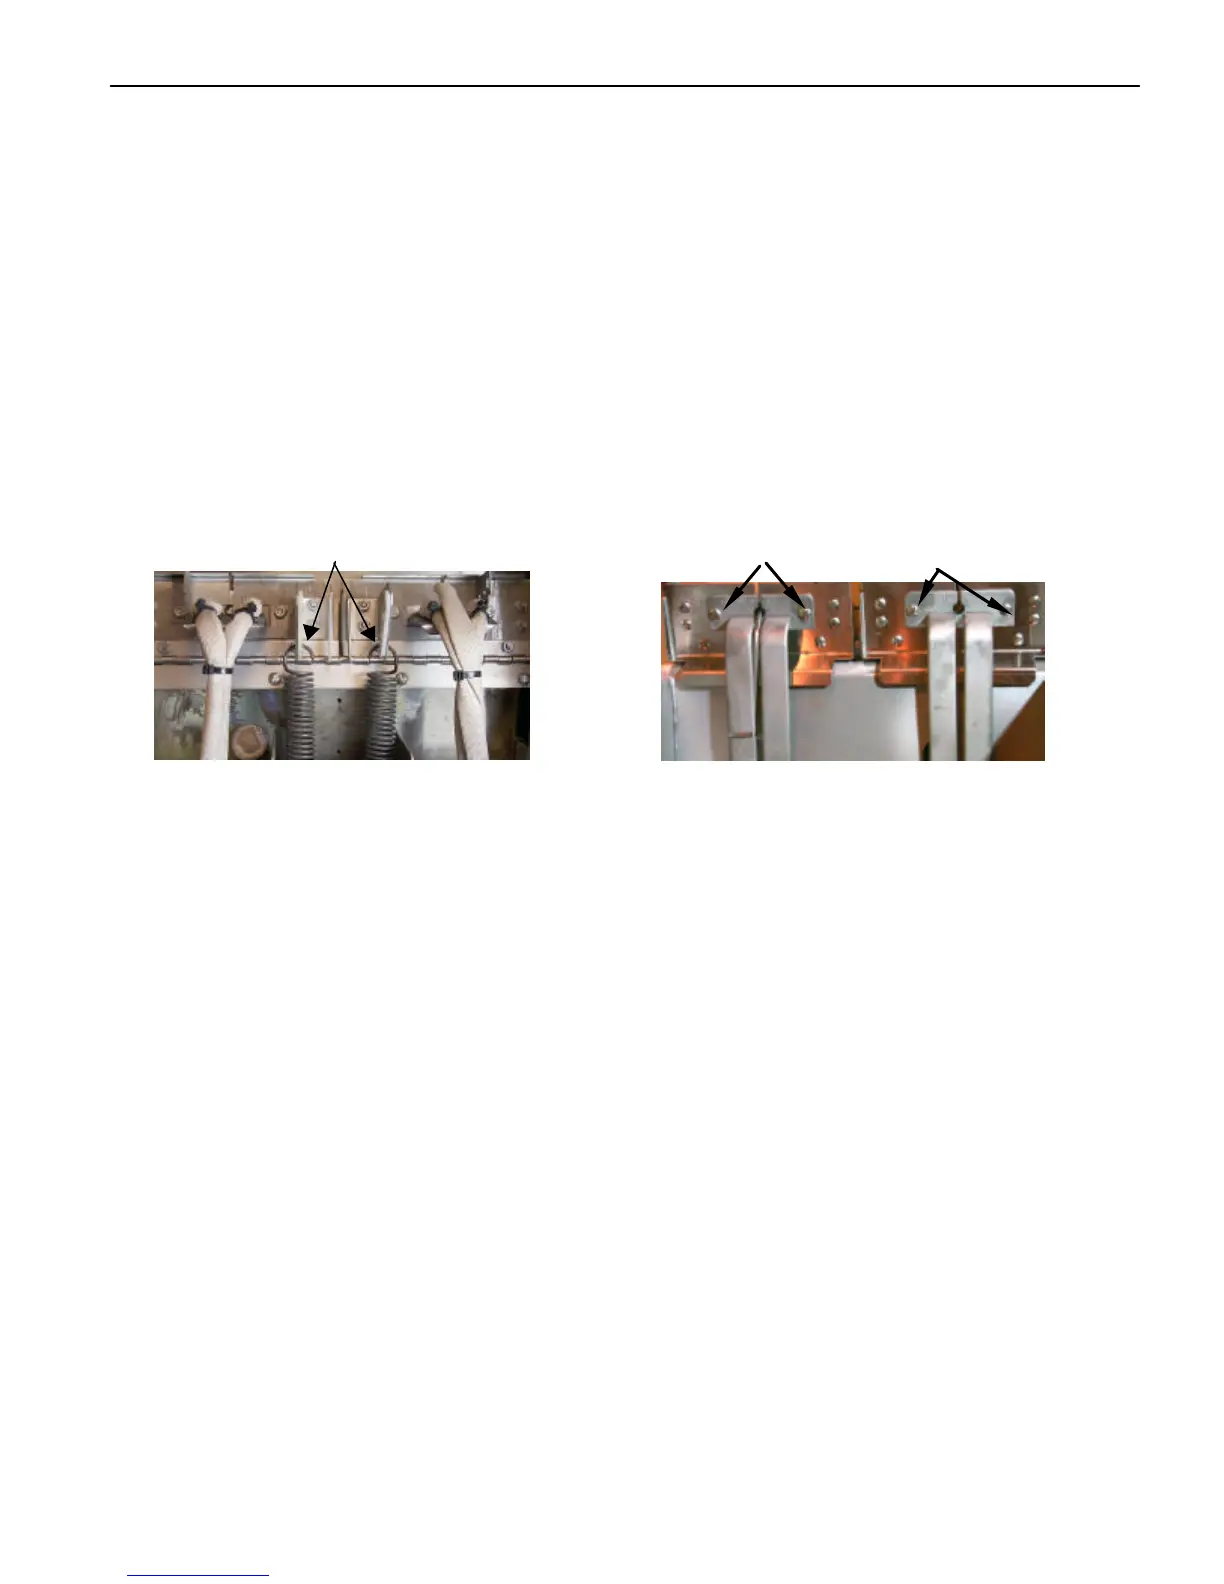
5. Disconnect the element springs. Fig: 10-14
6. Remove the element mounting screws and pull the element out of the frypot. Fig: 10-15
7. If present, remove the lift handle from the old element and install it on the new one.
8. Install the temperature probe and probe-securing components onto the replacement element.
9. Install the replacement element in the frypot and secure with mounting screws removed in Step 6.
10. Route the element leads (terminals) to the rear of the frypot.
11. When replacing the left element (as viewed from the front of the fryer) insert pin terminals into
the correct holes in the 6-pin connector. When all pins are fully inserted, close the connector by
sliding the halves together until the tabs snap back into place.
12. When replacing the right element (as viewed from the front of the fryer), use the 9-pin connector.
Follow the steps outlined in Step 11.
13. Insert the connector(s) into the receptacle(s) in the rear of the contactor box. Be sure the latches
lock the connectors in place.
14. Install the temperature probe wires into the corresponding pin locations.
15. Reconnect the element spring.
16. Install the tilt housing assembly.
Fig: 10-14
Element springs on surface ship fryer.
Element mounting screws on surface ship fryer.