111
4.5Disassembly and Assembly Procedure
DX100 Service Manual
4.5.3.4 Power Supply Board/Power Distribution Board
1. Remove the Top Cover. (P.97)
2. Remove the Upper Cover. (P.100)
3. Remove the Rear Frame. (P.101)
4. Remove the Right Frame. (P.102)
5. Remove the Left Frame. (P.102)
6. Remove the heater board unit.
("4.5.3.3 Heater Board" Step6 (p109) to Step 8 (p109))
7. Disconnect the cables from all connectors on the Power Supply Board. (Be sure to
unlock the connector (CN1) before disconnecting the cable)
(4.6 Connector Position "Power Supply Board (p207)")
8. Unlock all the connectors of the cables connected to the Power Distribution Board, and
disconnect all the cables.
(4.6 Connector Position "Power Distribution Board (p207)")
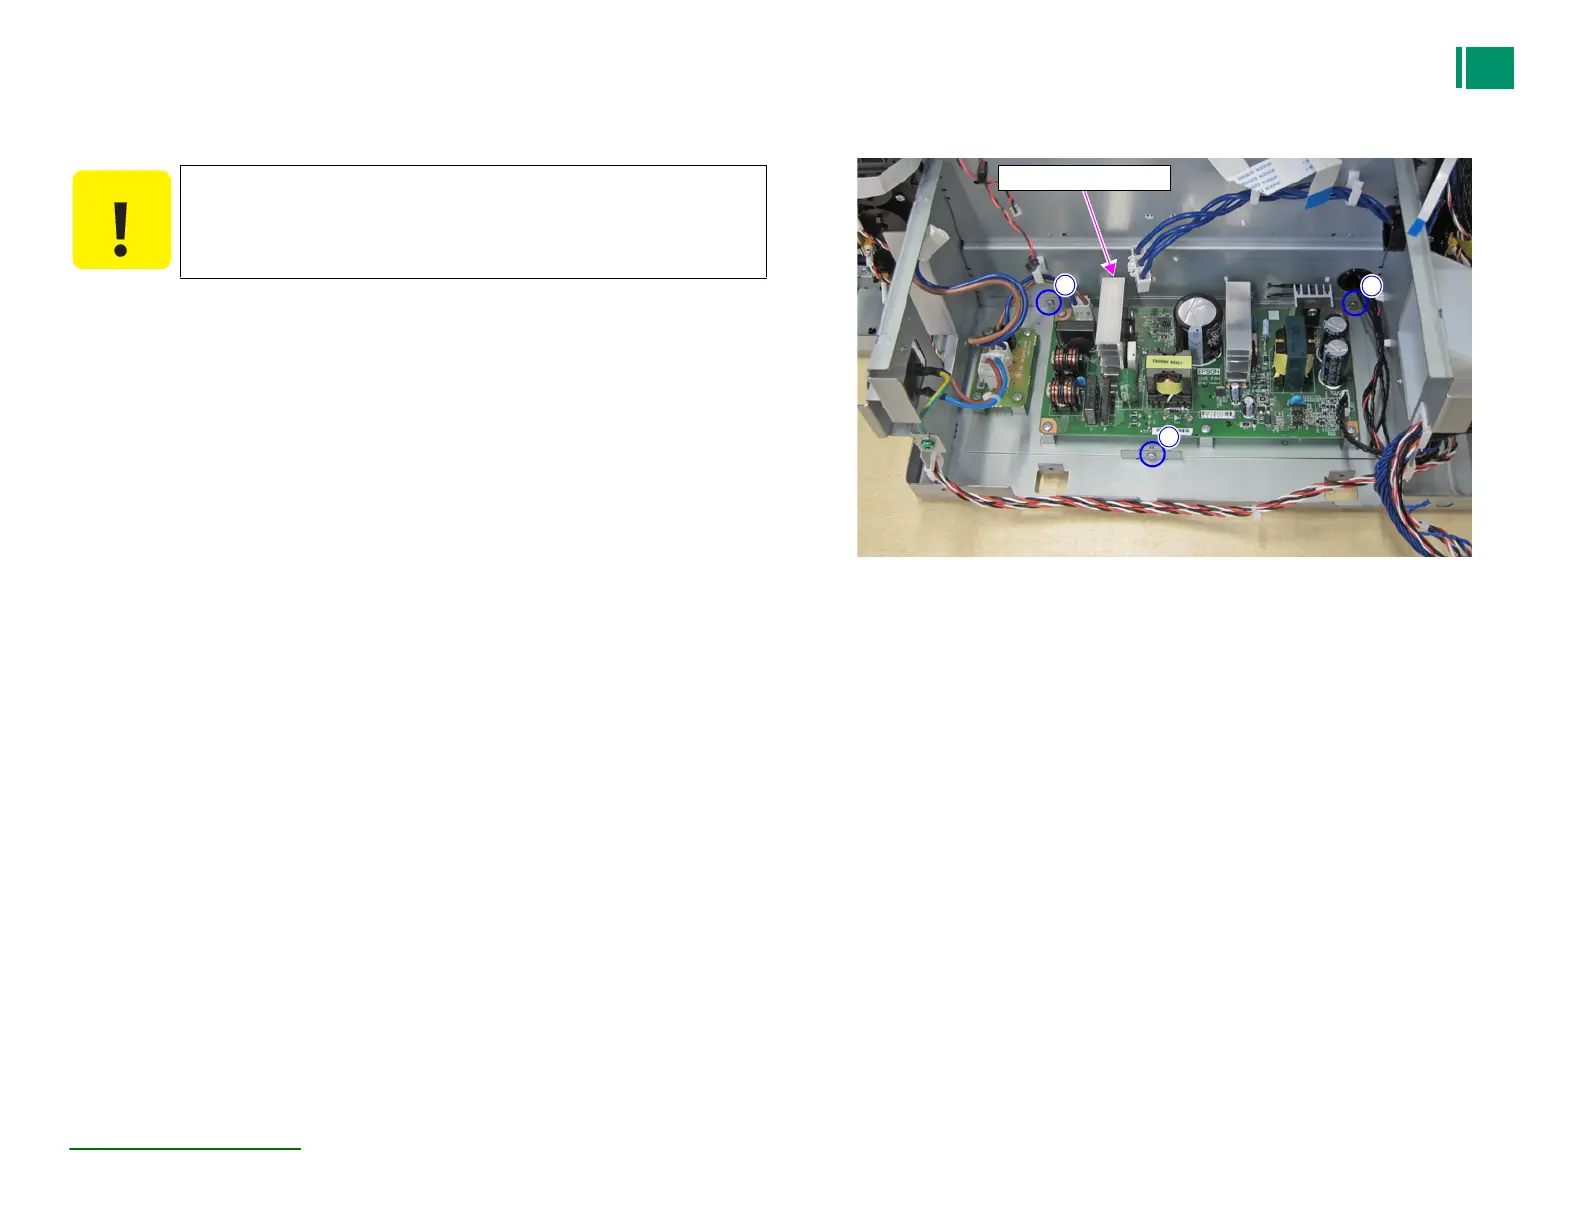
9. Remove the three screws, and remove the Power Supply Board Unit.
A) Silver M3x6 Bind machine screw : 3 pieces
Figure 4-38. Removing the power supply board unit
Before working, wear an antistatic wrist band when handling the internal
circuit boards to prevent damage from static electricity.
A
Power supply board unit
A
A
 Loading...