271
5.6Ink System Related Adjustment
DX100 Service Manual
5.6 Ink System Related Adjustment
5.6.1 Initial charge
This is to fill the ink inside the printer. The initial ink charge is only available after
performing the Ink Discharge and Ink Flushing / Discharge.
1. Turn the printer on.
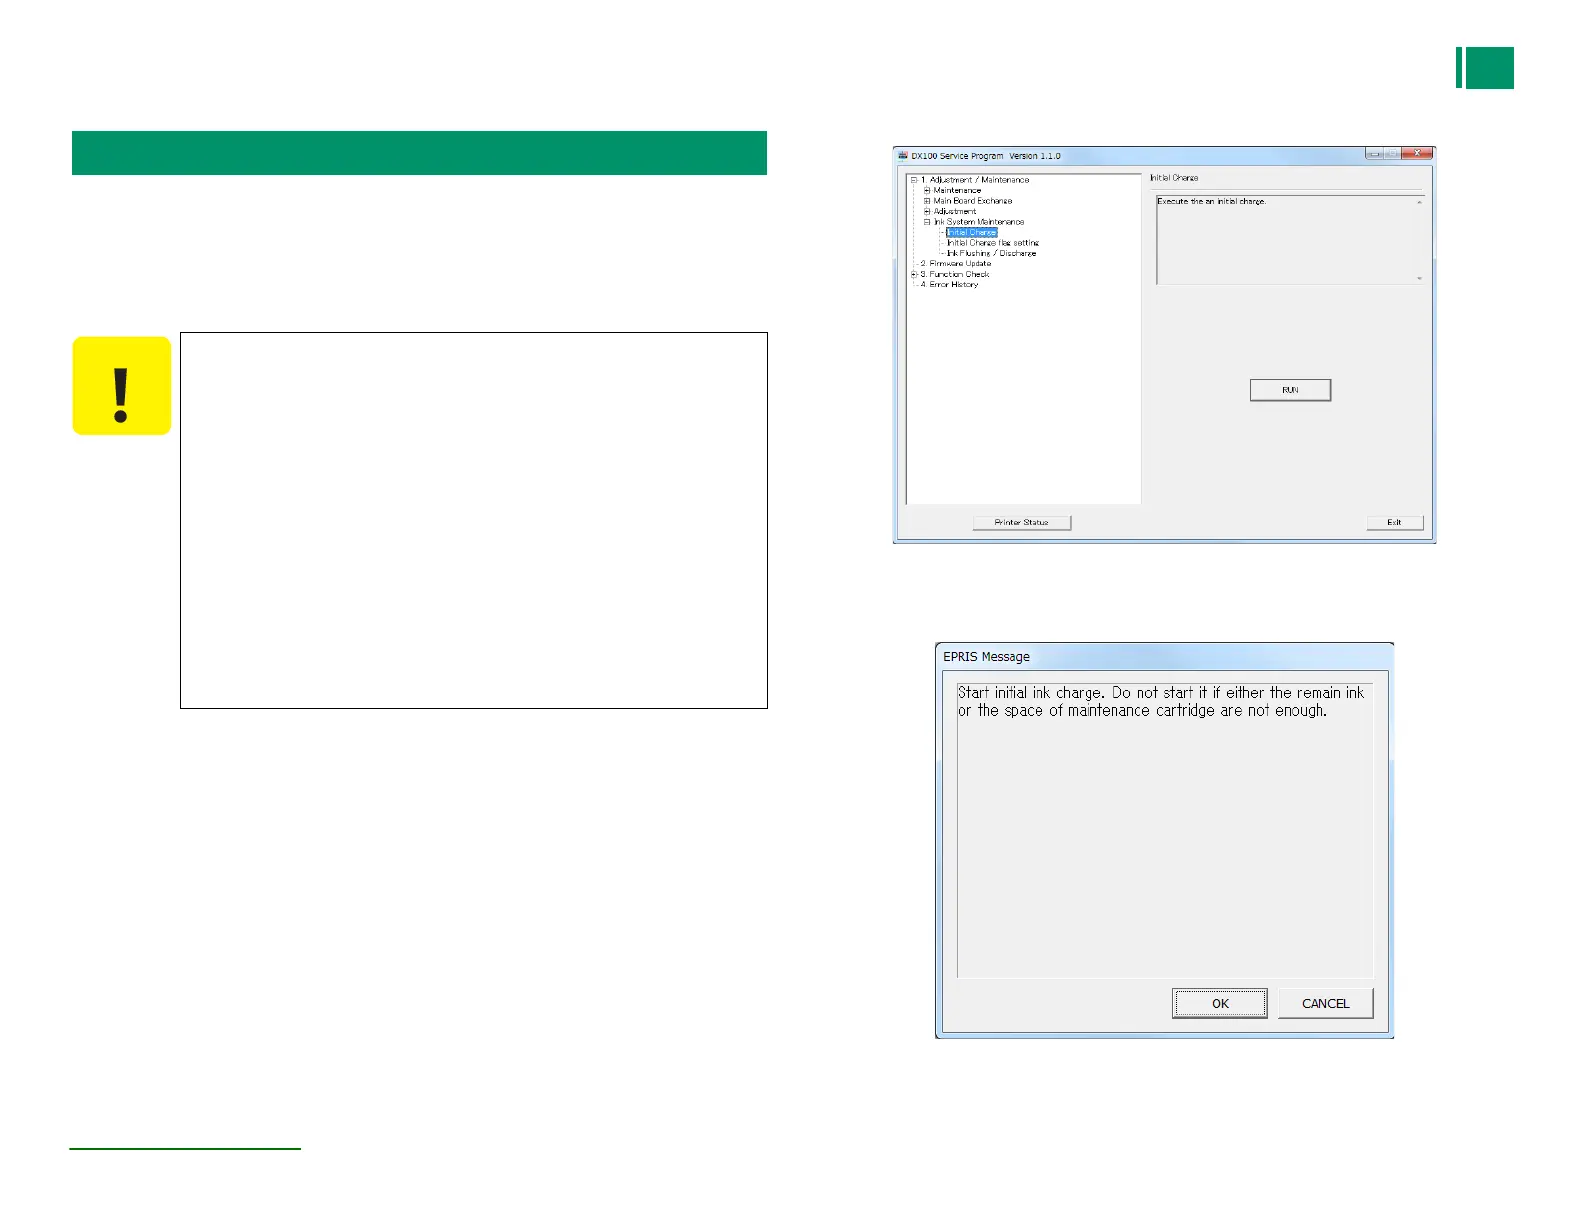
2. Select 1. Adjust / Maintenance Ink System Maintenance Initial Charge.
3. Install the ink cartridges in the printer.
4. Click [RUN].
Figure 5-95. Initial charge screen
5. Click [OK] on message screen.
Figure 5-96. Message screen
6. The Initial charge starts.
Make sure to observe the following precautions before
starting.
Do not unplug the printer AC cable during initial ink charge.
Do not unplug the USB cable that connects the printer to a computer
during initial ink charge.
Do not open the exterior covers during initial ink charge.
Ink leak might be occurred if you don’t follow below caution.
When performing initial ink charge, use the brand-new maintenance
cartridge or empty waste ink bottle. Don’t use the used maintenance
cartridge. Bring back that, and then throw it away in the appropriate
place.
Don’t perform the initial ink charge on the service program in the
initial ink cartridge is completed and there is ink inside of the ink tube.
If you try to perform the initial ink charge, perform that after
discharging it.
 Loading...