187
4.5Disassembly and Assembly Procedure
DX100 Service Manual
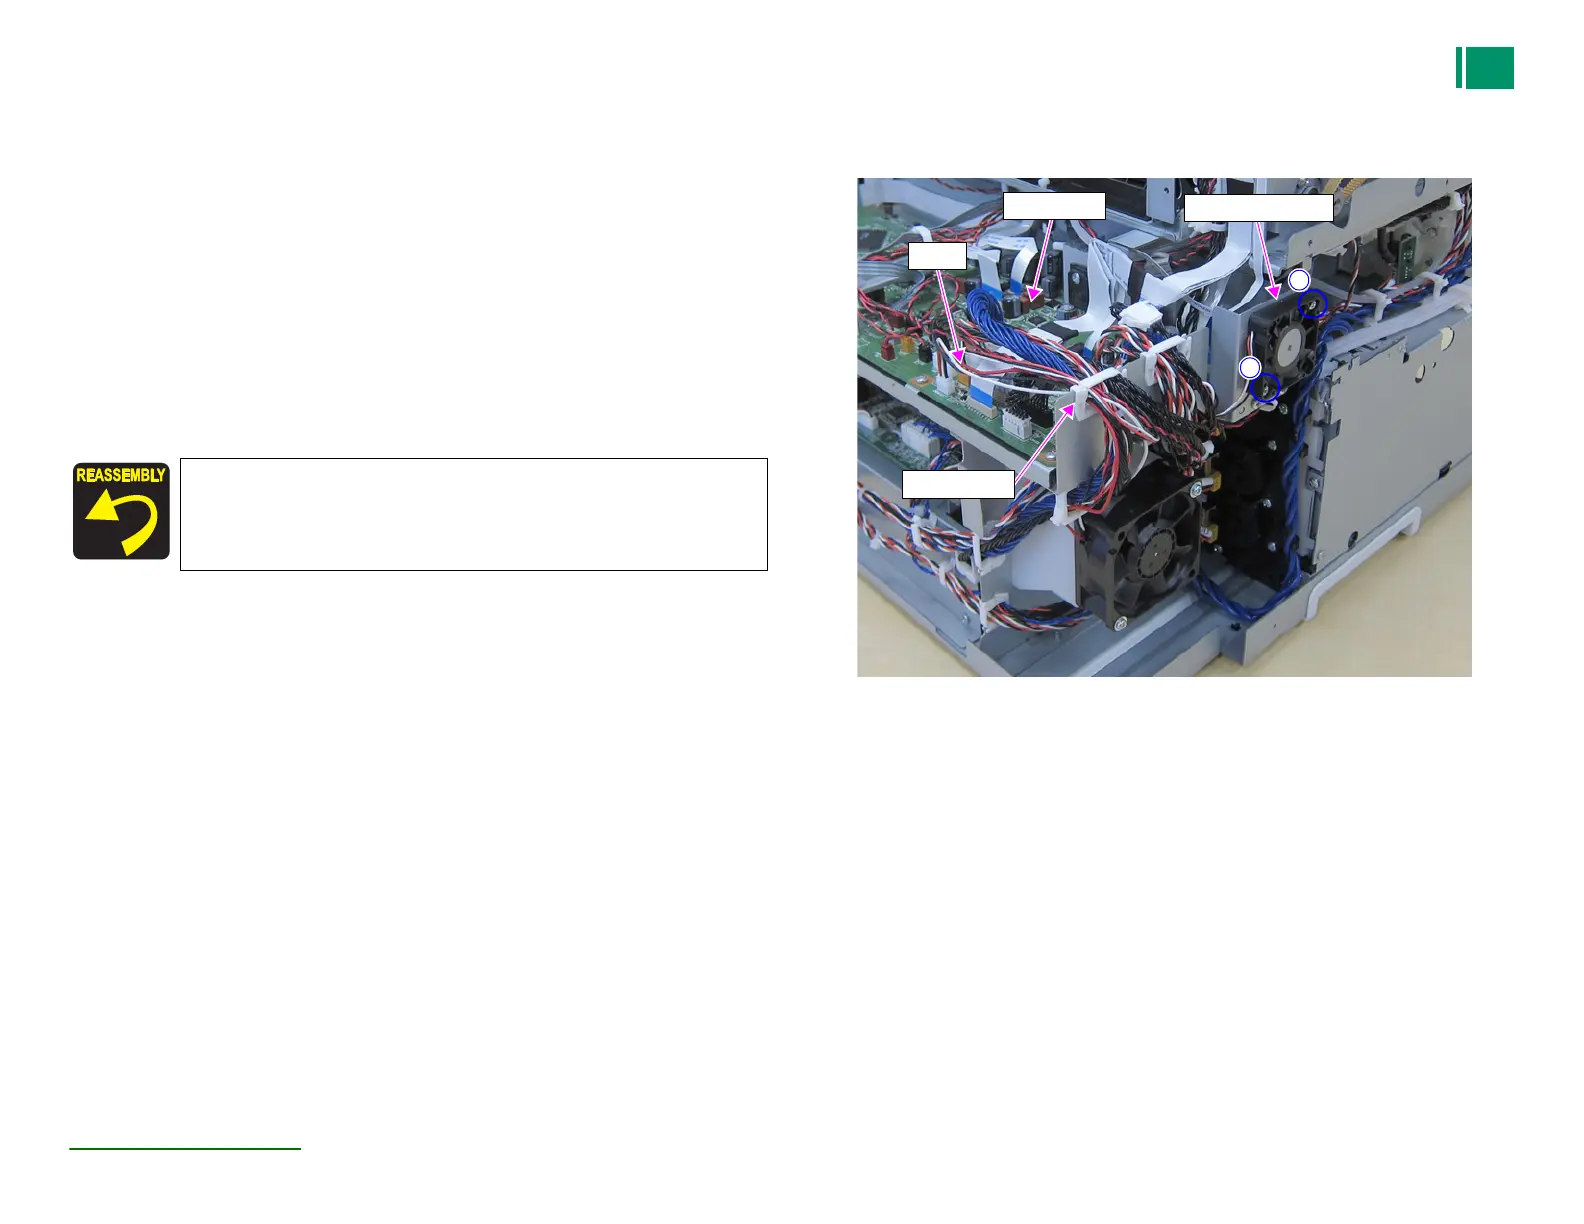
4.5.8 Fan/Heater
4.5.8.1 Cooling Fan (+5V)
1. Remove the Top Cover. (P.97)
2. Remove the Upper Cover. (P.100)
3. Remove the Rear Frame. (P.101)
4. Remove the Left Frame. (P.102)
5. Disconnect the cable from the connector (CN26) of the Main Board.
6. Release the cable from the wire saddle.
7. Remove the two screws, and remove the Cooling Fan (+5V).
A) Silver M3x10 S-tite screw : two pieces
Figure 4-153. Removing the Cooling Fan (+5V)
Install the Cooling Fan (+5V) so that the label comes to the inside.
Cooling Fan (+5V)
Main Board
CN26
Wire saddle
A
A
 Loading...