155
4.5Disassembly and Assembly Procedure
DX100 Service Manual
4.5.5.16 Upper Paper Guide Unit
1. Remove the Top Cover. (P.97)
2. Remove the Rear Cover. (P.99)
3. Remove the Upper Cover. (P.100)
4. Remove the Top Cover Open Sensor. (P.164)
5. Remove the Release Unit. (P.152)
6. Remove the U Guide. (P.148)
7. Remove the APG Unit. (P.128)
8. Remove the Driven release holder. (P.154)
9. Remove the PE Sensor Unit. (P.171)
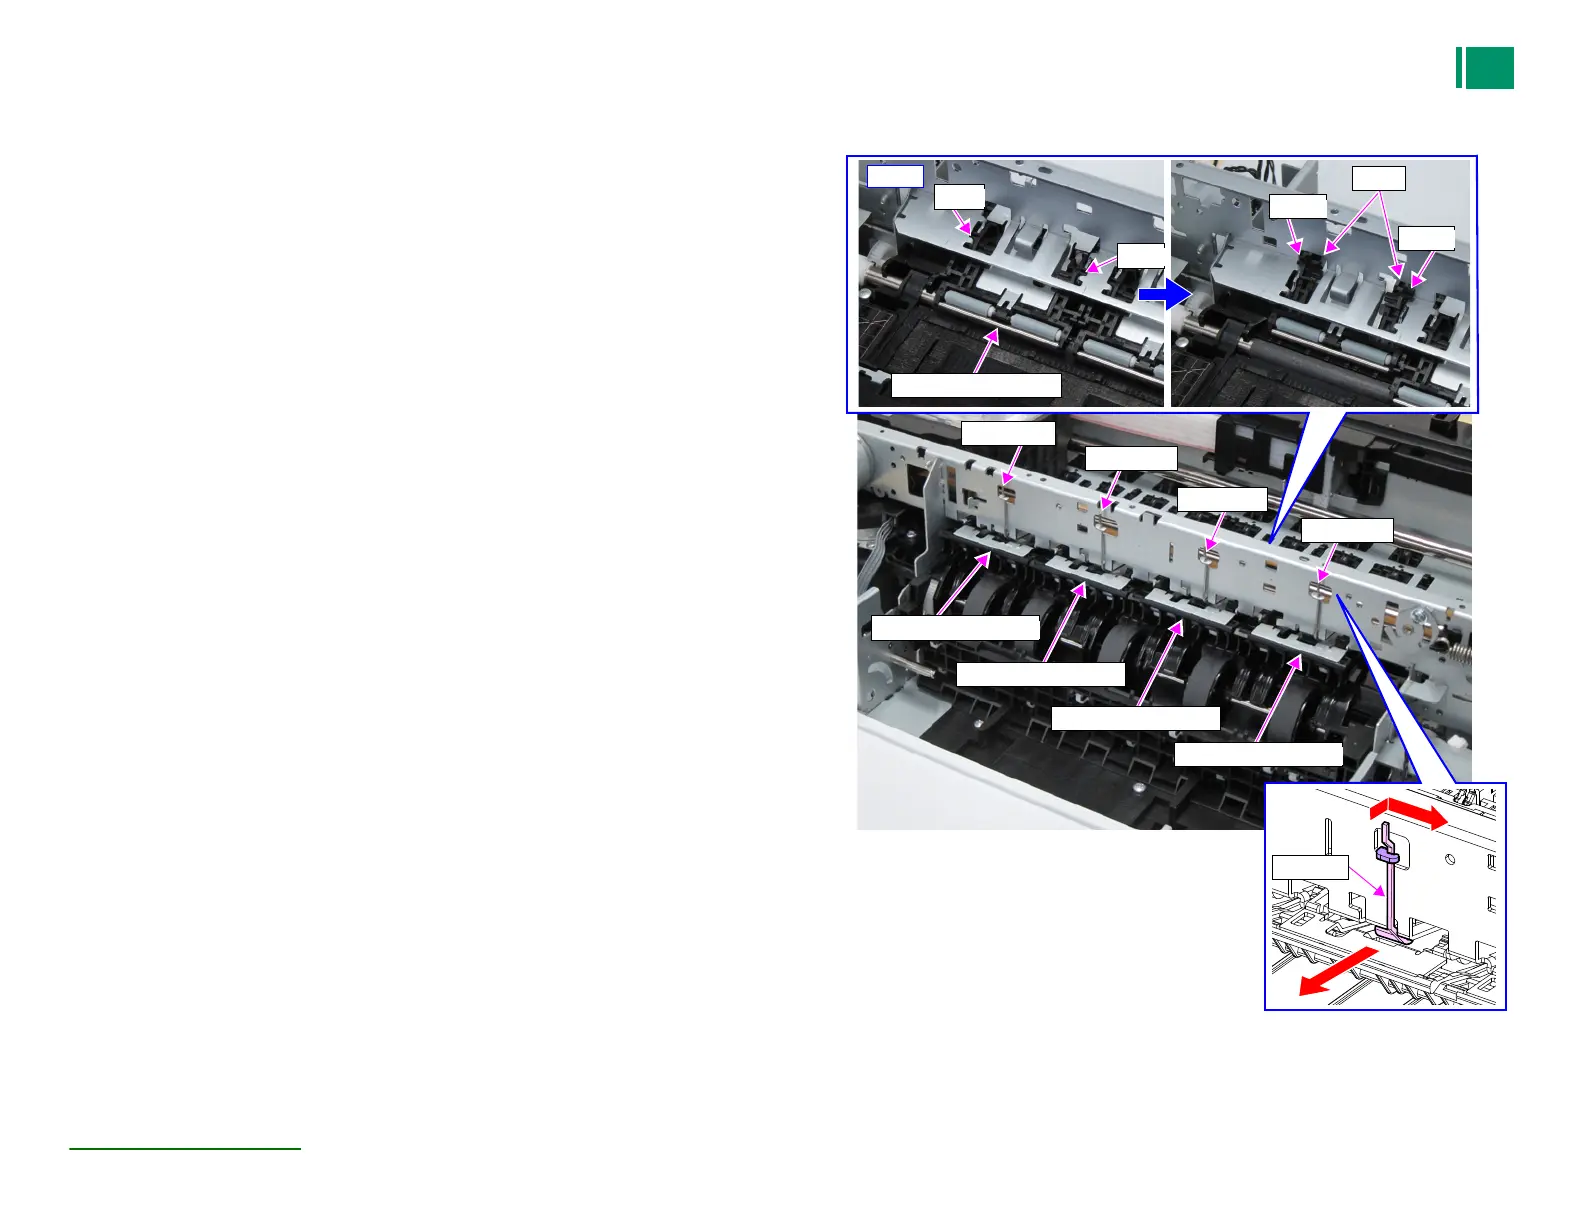
10. Remove the four PF spring from the four Upper Paper Guide Unit in the direction of
the arrow.
11. Lift the front side of the Upper Paper Guide Unit, and slide it to the rear of the printer
to disengage the shaft of the Upper Paper Guide Unit from the hole of the frame.
12. Remove the Upper Paper Guide Unit to the rear.
Figure 4-103. Removing the Upper Paper Guide Unit
Front
Upper Paper Guide Unit
Shaft
Shaft
Shaft
Shaft
Holes
PF spring
PF spring
PF spring
PF spring
Upper Paper Guide Unit
Upper Paper Guide Unit
Upper Paper Guide Unit
Upper Paper Guide Unit
 Loading...