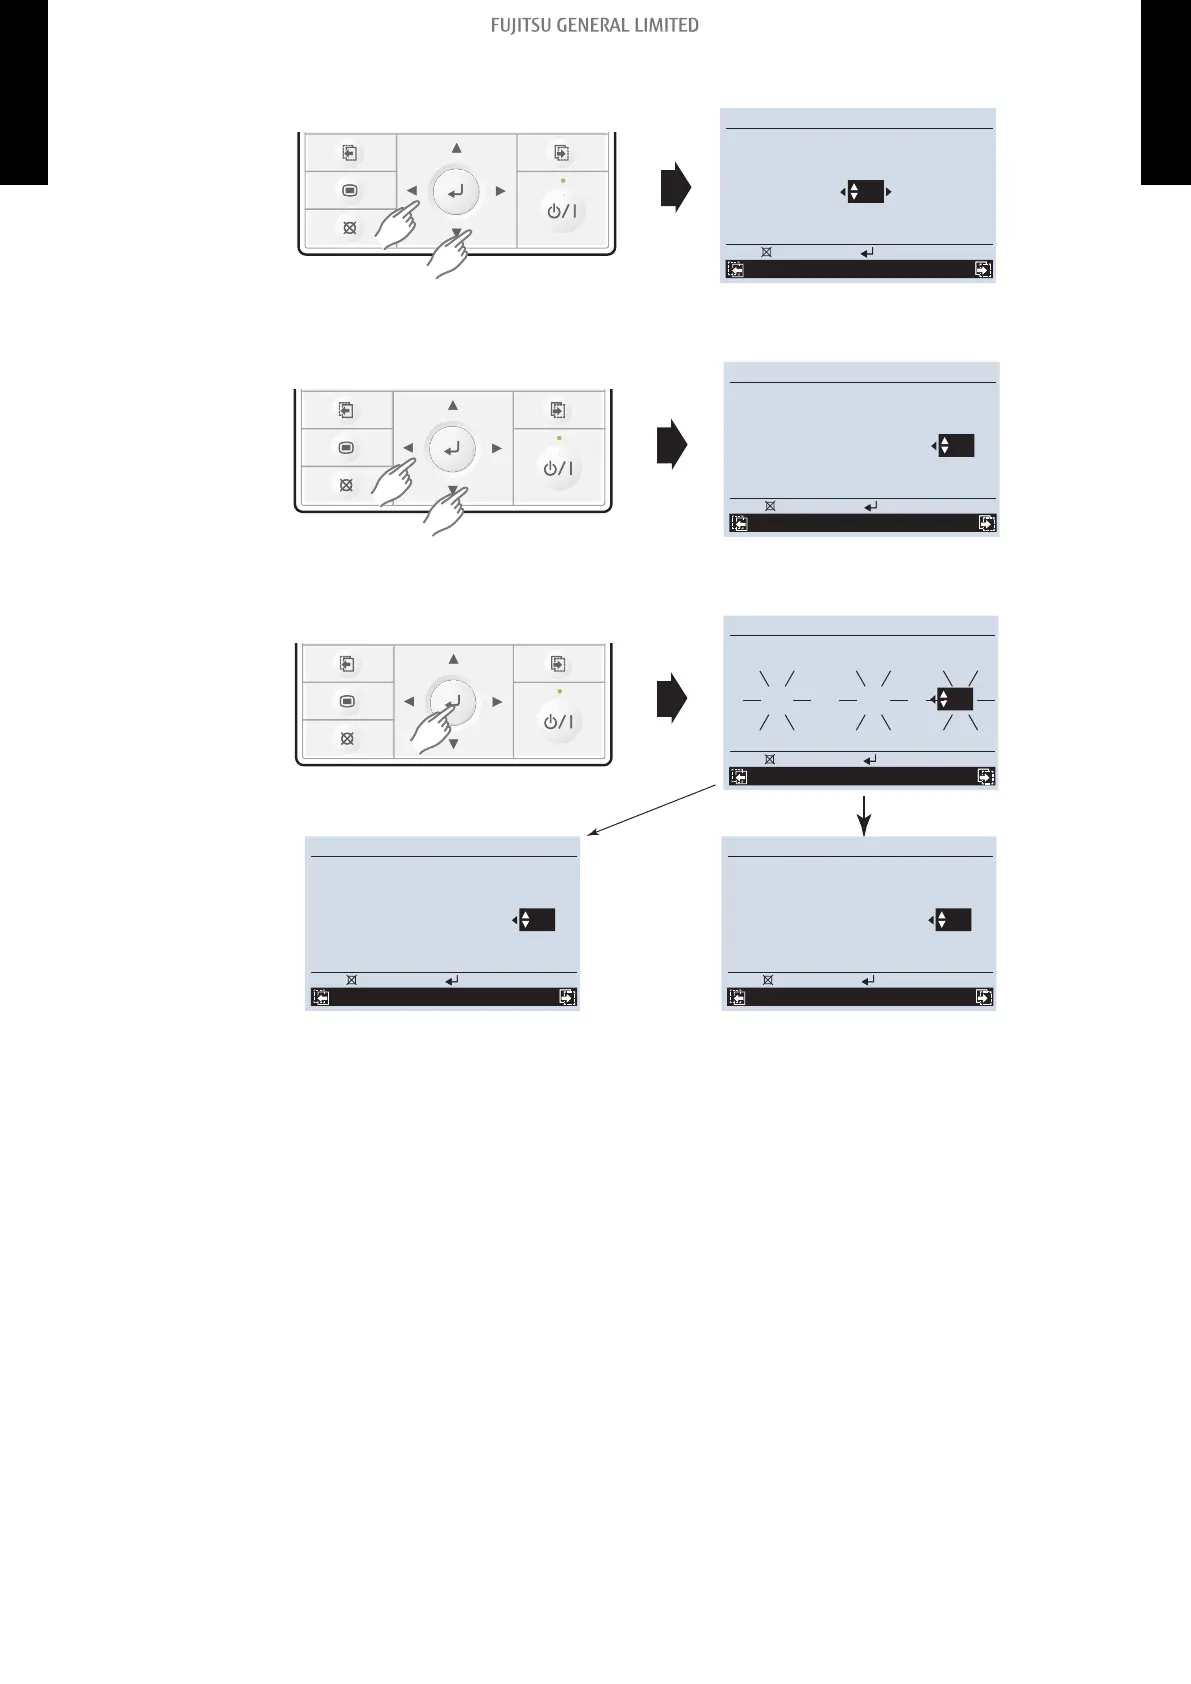
3. Select the [Function No.] with pressing the [Cursor button (Left/Right)], and select the Function
No. to be set with pressing the [Cursor button (Up/Down)].
C
ancel
:
OK :
Function set tin g
Mo
10:00AM
R.C. Function Setting
address No. No.
Version Er ror hi sto ry
00 30 00
4. Select the [Setting No.] with pressing the [Cursor button (Left/Right)], and select the Setting No.
to be set with pressing the [Cursor button (Up/Down)].
C
ancel
:
OK :
Function set tin g
Mo
10:00AM
R.C. Function Setting
address No. No.
Version Er ror hi sto ry
00 30 01
5. Pressing the [Enter button], confirm the setting.
The data will be transferred to the indoor unit.
C
ancel
:
OK :
Function set ting
Mo
10:00AM
R.C. Function Setting
address No. No.
Version Er ror his tor y
00 30 01
C
ancel
:
OK :
Function set ting
Mo
10:00AM
R.C. Function Setting
address No. No.
Version Er ror his tor y
00 30 - -
C
ancel
:
OK :
Function set ting
Mo
10:00AM
R.C. Function Setting
address No. No.
Version Er ror his tor y
00 30 01
Error
Good
Function details: Refer to Chapter 15-5. "Function details" on page 251.
- 239 -
15-3. Indoor unit (setting by wired remote controller) 15. Function settings
2-UNIT
MULTI-SPLIT TYPE
2-UNIT
MULTI-SPLIT TYPE
 Loading...