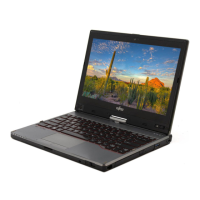
Saving your Factory Image
When you purchased your new system, a copy of the pre-installed Factory Image
was loaded into a hidden partition
on your hard disk drive. Having a copy of the
original Factory Image available to you means that in the event of system
failure,
you will be able to restore it to its original state.
To make a copy of the Factory Image to DVD discs, you will need several blank
discs (DVD-R or DVD+R discs are
recommended) to create the copy. After creating
the copy, be sure to label the discs and keep them in a safe place to ensure they do
not get damaged.
Creating Backup Images of Factory Image and Discs
• SOME CONFIGURATIONS OF CERTAIN STYLISTIC MODELS DO NOT HAVE APPLICATIONS
LOADED ON THE HARD DRIVE
; RATHER, THEY ARE AVAILABLE
AT THE FUJITSU SUPPORT SITE FOR
DOWNLOAD
. PLEASE TAKE THAT INTO ACCOUNT WHEN READING THE FOLLOWING PROCEDURES.
• ALL USER-CREATED DATA WILL BE DELETED FROM YOUR SYSTEM WHEN THE FACTORY IMAGE IS
RESTORED
.
1. On your desktop, there is a [My Recovery] icon that allows you to make a
backup image of the Factory image for
later use. Launch My Recovery from the
desktop icon
2. Select [Manage/Create]-> [Factory Image].
The Backup Images menu displays a list from which you can choose which type
of disc you want to burn: Bootable
Disc, Applications Disc, or Recovery Disc.
3. Select
Recovery Disc
, then click [Make DVD].
4. Confirm that the # box has “2” (Note that in some cases the box may display a
larger number for the factory image,
depending upon its size.)
5. The message “Recovery Disc #1 will be created. Enter your comments and the
number of media on the DVD”. Click [YES] to burn the Factory Image.
6. While the copy is being made, a “Writing to the media screen displays a progress
bar. When the copy is complete, a dialog will appear informing you of the
successful completion of the backup.
Appendix 127

 Loading...