DMC-1500 Chapter 2 Getting Started • 9
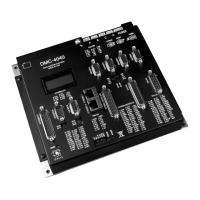
The stepper mode jumpers are located next to the GL-1800 which is the largest IC on the board. The
jumper set is labeled JP40 and the individual stepper mode jumpers are labeled SMX, SMY, SMZ,
SMW. The fifth jumper of the set, OPT, is for use by Galil technicians only.
The jumper set, J41, can be used to connect the controllers internal power supply to the optoisolated
inputs. This may be desirable if your system will be using limit switches, home inputs digital inputs,
or hardware abort and optoisolation is not necessary for your system. For a further explanation, see
section Bypassing the Opto-Isolation in Chapter 3.
Step 3. Configure DIP switches on the DMC-1500
Located on the outside of the controller box is a set of 5 DIP switches.
Switch 1 is the Master Reset switch. When this switch is on, the controller will perform a master reset
upon PC power up. Whenever the controller has a master reset, all programs and motion control
parameters stored in EEPROM will be ERASED. During normal operation, this switch should be off.
Switch 2,3 and 4 are used to configure the baud rate of the main RS232 serial port. See section
Configuration in Chapter 4.
Switch 5 is used to configure both serial ports for hardware handshake mode. Set this switch on for
handshake mode. Please note that the Galil communication software requires that hardware handshake
mode be enabled.
Step 4. Connect AC Power to the Controller
Before applying power, connect the 60-pin and 26-pin ribbons between the DMC-1500 and ICM-1100
interconnect module. The DMC-1500 requires a single AC supply voltage, single phase, 50 Hz or 60
Hz. from 90 volts to 260 volts.
WARNING: Dangerous voltages, current, temperatures and energy levels exist in this product
and in its associated amplifiers and servo motor(s). Extreme caution should be exercised in the
application of this equipment. Only qualified individuals should attempt to install, set up and
operate this equipment.
WARNING: Never open the controller box when AC power is applied to it.
Applying power will turn on the green light power indicator.
Step 5. Install Communications Software
After you have installed the DMC-1500 controller and turned the power on to your computer, you
should install software that enables communication between the controller and PC. There are several
ways to do this. The easiest way is to use the communication disks available from Galil
(COMMDISK VOL1 FOR DOS AND VOL2 FOR WINDOWS).
Using the COMMdisk Vol1 for Dos:
To use this disk, insert the COMMDISK VOL 1 in drive A. Type INSTALL and follow the
directions.
Using the COMMdisk Vol2 for Windows (16 bit and 32 bit versions):
For Windows3.x, run the installation program, setup16.exe. For Windows 95 or Windows NT, run
the installation program, setup32.exe.
 Loading...