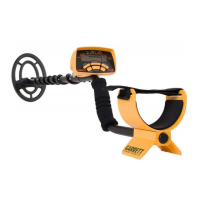
Notch Discrimination
16
Apex has 20 pixels or “notches” of discrimination, shown
on the lower scale. Any combination of these pixels
can be switched on or off based upon your prefer-
ence. There are two primary methods for modifying the
Notch Discrimination Pattern to reject a specific type of
trash or unwanted item.
For the first method, use the (+) or (-) NOTCH DISC
buttons to move the Target ID cursor to the left or
right. Next, press the (/x) elim button to eliminate or
activate the pixel located on the Lower Scale, directly
below the Target ID cursor. (See illustrations on next
page.)
The second method of modifying the Notch
Discrimination pattern uses only the (/x) elim button.
When an unwanted target is audibly detected, simply
push the (/x) elim button to create a notch at that
Target ID Cursor. The next time this item is encountered,
it will not produce an audible signal.
Tip: Notch Discrimination can also be used to find
specific metal items. For example, if an earring has been
lost, scan the matching earring in ZERO-DISC mode
and note its Target ID cursor. Then, use the NOTCH
DISC and (/x) elim buttons to switch off all the pixels
except the one for the earring and an additional pixel
on either side to account for some ID variations.
Example of Manual Modication to Notch Discrimination Pattern
Modify pattern with these buttons
Use the NOTCH DISC buttons to position the Target
ID Cursor above the pixel you wish to eliminate
(see illustration to left). Use the (/x) elim button to
delete this pixel from the Lower Scale (see below).
This item is now rejected.
Note: Changes made to the Notch Discrimination pattern
while in CUSTOM Mode will be retained when the detector is
switched OFF. Changes made to all other modes will return to
the factory settings when the detector is switched OFF and
back ON.