FP1500 Installation, Configuration and Commissioning Manual 36
Before starting the installation of the modem, check that no element is connected to the
RS232 port, which is to be used for this function.
[MAIN MENU] [# Exit]
1. Configure 4. Connect 7. See
2. Test. 5. Disconnect
3. Time 6. Print
From the [Main Menu] screen, select option 6
<Print> select option 5 <Options> check that
the internal printer is on [NO] mode.
[PRINT] [# Exit]
1. Element 4. Disconnected
2. Historic 5. Options
3. Mode
Printer port: [ 01 ]
Internal printer: [ NO ]
Return to option 3 <Mode> and set the printer
Mode to [OFF].
[PRINT] [# Exit]
1. Element 4. Disconnected
2. Historic 5. Options
3. Mode
Printer Mode: [ OFF ]
[CONFIGURE] [# Exit]
1. System 4. System Op. 7. Events
2. See Config. 5. Check Prog. 8. Day Mode
3. Time/Date 6. Power Supply 9. Codes
[SYSTEM OPTIONS] [#Exit]
1. General
2. Messages
3. Modem
[MODEM] [#Exit]
1. GSM
2. Normal
3. Telephones
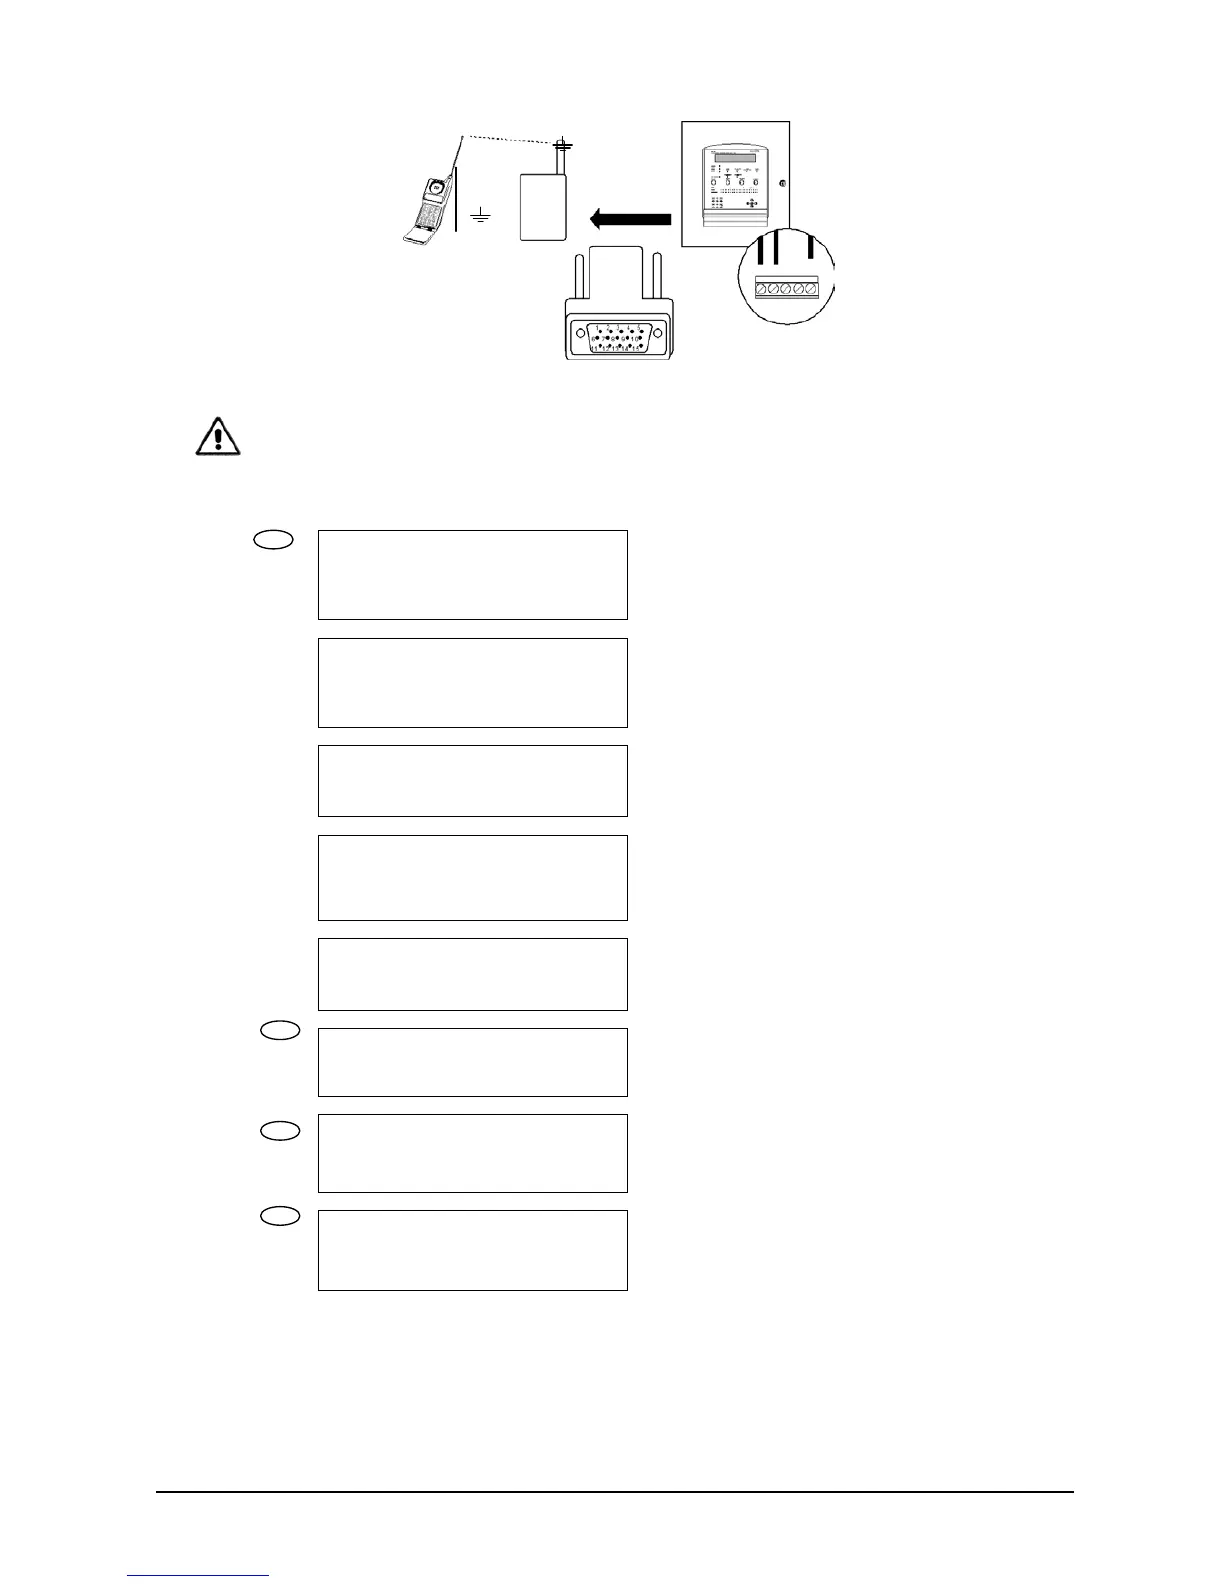
For the installation of the GSM modem:
1. Connect the modem serial cable to the
RS232 port of the control unit.
2. Connect the modem power supply cable to
the auxiliary 24 V output of the control unit.
Once installed, it must be configured in the
control unit:
1. From the [Configure] menu, select point 4
<System Options> and option 3
<MODEM>.
2. Choose the modem to be configured, in this
case, option 1<GSM>
3. Within the GSM modem menu, select point
6
4
TXA RXB A B
RS1
6 RXB
2 TXA
9
3
1