PROTEUS XR/a
GE MEDICAL SYSTEMS Operator Manual
REV 11 DIRECTION 2259724-100
5-1
CHAPTER 5 PROTEUS XR/A SYSTEM CONSOLE
5-1 Introduction
This section introduces you to the Operator Console Display. A standard
system screen is used as an example to acquaint you with the
arrangement of screen information.
Beside the ON/OFF, and status display buttons described in the previous
section, the console also has a prep/expose hand switch and prep
exposure buttons. The console also has an indicator lamp for x-ray
exposure. It is located on the status display bar.
When there is an x-ray exposure the yellow x-ray exposure indicator
lights and the console beeps. X-rays are produced when the x-ray
prep/exposure buttons or hand switch are pressed.
On the outside of the display screen are a set of up/down arrows. These
arrows are used to change the technique factors on the display screen.
These buttons will be explained in the technique section.
NEVER LOAD NON-SYSTEM SOFTWARE ONTO THE SYSTEM
CONSOLE.
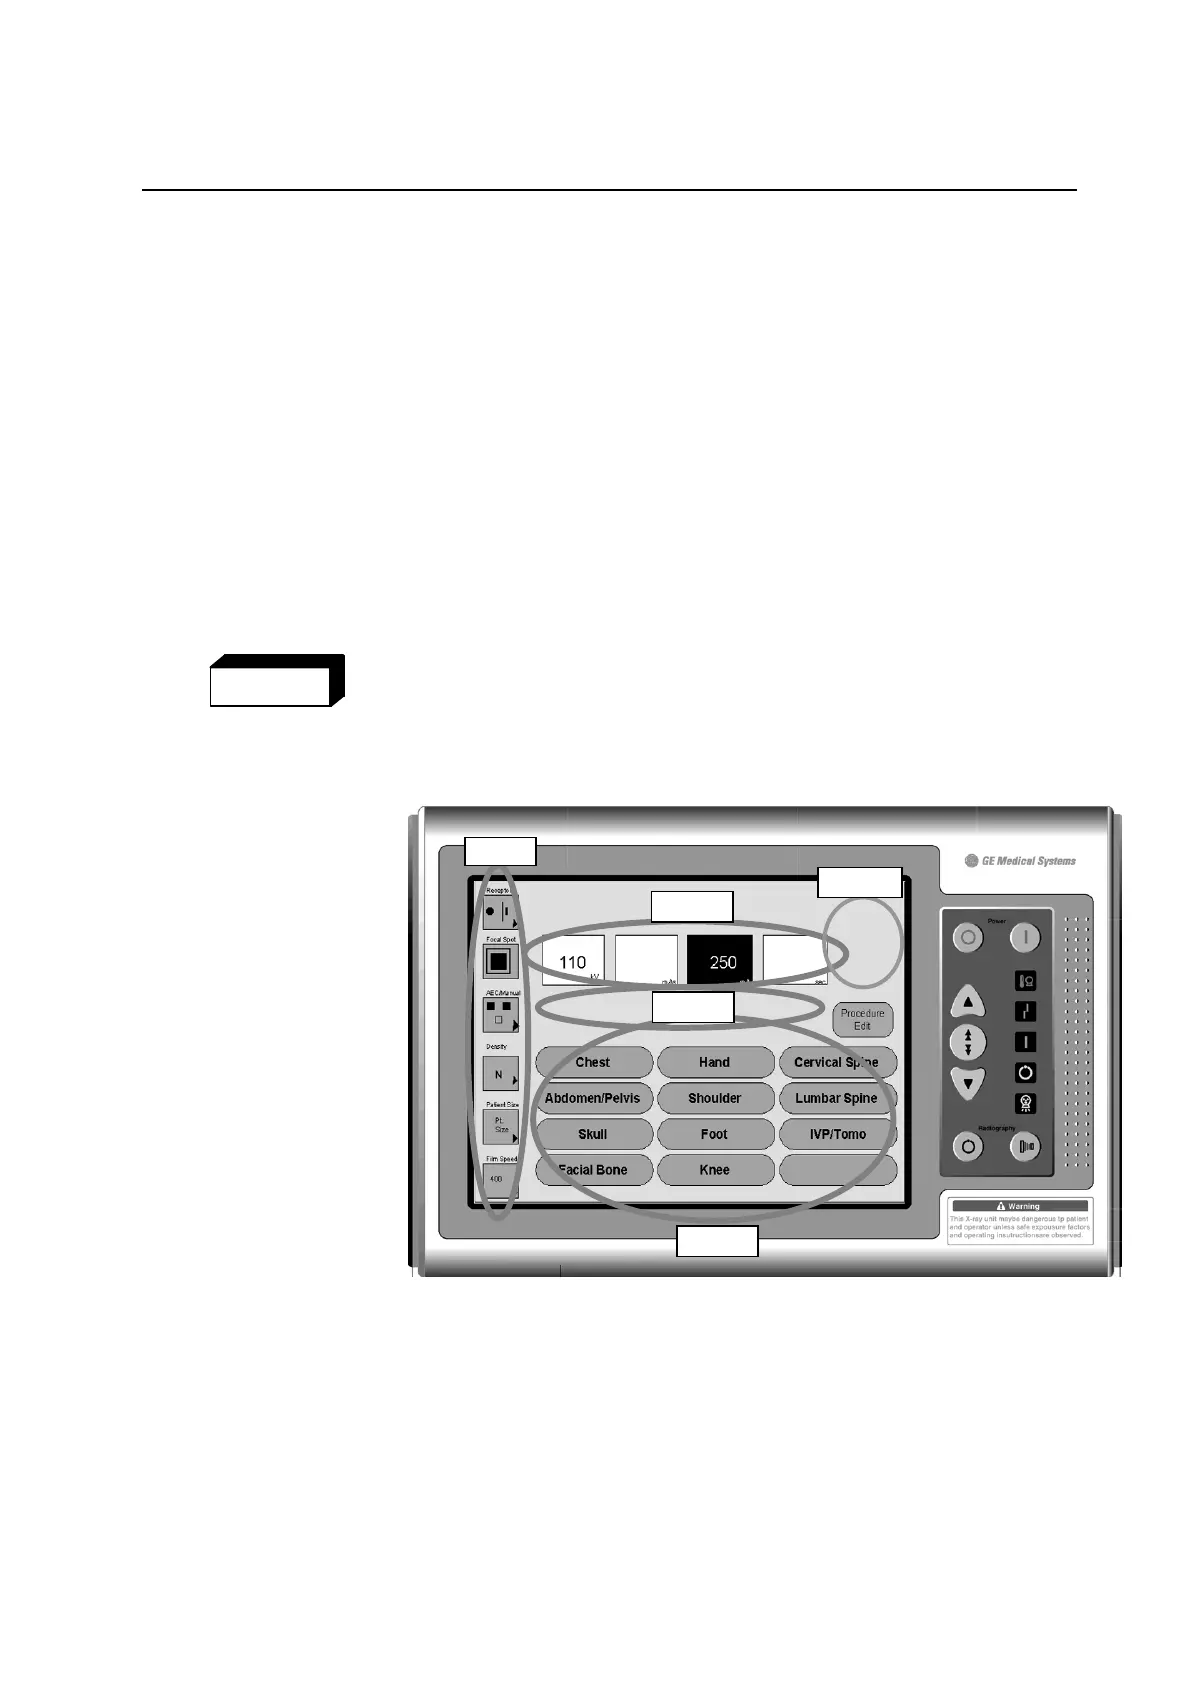
ILLUSTRATION 5-1
UNDERSTANDING THE DISPLAY
Group 1 Technique S
Group 1 Technique S
Group 1 Parameter selection Area, see 5-1-1
Group 2 Technique Selection Area, see 5-1-2
Group 3 Error Message Area, see 5-1-3
Group 4 Anatomical Programmer with Procedure Edit, see 5-2
Group 5 Print button and display button, see 5-3-3
This is the main Screen of the system console. This will appear when
the system is initially turned on.
Group
Group 2
Group 3
Group 4
WARNING
Group 5
FOR TRAINING PURPOSES ONLY!
NOTE: Once downloaded, this document is UNCONTROLLED, and therefore may not be the latest revision. Always confirm revision status against a validated source (ie CDL).

 Loading...