checkbox to have your object printed with support structures.
b. Extruder
If you are printing with dual extruder, you can select one of them to print the support
material.
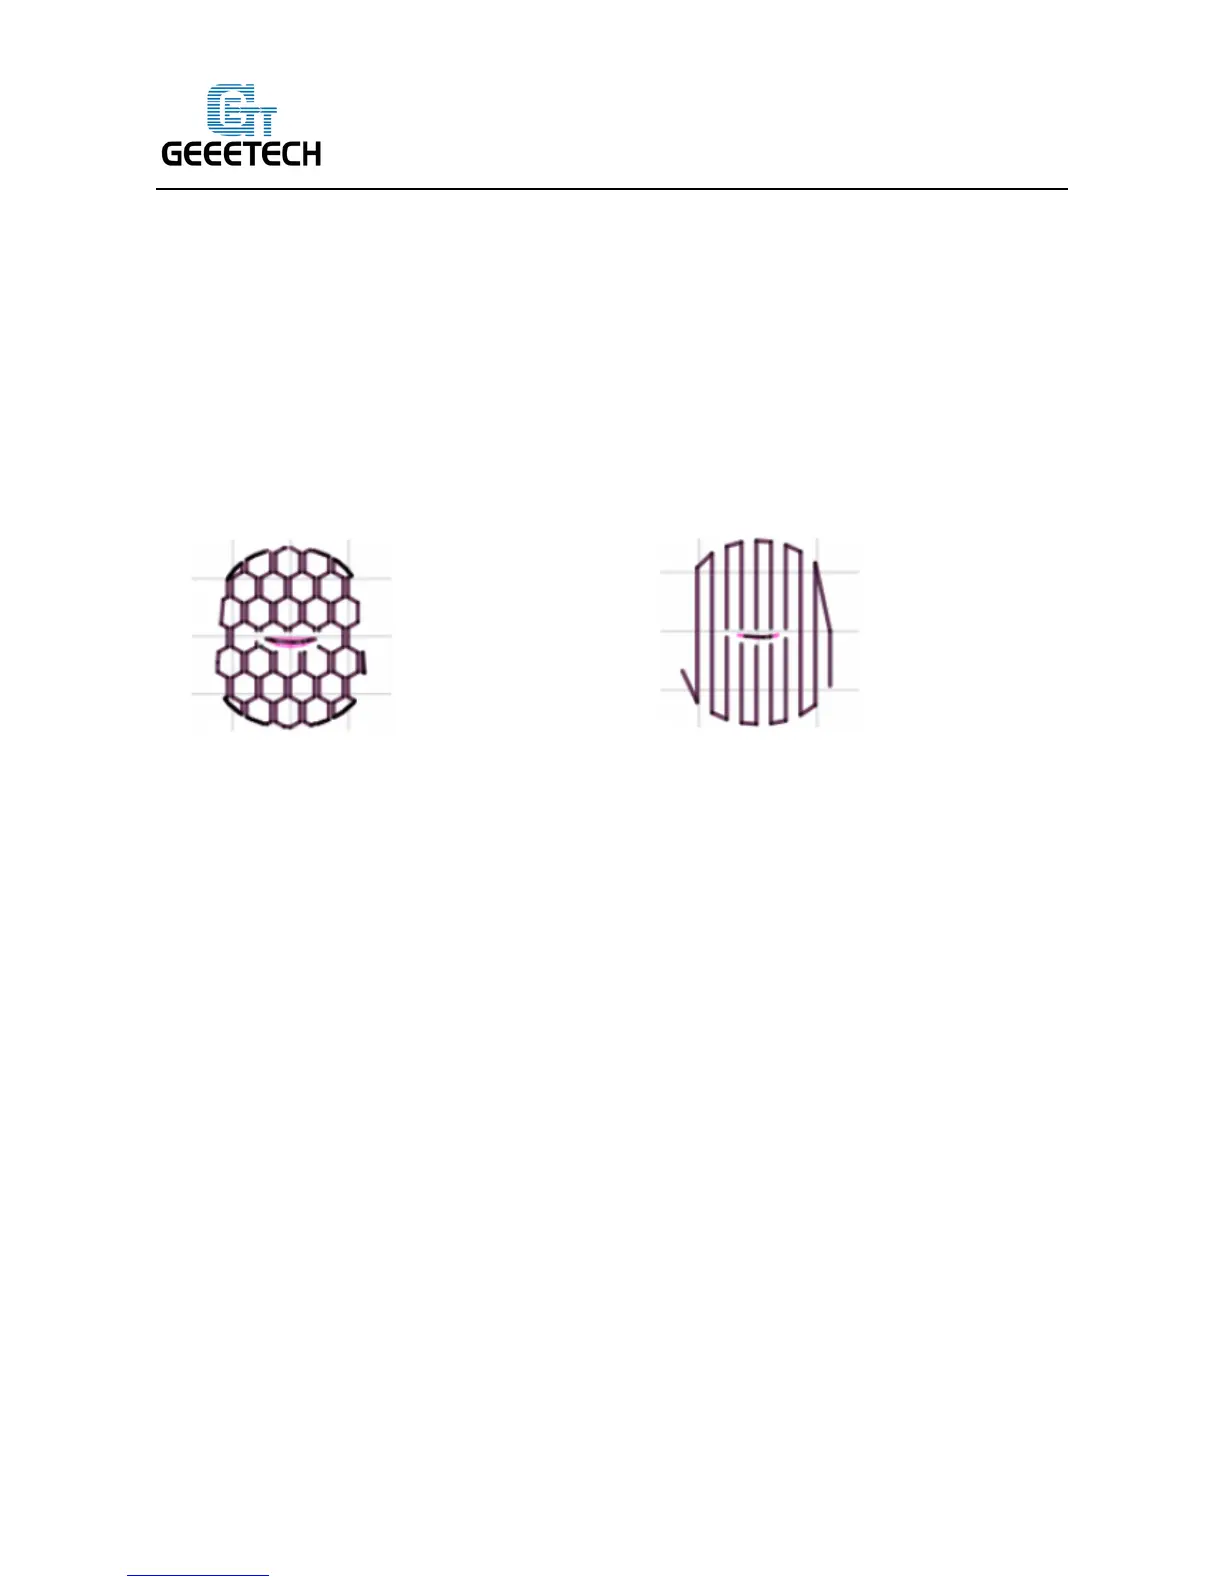
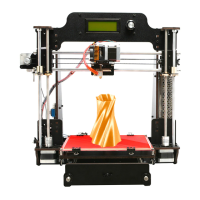
c. Pattern
There are different patterns available for printing support structures, resulting in sturdiness or
the easiness to remove the support. You can choose from the following patterns.
(1) Honeycomb (2) Rectilinear
d. Pattern Spacing
Pattern Spacing determines the distance between support lines, and is akin to infill density
apart from being defined only in mm. The adjustment of this attribute by taking into account the
width of the support extrusion and the amount of support material will adhere to the object.
Care should be taken to choose a support pattern which matches the model, where the support
material attaches perpendicularly to the wall of the object, rather than in parallel, so it will be easy
to remove. If the support structure does run along the length of a wall, the Pattern Angle option
allows the direction of the support lines to be rotated.
Now all the parameters are set. Click [Apply] and [OK].
4. Begin Printing
So far, all the preparatory work is completed. The next step is to import the model file for slicing
and printing. For 3D printer, the file format of the model is generally .stl file. We can download for
free and print those models which are shared online, and you can also design your own creative