EasyManuals Logo

Geeetech Prusa I3 User Manual

Geeetech Prusa I3
24 pages
To Next Page IconTo Next Page
To Previous Page IconTo Previous Page
Page #17 background imageLoading...
Page #17 background image
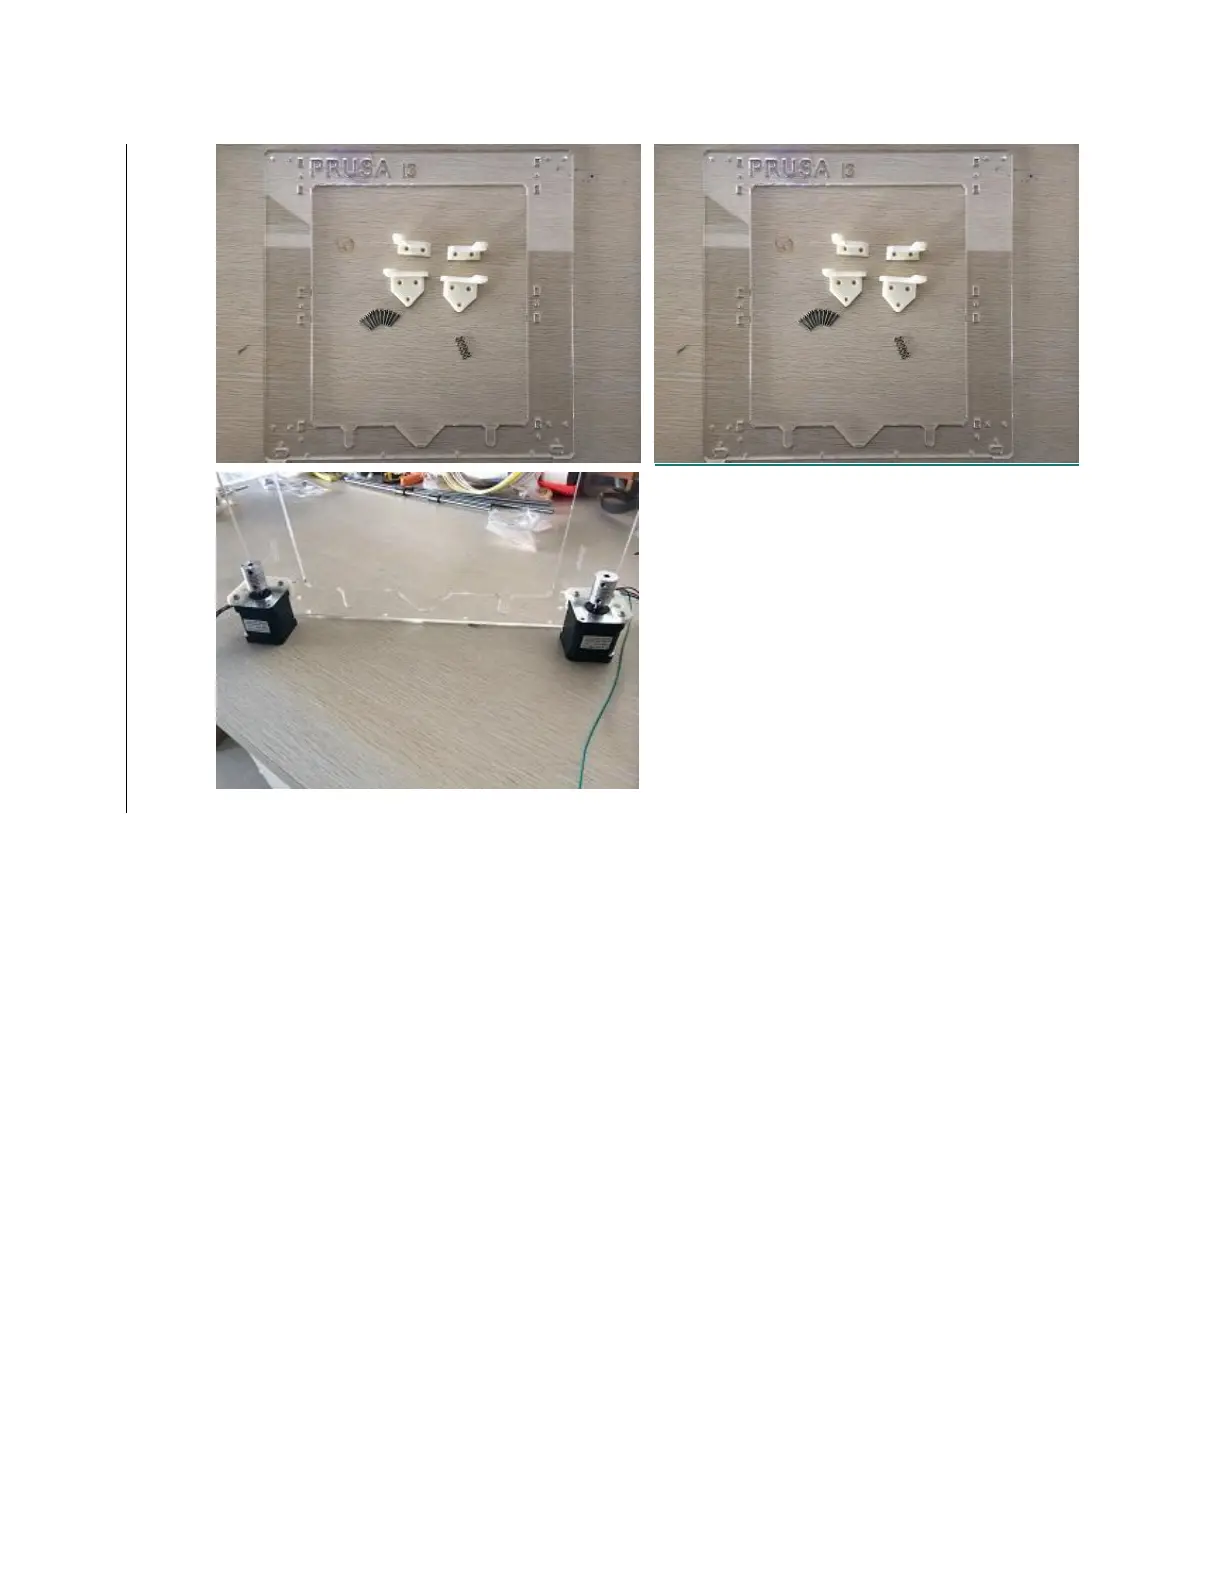
2. Attach the X-Z system assembled in the previous section to the Z plate. The precision rods of the X-Z
system should fit into the circular openings on the z bottom pieces. The precision rods then sit right on
top of the z motors (you might need to gently hammer the rods for them to go all the way in). The
threaded rods should fit into the motor coupler. Slide the X printed pieces on the precision rods to make
this fit happen.
3. Attach the z top pieces to the acrylic plate with two m3-16 screws and nuts on each side.

Questions and Answers:

Question and Answer IconNeed help?

Do you have a question about the Geeetech Prusa I3 and is the answer not in the manual?

Geeetech Prusa I3 Specifications

General IconGeneral
Build Volume200 x 200 x 180 mm
Layer Resolution0.1-0.3 mm
Filament Diameter1.75 mm
Nozzle Diameter0.4 mm
Print TechnologyFDM (Fused Deposition Modeling)
ConnectivitySD card, USB
Supported MaterialsPLA, ABS, Wood
Frame MaterialAcrylic
Power SupplyDC 12V
Machine Weight8 kg

Related product manuals