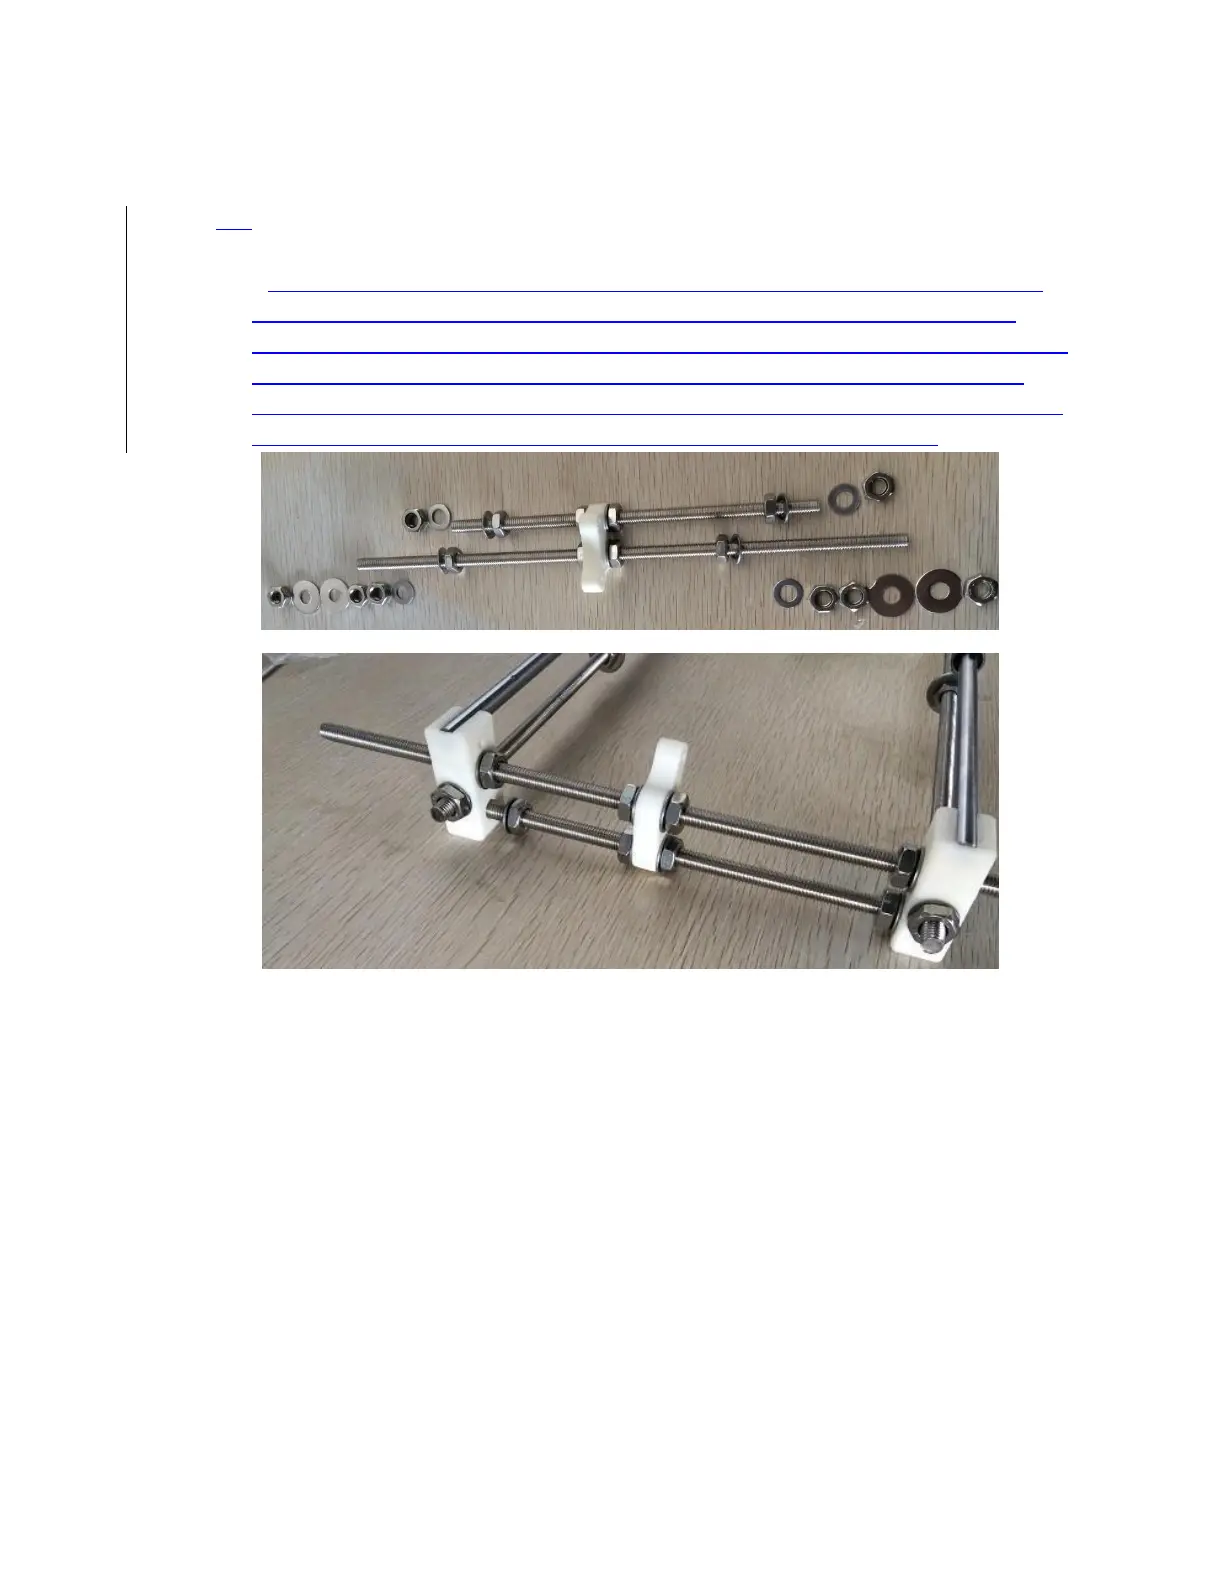
3. nut – washer – chassis corner – washer – nut – nut – washer – Y motor mount – washer – nut –
nut – washer – chassis corner – washer – nut. Do not tighten yet.
4 Align the rods and tighten all nuts so the chassis will not fall apart. You might need to adjust
the chassis later when mounting the Y plate.
5 Put the 310mm and 205mm rods through the printed Y motor mount, with orientation
shown in the picture above. The 310mm should be going through the top holes in the
chassis corners. The order of washers and nuts on the 310mm rod is: nut – fender washer –
fender washer – nut – nut – washer – chassis corner – washer – nut – nut – washer – Y
motor mount – washer – nut – nut – washer – chassis corner – washer – nut – nut – fender
washer – fender washer – nut. The order of nuts and washers on the 205mm
Pictures for step 3 and 4
4. Finished Chassis
Congratulations, now you have the chassis made. It should look like what’s in the picture below.