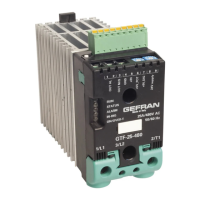
35
80960G_MHW_GTF_05-2019_ENG
4.1 sequence autobauD serial
Function
Adapt the serial communication speed and parity of the GTF
modules to the connected supervision terminal or PLC.
The “RUN”and “STATUS” LEDs mentioned in the
procedure can vary its behavior based on on he
parameters Ld.1 e Ld.2
Procedure
1 Connect the serial cables for all modules on the
network t and to the supervision terminal.
2 Set the rotary switch on the GTF modules to be
installed, or on all modules present in case of first
installation, to position “0+0”. *
3 Check that the “RUN” and “STATUS” LEDs flash at
high frequency (10Hz).
4 The supervision terminal must transmit a series of
generic “MODBUS” read messages to the network.
5 The procedure is over when all of the “RUN” and
“STATUS”LEDs on the GTF modules flash at a
normal frequency (2Hz) (if parameter 50 Ld.1 = 16
as default).
The new speed parameter is saved permanently in each GTF;
therefore, the “AUTOBAUD SERIAL” sequence does not have
to be run at subsequent power-ups.
When the rotary switch is turned, the green
“STATUS” LED stays on steadily for about 6
seconds, after which it resumes normal operation
and saves the address.
* Note: the address set by the rotary switches is acquired only at
power-on.
?
INSTALLATION OF
SERIAL NETWORK 1
ModBus
SETTING
THE NODE
ADDRESS
OPERATIVE
FUNCTION
NO
The serial network communication
speed is the same as for GTF.
SI
“AUTOBAUD”
SERIAL 1
SEQUENCE
“RUN and STATUS”
LEDs flashes at 10 Hz
 Loading...