Video Playback
94
4
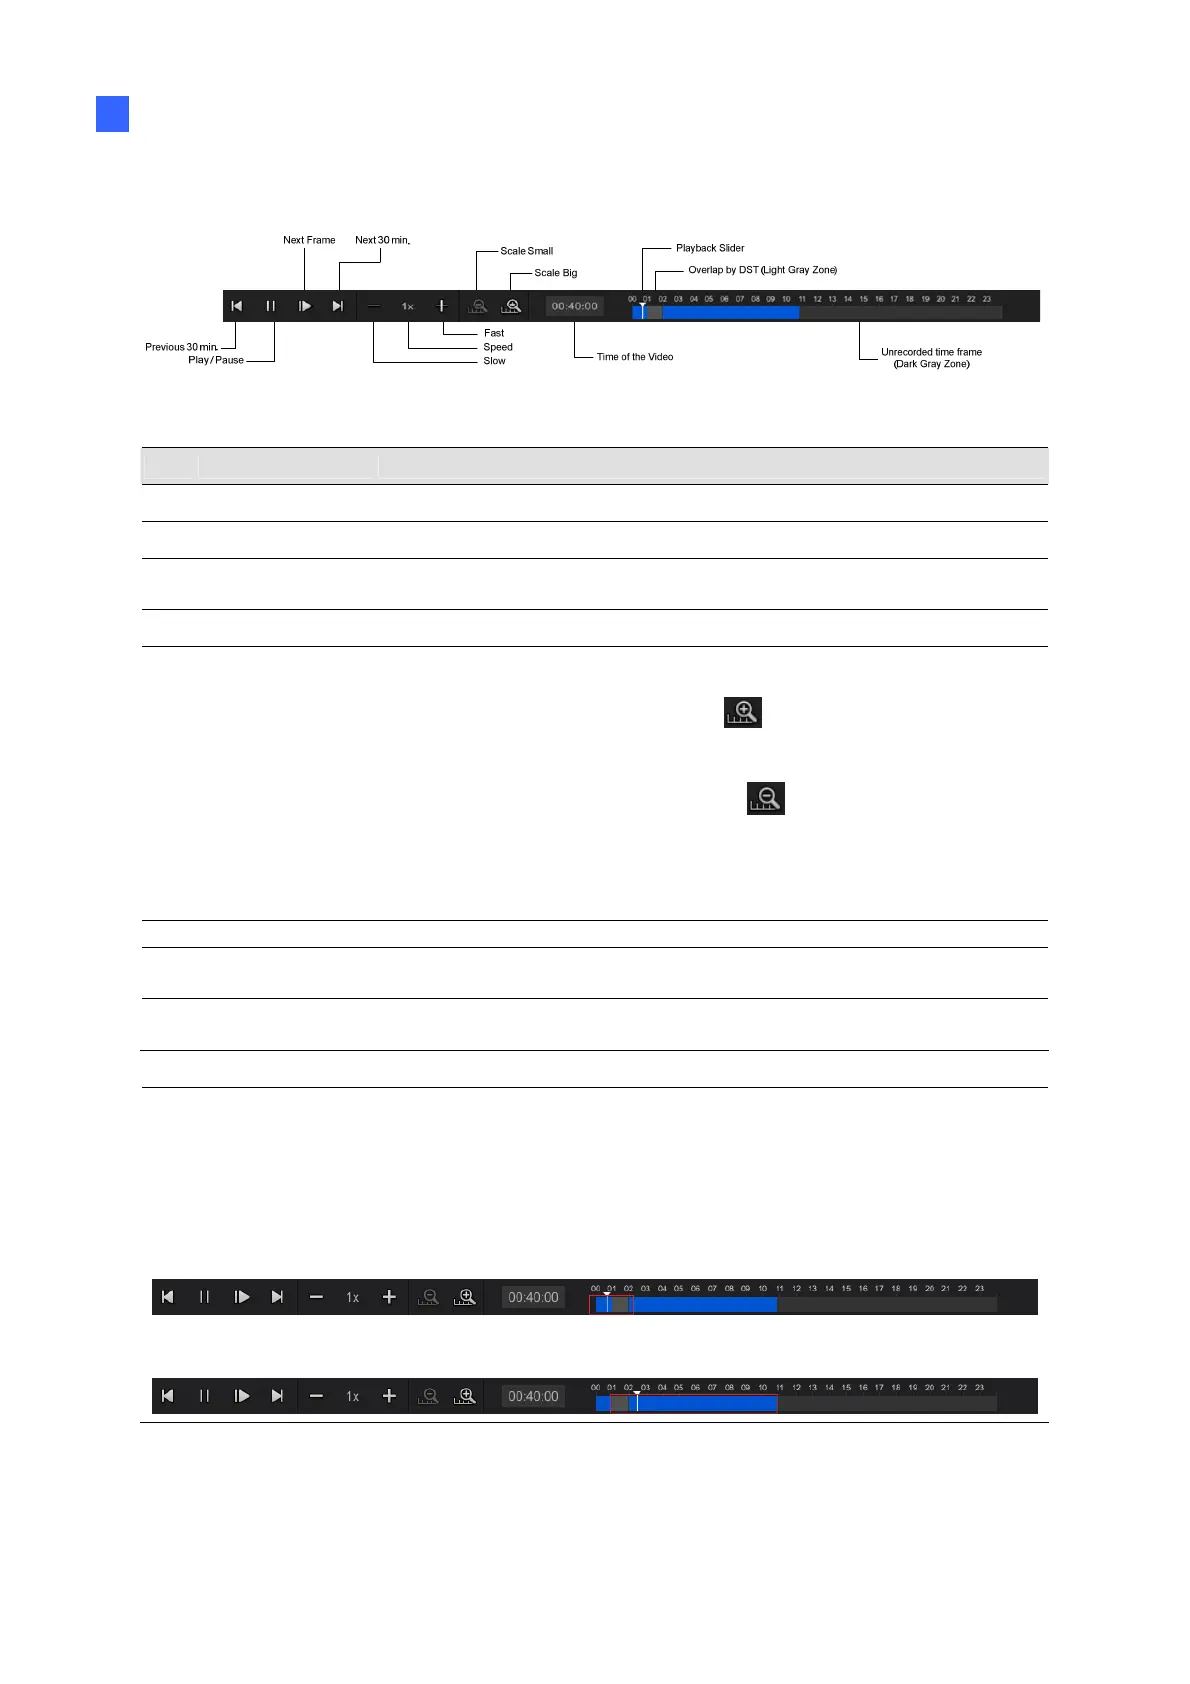
Use controls on the Playback Panel to view the event in the way you want. Move the slider
forward or backward to navigate through video frames.
Figure 4-2
The controls in the timeline player screen:
No. Name Description
1 Camera Name Indicates the camera name.
2 Camera View Displays the playback video.
3 Date Display
Allows you to specify a date for playback. The date with recordings
is highlighted in blue.
4 Playback Panel Contains typical playback control buttons.
5 Timeline
The time with recordings is highlighted in blue.
For GV-SNVR0411 / 0412 / 0811 / 0812 / 1600 / 1611 / 1612,
a) With the Scale Big button
clicked, displays a 60-
minute timeline consisting of 12 grids with each specifying
five minutes.
b) With the Scale Small button
clicked, displays a 24-
hour timeline consisting of 24 grids with each specifying an
hour.
For GV-SNVR0400F, displays a 24-hour timeline consisting of
48 grids, with each specifying half an hour.
6 Live Closes the timeline player and returns to the live view window.
7 Division
Changes the screen division, which varies among different GV-
SNVR models.
8 Export
Exports recordings as AVI files to a USB flash drive. See 4.2
Recording Export for details.
Note:
The light gray zone in between the blue recording zones, as indicated in Figure 4-2, is a
one-hour overlap of 2 separate recordings caused by the Daylight Saving Time (DST).
Note the following to distinguish the recordings.
To play back the last hour of the recording with DST enabled, click the Next 30 min.
button when the Playback Slider is placed before the gray zone.
To play back the first hour of the recording with DST disabled, click the Previous 30
min. button when the Playback Slider is placed after the gray zone.
 Loading...