95
4.2 Recording Export
Using the timeline player, you can export recordings to a USB flash drive. To export
recordings, follow the steps below.
1. Connect a USB flash drive of FAT32 format to the USB port on the device.
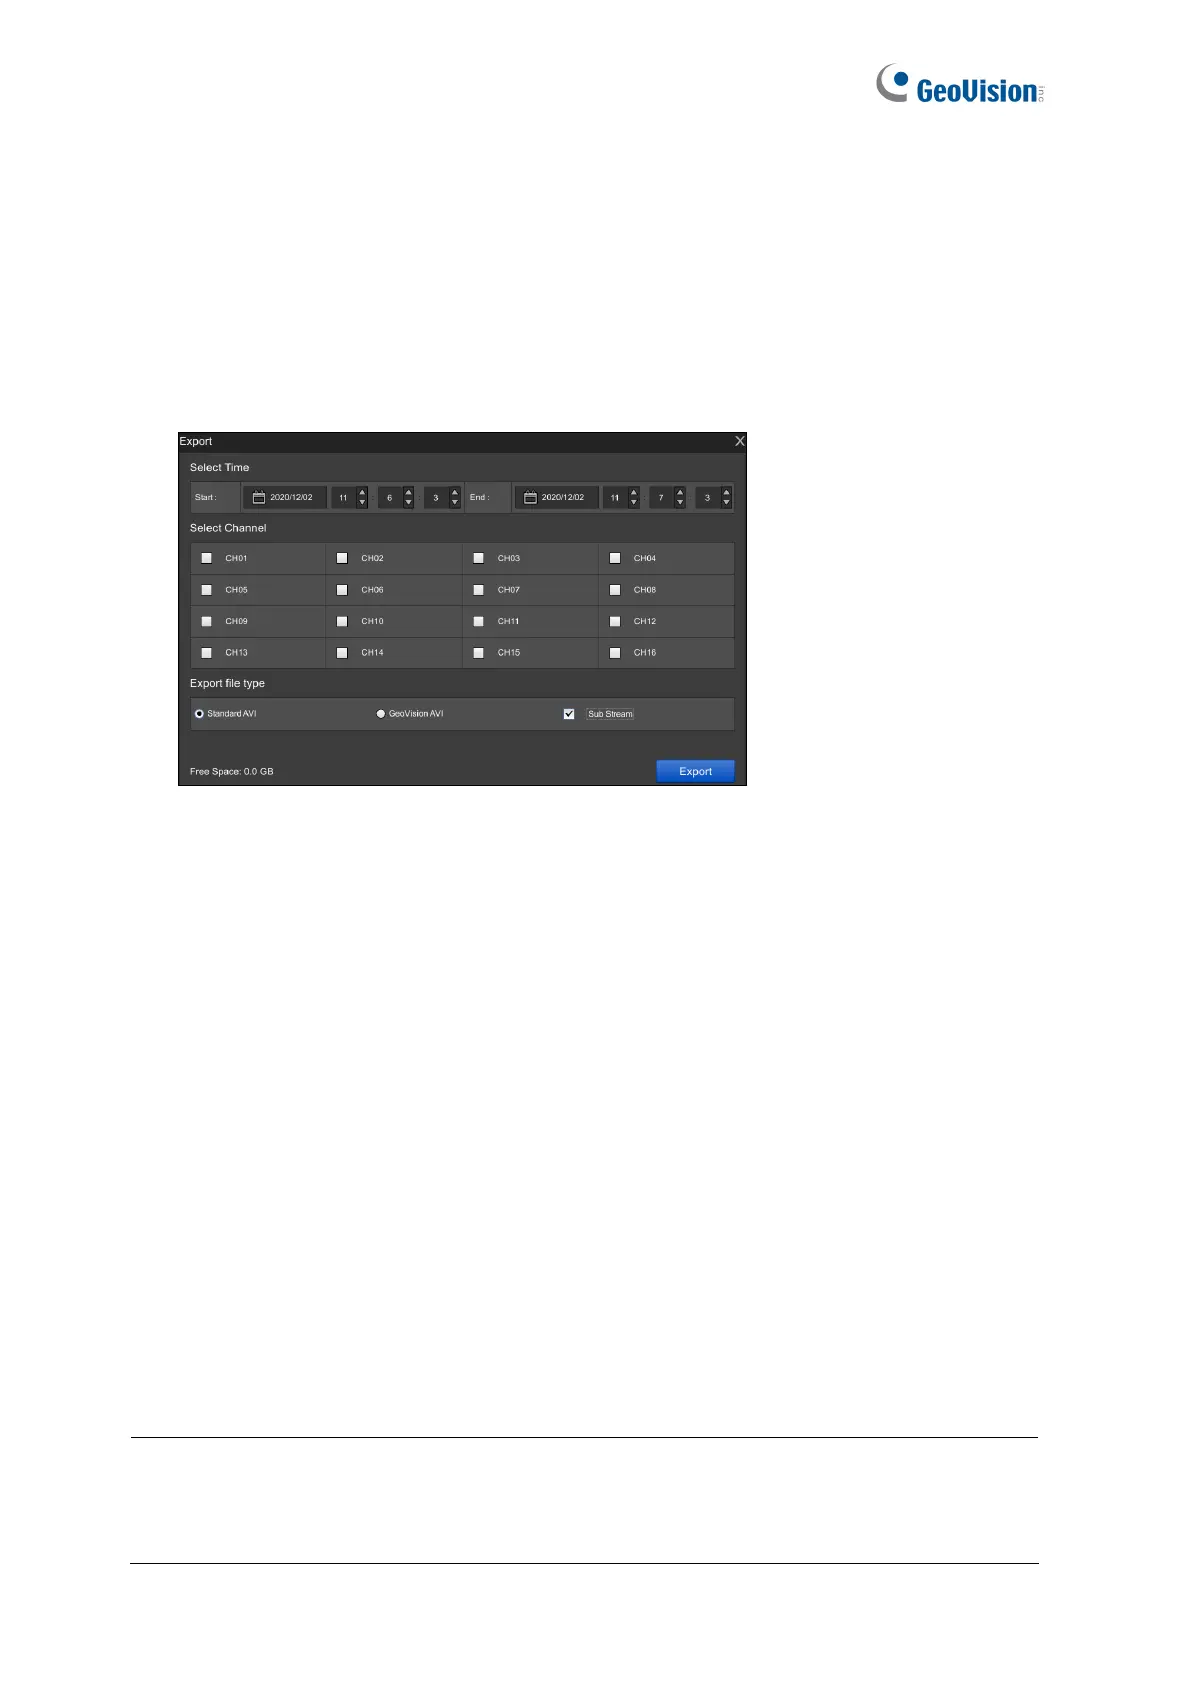
2. On the timeline player screen, click Export (No.8, Figure 4-1).
Figure 4-3
For GV-SNVR0411 / 0412 / 0811 / 0812 / 1611 / 1612:
˙ Select GeoVision AVI to export video without audio.
˙ Select Standard AVI to export video with audio. Note the Standard AVI file is not
supported by GeoVison applications.
˙ Only for GV-SNVR1611 / 1612, select Sub Stream to export sub-stream recordings
if the camera host is recorded in dual streams.
For GV-SNVR0400F / 1600, the recordings are exported in GeoVision AVI format.
3. Select the start and end time of the recordings to be exported.
4. Select the desired channels for export.
5. Click Export.
For the recordings exported in GeoVision AVI or Standard AVI format, you need to install
GeoVision codec in a PC for playback using Windows Media Player. For GeoVision AVI
format only, you can install the GV-ViewLog player for playback.
Note:
1. For GV-SNVR0400F / 1600, the exported recordings only support video.
2. If GV-SNVR is connected with more than one USB flash drive, the recordings will be
backed up to the first USB flash drive connected.
 Loading...