EasyManuals Logo

GeoVision GV-SNVR0410F User Manual

GeoVision GV-SNVR0410F
136 pages
To Next Page IconTo Next Page
To Previous Page IconTo Previous Page
Page #45 background imageLoading...
Page #45 background image
Getting Started
38
2
6. To install more HDDs, repeat the steps above.
7. Place the cover back and tighten the screws.
The hard drive is now ready for use.
Installing the L-Shaped Brackets
Tighten the 6 screws to secure and attach the 2 L-shaped brackets to each side of
GV-SNVR1600.
Figure 2-20
2.1.5 GV-SNVR1611 / 1612
Installing the Hard Drive
Follow the steps below to install the hard drive to GV-SNVR1611 / 1612.
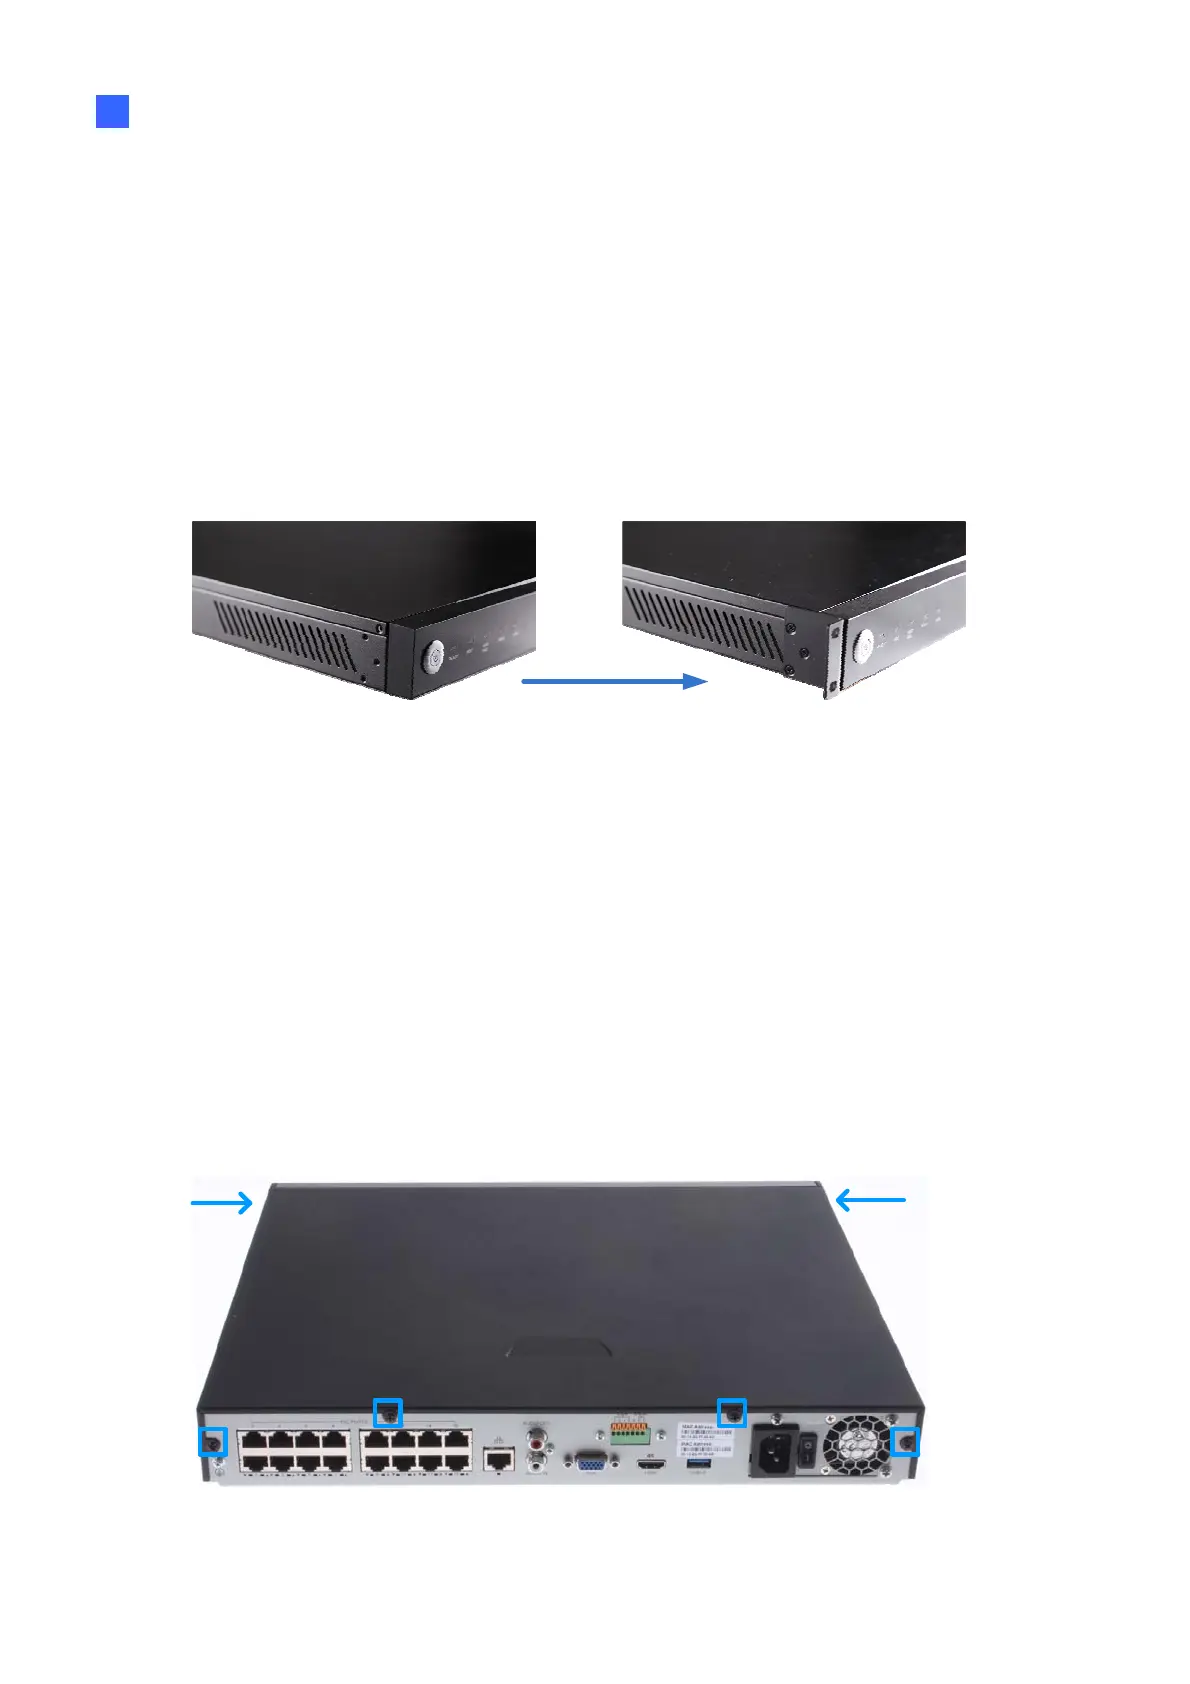
1. Unscrew the two screws on both sides and the four screws on the rear to remove the
cover.
Figure 2-21

Table of Contents

Other manuals for GeoVision GV-SNVR0410F

Questions and Answers:

Question and Answer IconNeed help?

Do you have a question about the GeoVision GV-SNVR0410F and is the answer not in the manual?

GeoVision GV-SNVR0410F Specifications

General IconGeneral
BrandGeoVision
ModelGV-SNVR0410F
CategoryRecording Equipment
LanguageEnglish

Related product manuals