54
Changing or Replacing
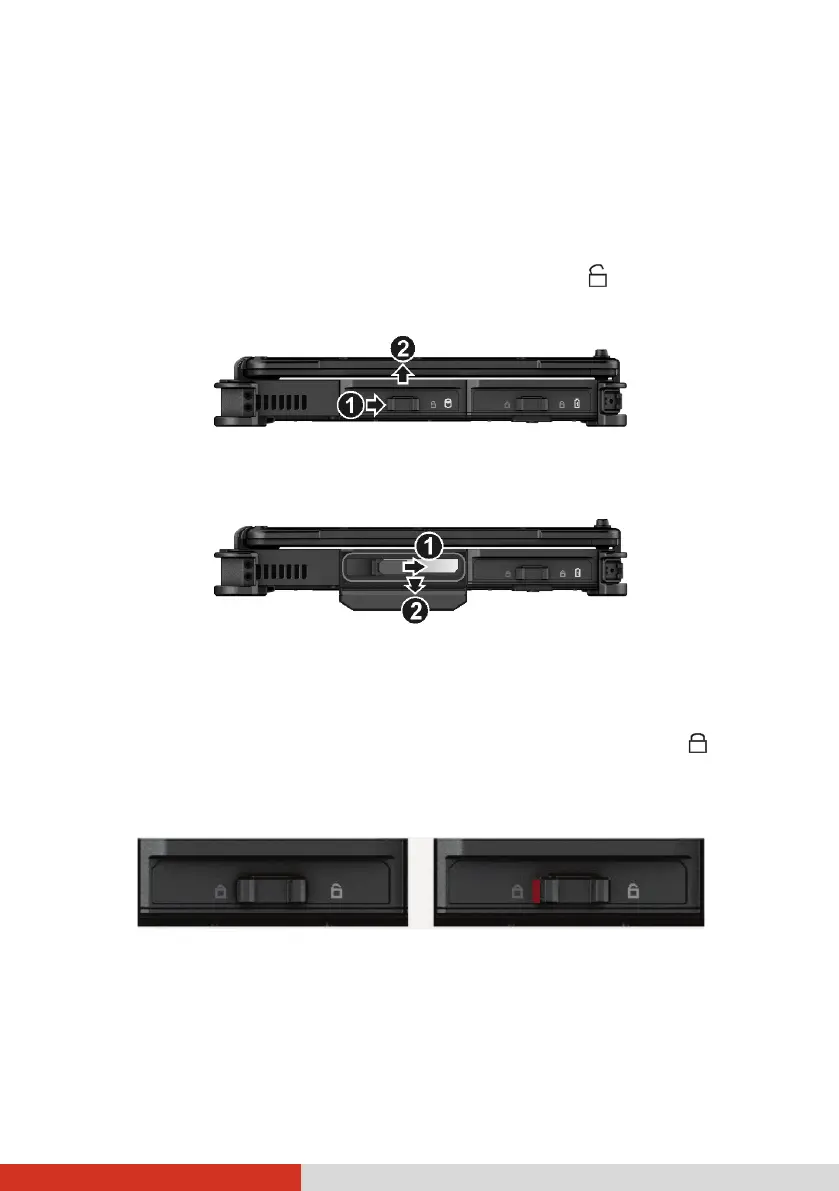
Replacing the Hard Disk Drive
1. Turn off the computer and disconnect the AC adapter.
2. Slide the cover latch toward the unlocked position ( ) (
) and then
lift up the tab (
) to release the cover.
3. Using the ribbon strip, first pull the small latch toward the right to
unlock (
) and then pull the hard disk drive out of the device bay (
).
4. Noting the orientation, insert the new hard disk drive all the way into
the slot until the small latch clicks into place.
5. When closing the cover, push the tab downward until the cover clicks
into place and then slide the latch toward the locked position ( ).
CAUTION: Make sure the latch is correctly locked, not revealing the underneath
red part.
Correct Incorrect (revealing red part)
 Loading...