<Doc_TEC><Doc_503712400><Rel_B><Lang_EN>
Page 50 av 64
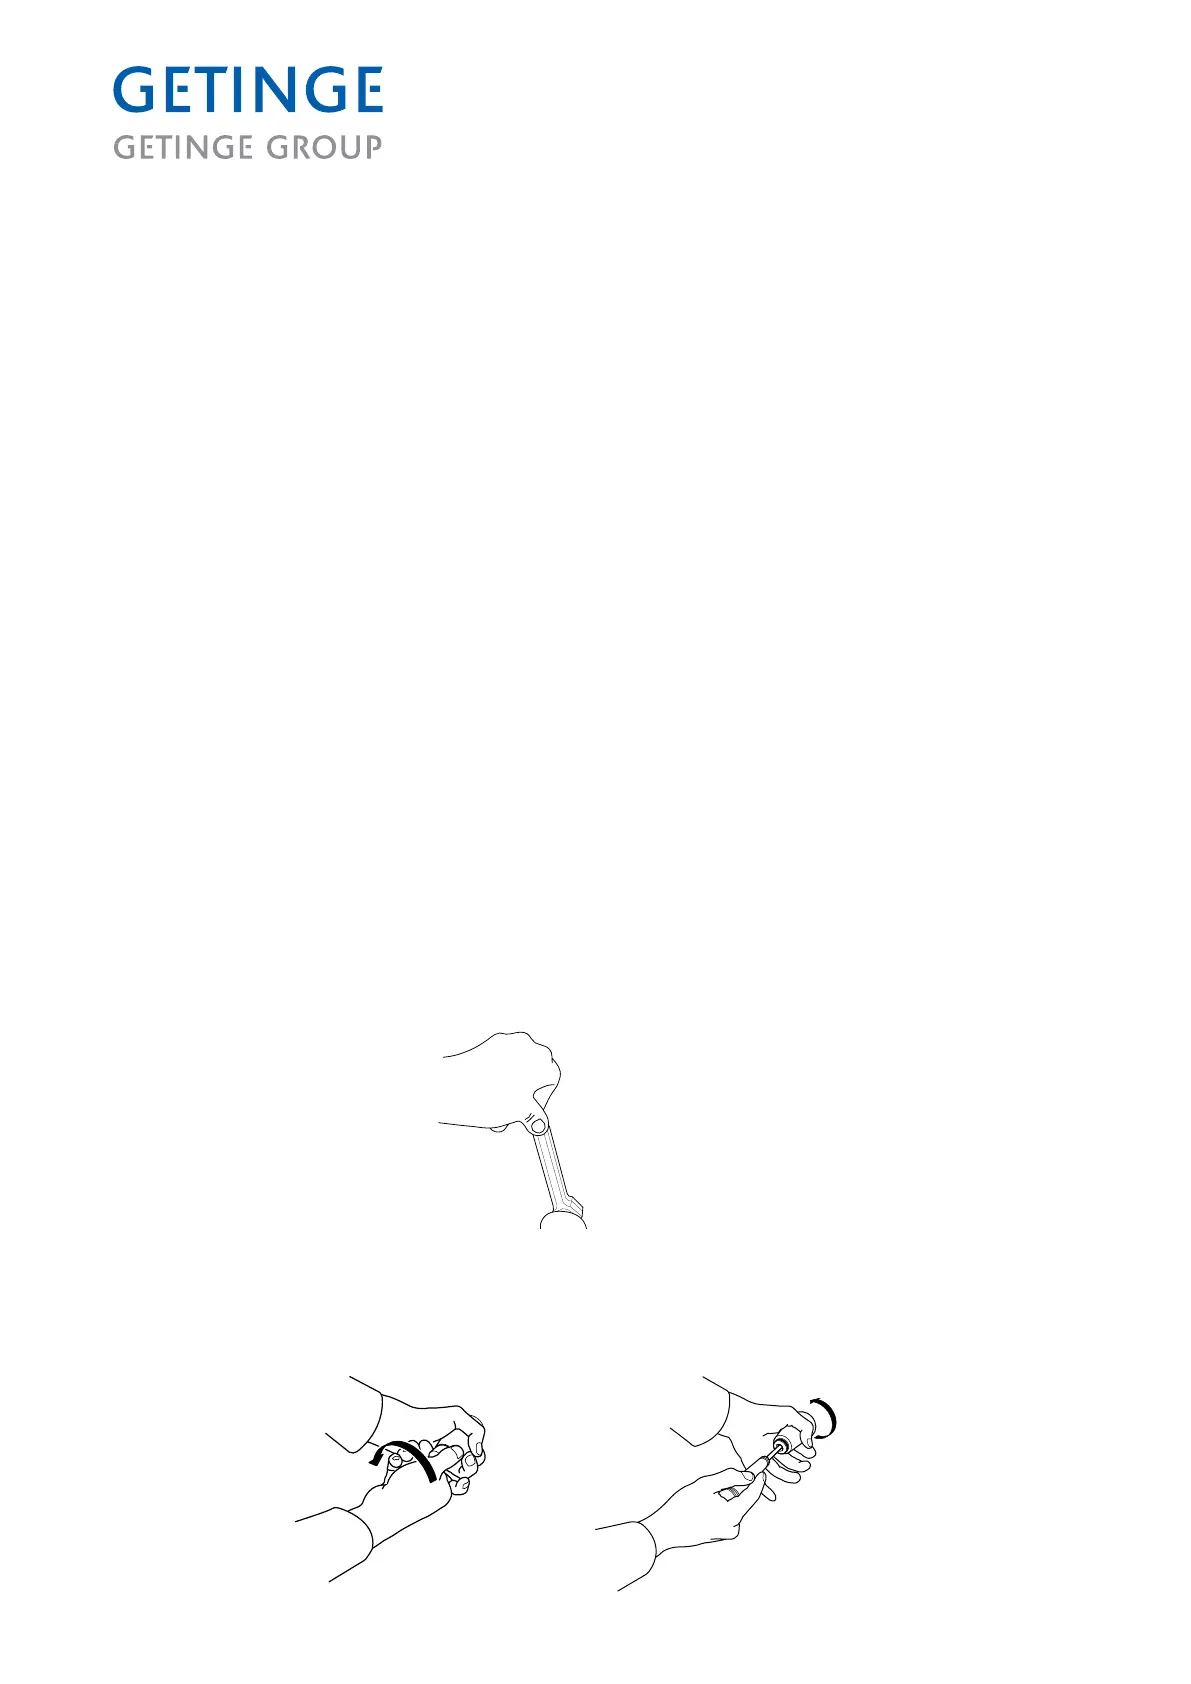
3.1.2 Unscrewing with a screwdriver
Hold the nozzle and unscrew the nozzle head. Then insert a screwdriver into the nozzle
and position the blade in the slot. Holding the screwdriver rmly, unscrew the nozzle.
Clean the nozzle components mechanically and ret the nozzle.
V574
V1375
V1376
2.3 Check the function of the check valves and clean as necessary.
The check valves are important not just for the ventilation process. In addition to
reduced ventilation, leakage can also occur. Clean the contact surfaces and replace
broken parts as needed.
2.4 Check hoses to ventilator for leakage/loose connections.
Cracked or leaking hoses and connections can result in impaired ventilation capacity or
leakage.
Replace damaged hoses or tighten connections as needed.
3 The chamber
3.1 Checking rotating nozzles
This inspection is done to prevent a slower rotation speed on the nozzle or the nozzle
becoming clogged with dirt, deposits and to ensure that the area between the nozzle and
the chamber is tight.
Failure to check the nozzles can result in impaired cleaning. Install the blue nozzle head
and clean it on the inside and outside. Check that the nozzle rotates freely without any
friction. Mount the nozzle head back again.
Check that the nut that attaches the nozzle to the chamber wall is tight.
The nozzle must be removed for cleaning. This can be done in either of the following
ways.
3.1.1. Unscrewing with fixed wrench
Use a xed wrench (size 10 mm) to lock the nut between the nozzle and the rotating
nozzle. Then unscrew the nozzle by hand. Clean the nozzle components mechanically
and ret the nozzle.