Lenses
Page 11 (40)
atos_cs_rev01_en_rev-c 2012-09-03
5. Lenses
The lenses shown in this example may, in some cases, differ from
those delivered in practice. Therefore, the statements made here have
to be used correspondingly.
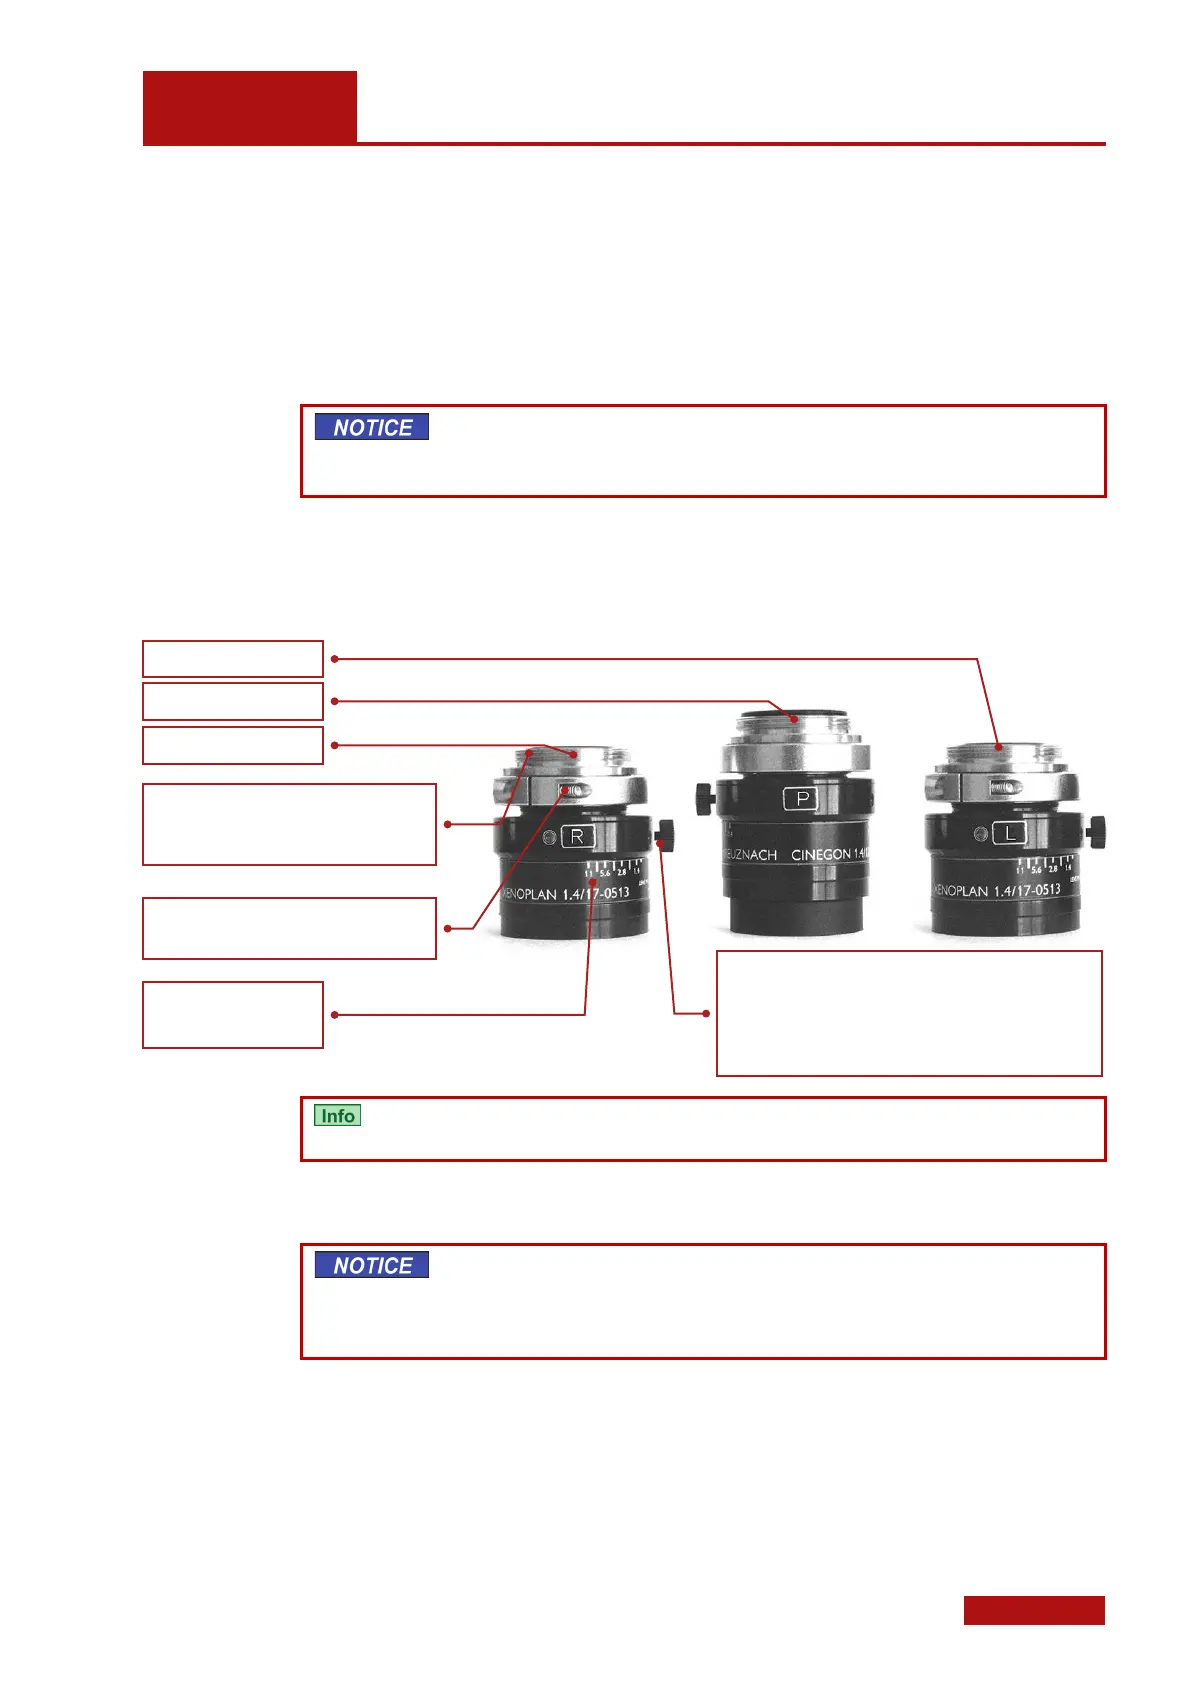
All lenses are marked with L (left) or R (right) or P (projector). Left and
right are defined from the sensor view in normal operating position.
Never switch on the sensor if the projector lens still is equipped with
the lens cap! Due to the high light output, the lens cap and the pro-
jector lens may be damaged!
5.1 Lenses
For the projector lenses, the aperture value is fixed and cannot be
changed.
Select a set of lenses matching the required measuring volume and
camera positions (e.g. SO, 300, 500), and screw it into the cameras
and the projector.
To avoid getting dirt into the cameras and the projector, always equip
the devices with lenses or blind caps, even when they are switched
off. When changing the lenses, fix the new lenses in place immedi-
ately.
Screw in the lenses carefully by hand, lock the focus locking ring, if
necessary, to ensure screwing in without any problems.
Screw thread; tighten carefully by hand in
the housing!
While doing so, lock focus locking ring!
Focus locking ring with hex socket head
locking screw
In this example 17 mm.
Aperture setting ring with manual locking screw. If no
screw exists, locking is done by means of three hex
socket head screws in the aperture ring. Note: In the
example shown, aperture value 11 means aperture
closed and aperture value 1.4 means aperture open.
 Loading...