70
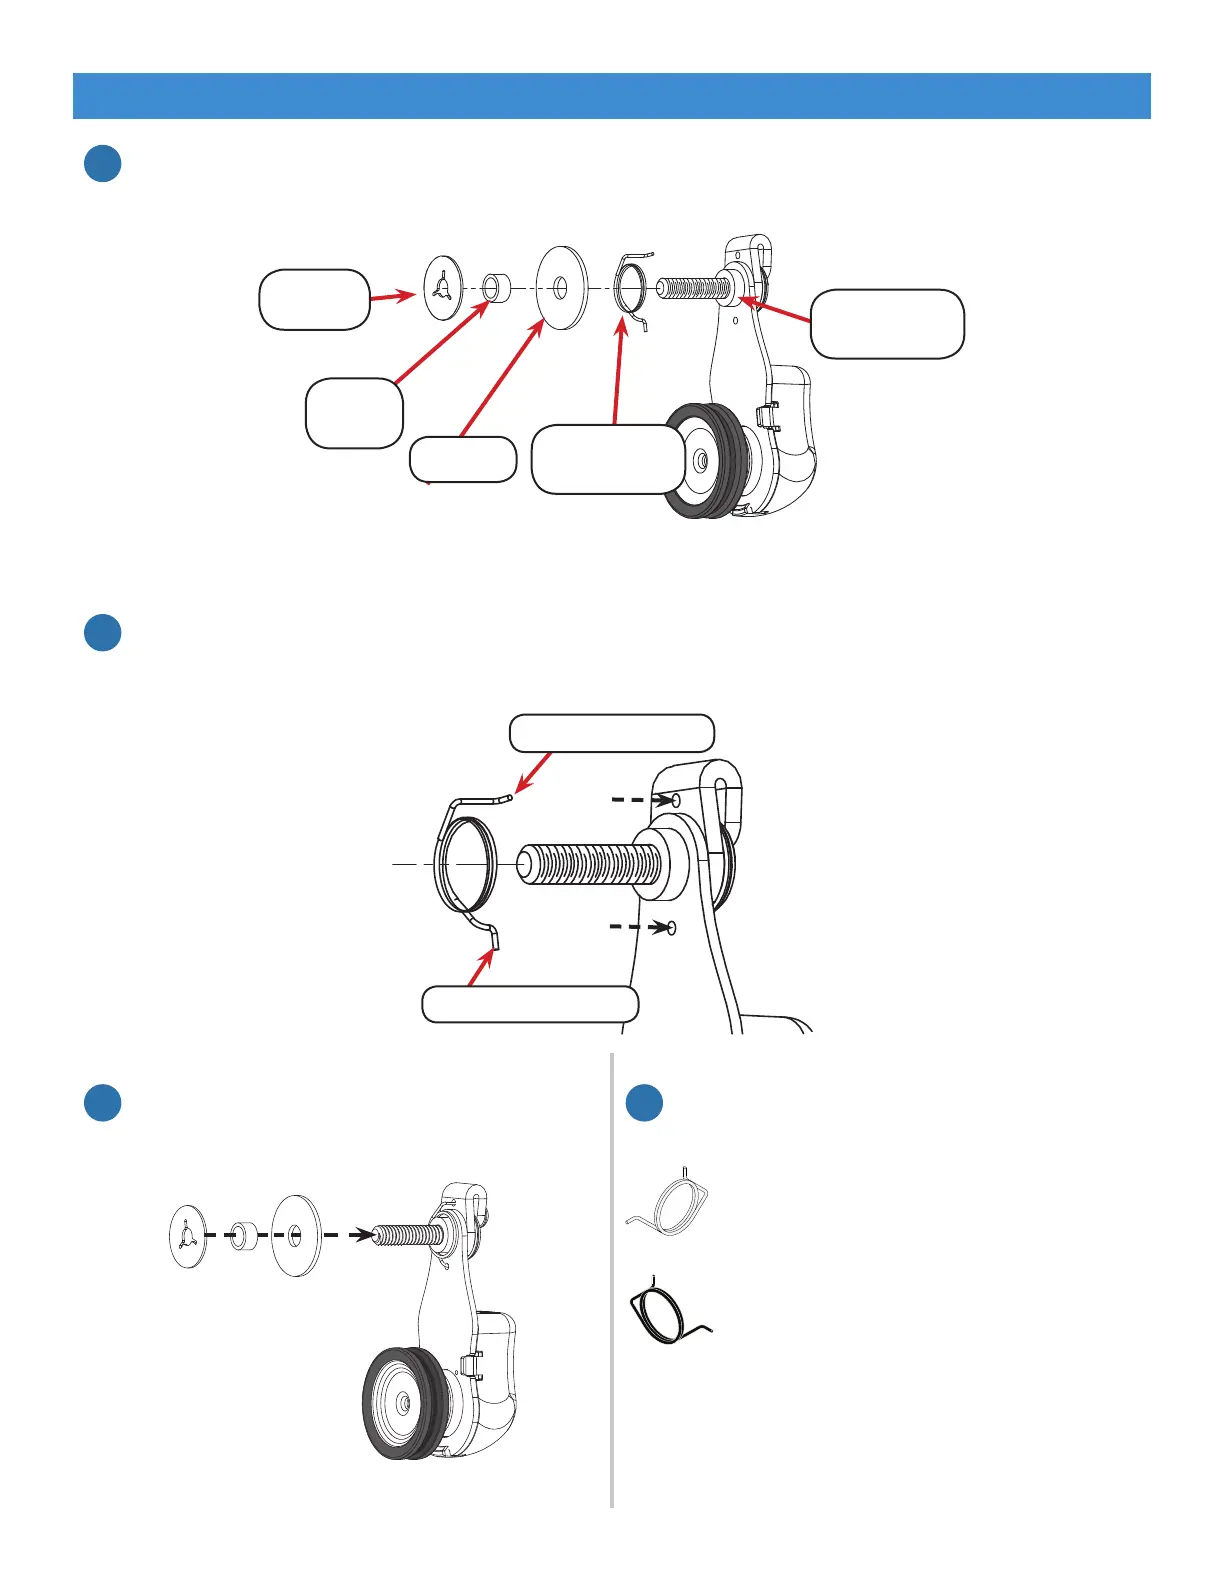
4. Slide the washer, wheel spacer, and plastic
stop back onto the encoder screw.
5. Complete the assembly instructions for the
encoder you repaired.
For the upper encoder (silver spring)
assembly instructions, see page 21.
For the lower encoder (black spring)
assembly instructions, see page 23.
2. Slide the plastic stop, wheel spacer, washer, and broken encoder spring o the encoder.
Leave the shoulder spacer on the encoder screw.
3. Place the new encoder spring onto the encoder screw. The long spring arm should slide into
the hole in the lock collar, and the short spring arm should go into the hole on the encoder
base.
Shoulder
Spacer
Plastic
Stop
Wheel
Spacer
Washer
Encoder
Spring
Long Spring Arm
Short Spring Arm
Repairs and Diagnostics
5
6
7 8
Replacing the Encoder Spring (Continued)
 Loading...