16
308-327
Troubleshooting
WARNING
Pressure Relief Procedure
To
reduce the risk of serious bodily injury
, including
fluid injection, splashing in the eyes or on the skin, or
injury from moving parts, always follow this proce
-
dure when you shut of
f the sprayer
, when checking,
adjusting or cleaning the system, and when changing
spray tips.
1.
Engage the trigger safety latch.
2. T
urn the engine ON/OFF switch to OFF
.
3. T
urn the pressure control switch to OFF
.
4.
Disengage the trigger safety latch. Hold a metal
part of the gun firmly to the side of a grounded
metal pail, and trigger the gun.
5.
Engage the trigger safety latch.
6.
Open the fluid pressure drain valve and leave it
open until you start the sprayer again.
7.
Disconnect the spark plug.
If you suspect the hose or spray tip is completely
clogged or that pressure is not fully relieved after fol
-
lowing the steps above,
VER
Y SLOWL
Y
loosen the
tip guard or hose end coupling to relieve pressure
gradually
. Now clear the tip or hose obstruction.
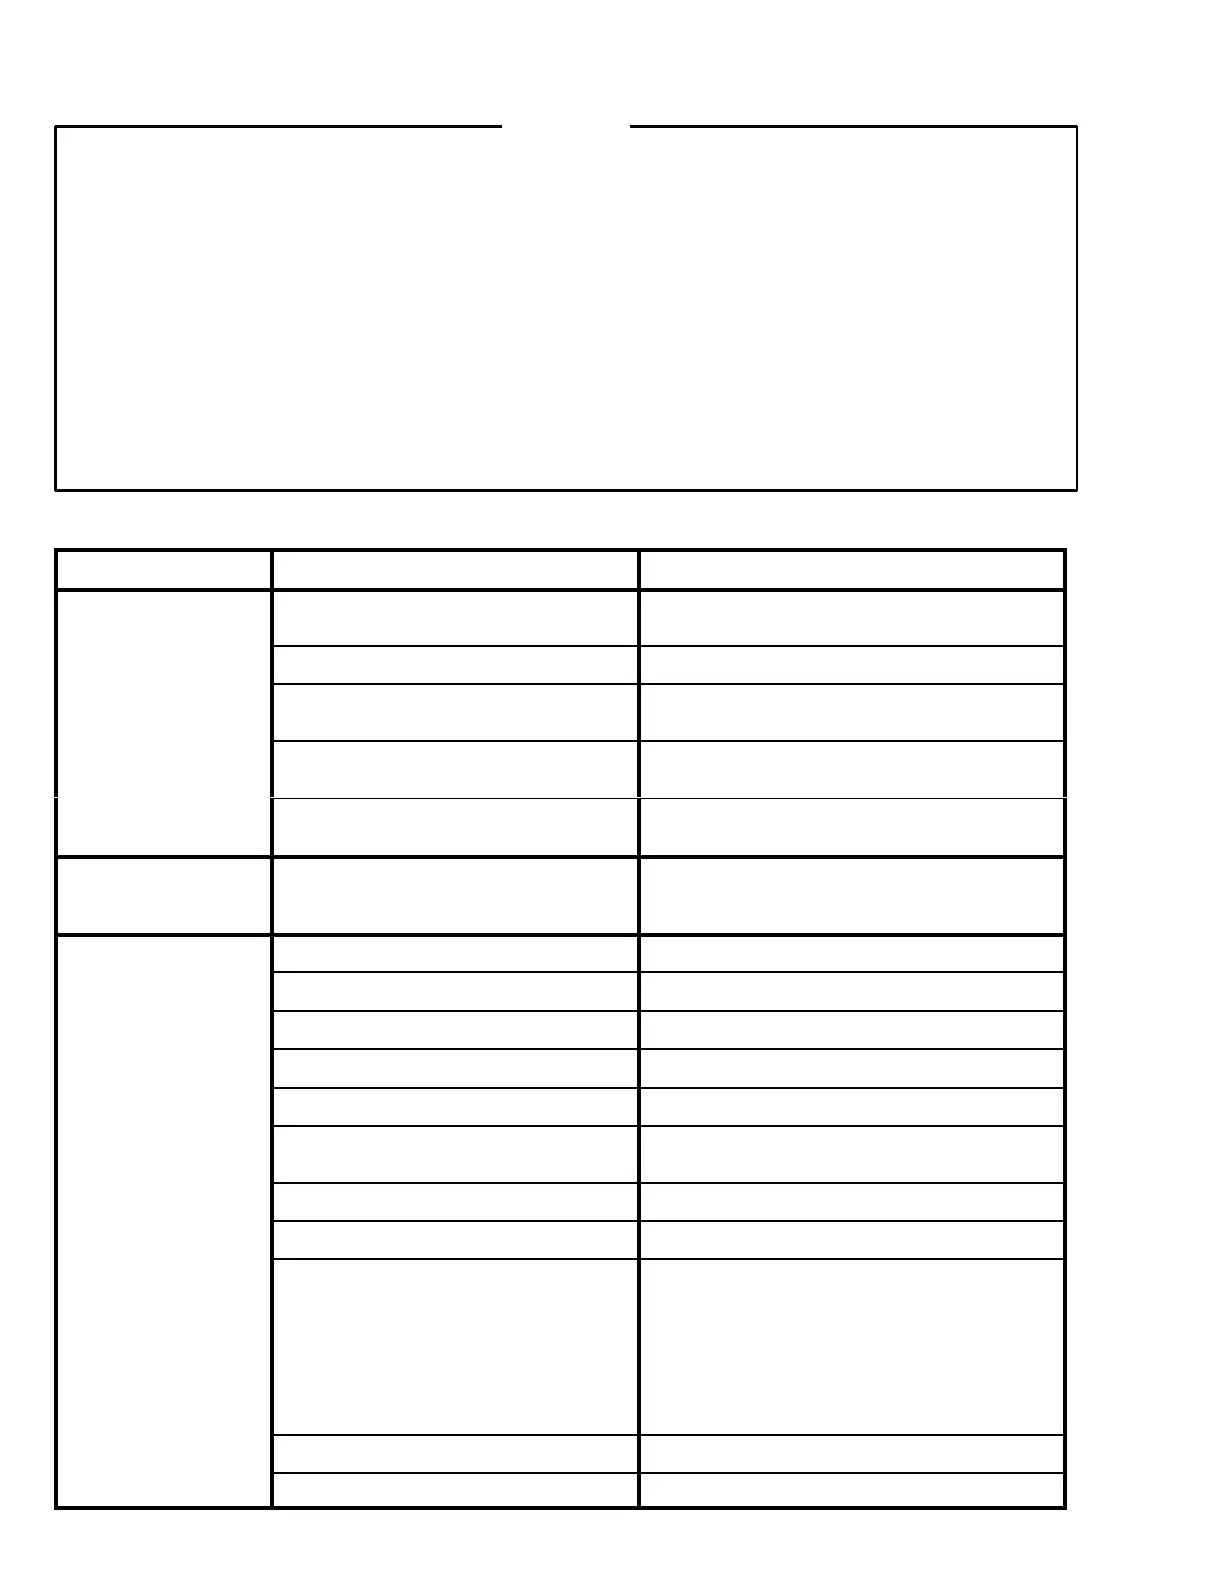
Check everything in the chart before disassembling the sprayer
.
PROBLEM
CAUSE SOLUTION
Engine/sprayer
won’t
start
Engine switch not on
T
urn on.
Out of gas
Replenish
Engine oil level low
T
ry starting engine. If light on rear of engine glows,
replenish oil.
Spark plug cable disconnected or
spark plug damaged
Connect cable on top of engine or replace spark
plug.
W
ater frozen in pressure control
Return
pressure control to authorized Graco dealer
for
repair
.
Engine won’t “pull over”
Oil seepage into combustion
chamber
Remove spark plug. Pull starter rope 3 or 4 times.
Clean or replace plug. T
ry to start. Keep sprayer
upright to avoid oil seepage.
Engine operates, but
Pressure control switch turned OFF T
urn on.
displacement pump
doesn’t
Pressure setting too low
Increase pressure.
Displacement pump outlet filter dirty
Clean filter
.
T
ip or tip filter clogged
Clean tip or tip filter
.
Broken drive belt
Replace belt.
Displacement pump rod seized by
dry paint
Service pump. See page 31.
Connecting rod worn or damaged
Replace. See page 18.
Drive housing worn or damaged
Replace. See page 19.
Electrical power not energizing field
Check wiring connections. See page 23.
With pressure control switch ON and pressure
turned to MAXIMUM, use a test light to check for
power at black and white wires from pressure con
-
trol.
Have pressure control checked by authorized Gra-
co dealer
.
Clutch worn or damaged
Service. See page 21.
Pinion assembly worn or damaged Service. See page 20.

 Loading...


