Repair
Install Install
Install
Pump Pump
Pump
Note
Steps1–5applytopumpB.Toreconnect
pumpA,proceedtostep6.
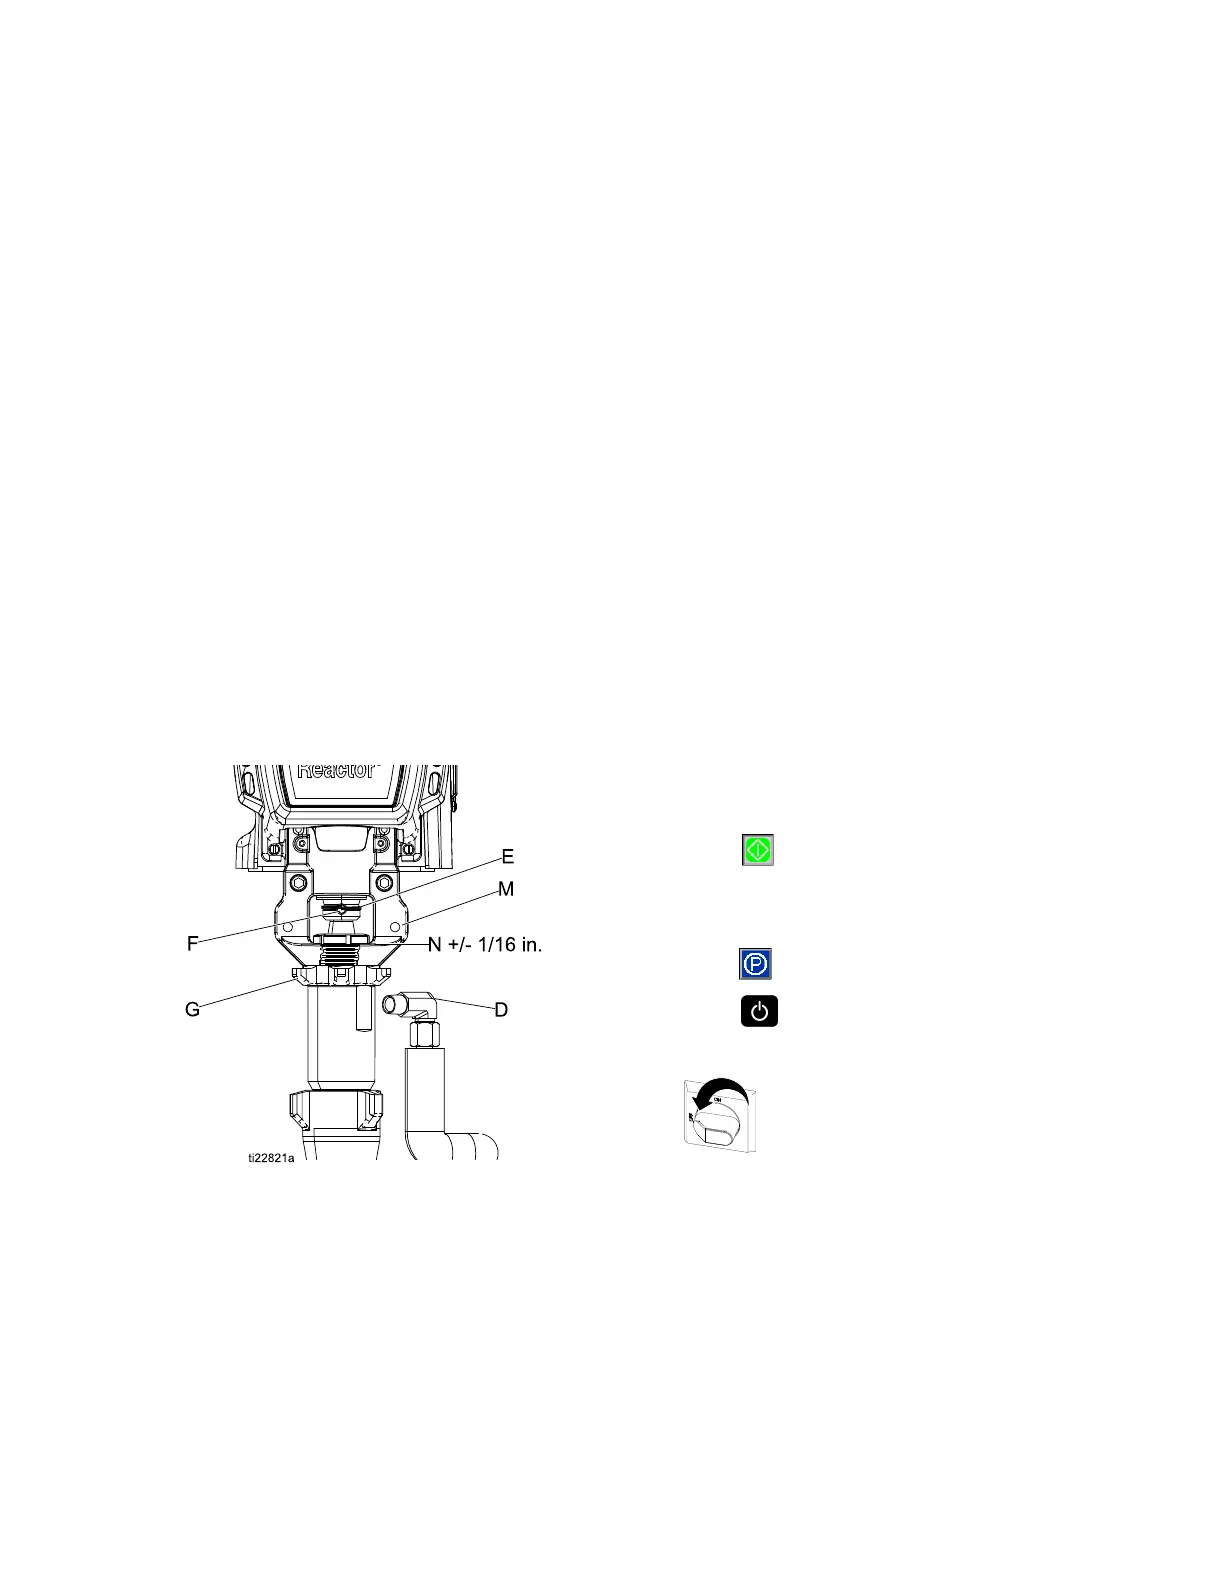
1.Ensurelocknut(G)isscrewedonpumpwith
atsideup.Screwpumpintobearinghousing
(M)untilpinholesalign.Pushpin(F)in.Pull
retainingwireclip(E)down.SeeFig.4forview
andassemblynotes.
2.Continuescrewingpumpintohousinguntiluid
outlet(D)isalignedwithsteeltubeandtop
threadsare+/-1/16in.(2mm)ofbearingface
(N).
3.Tightenlocknut(G)byhittingrmlywitha
non-sparkinghammer.
4.Reconnectuidinlet(C)andoutlet(D).
5.Gotostep13.
Note
Steps6–12applytopumpAonly.
6.Ensurestar-shapedlocknut(G)isscrewedon
pumpwithatsideup.Carefullytwistandextend
displacementrod2in.(51mm)abovewet-cup.
Figure3
7.Startthreadingpumpintobearinghousing(M).
Whenpinholesalign,insertpin.Pullretaining
wireclipdown.
8.Continuethreadingpumpintobearinghousing
(M)untiltopthreadsare+/-1/16in.(2mm)of
bearingface(N).Ensurethatbarbedttingsat
wet-cupushportsareaccessible.
9.ConnectcomponentAoutlettubelooselyat
pumpandatheater.Lineuptube,thentighten
ttingssecurely.
10.Tightenstar-shapedlocknut(G)byhittingrmly
withanon-sparkinghammer.
11.ApplythinlmofTSLtobarbedttings.Using
twohands,supporttubes(T)whilepushing
straightontobarbedttings.Secureeachtube
withawiretiebetweentwobarbs.
Note
Donotlettubeskinkorbuckle.
12.Reconnectuidinlet(C).
13.Purgeairandprimethesystem.SeeReactor
operationmanual.
Repair Repair
Repair
Drive Drive
Drive
Housing Housing
Housing
Removal Removal
Removal
1.Press
tostopthepumps.
2.Turnoffheatzones.
3.Flushpump.
4.Press
toparkthepumpsinthedownposition.
5.Press
todeactivatethesystem.
6.Turnmainpowerswitchoff.
333024S 55