Section 3: Installation Page 7
3 Installation
3.1 GENERAL
This Section gives details of the installation process for the Grant
Aerona Smart controller.
These installation instructions must be read in conjunction with
the Grant Aerona air source heat pump installation
instructions (provided with the unit).
Before starting to install the Grant Aerona Smart controller please
read the Health and Safety information given in Section 13 of
these installation instructions.
Similarly, before staring any installation work on the Grant
Aerona air source heat pump please read the Health and Safety
information given in Section 14 of the Aerona³ installation
instructions.
3.2 REGULATIONS AND STANDARDS
The installation of the Grant Aerona Smart controller and a Grant
Aerona air source heat pump must be in accordance with the
following recommendations, as applicable:
• Building Regulations for England and Wales, and Building
Standards for Scotland
• Local Bylaws (check with the Local Authority for the area)
• Water Supply (Water Fittings) Regulations 1999
• MCS Installer Standards
• MIS3005-D The heat pump Standard (Design)
• MIS3005-I The heat pump Standard (Installation)
• MCS020 MCS Planning Standard
The installation should also be in accordance with the latest
edition of the following standards and Codes of Practice:
• BS7671 and amendments
• BS EN 12831
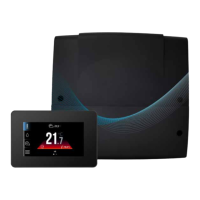
3.3 TOUCHSCREEN DISPLAY
The touchscreen display is designed to be wall mounted. It must
not be installed in steamy conditions such as a bath or shower
room. The touchscreen display should be mounted at a height
allowing comforTable operation, typically 1.5m above the oor.
Refer to Figure 3.1.
1.5m
0,2m
Figure 3-1: Touchscreen positioning
To reduce measurement disturbances avoid locations exposed to
strong sunlight, with poor air circulation, near heating equipment,
and directly at the door and windows, typically 200mm from the
edge of the do
or.
! NOTE !
When selecting the cable connecting the touchscreen
display with the wiring centre, you must use a cable with
single wire resistance lower than 8Ω. Total cable length
must not exceed 100m.
3.3.1 FITTING THE TOUCHSCREEN DISPLAY
The touchscreen display installation should be done according to
the following guidelines:
1. Detach the mounting plate from the back of the touchscreen
display. The plate is attached to the touchscreen with latches.
Use a at screwdriver to detach the plate. (See Figure 3-2)
2. Using a sharp tool cut out holes in four places of the cover for
the screw terminals. (See Figure 3-3)
1
2
Figure 3-2: touchscreen display & back plate
3. Connect the cable to the screw terminal as described on
the plate. Refer to Figure 3-4 The cable can be recessed in
the wall or it can run over its surface - In this case the cable
should be additionally placed in the cable channel.
Figure 3-3: Mounting plate cutaway
4. Drill holes in the wall and use screws to x the mounting
plate in the chosen place of the wall, maintaining its proper
position (Refer to Figure 3-4)
5. Attach the panel to the mounting plate using latches.w
! NOTE !
The touchscreen display connection cable can not be
ducted with other electrical cables that are part of the
building mains and should not be routed near devices that
emit a strong Electromagnetic eld
IMMEDIATE CONSIDERATION SHOULD BE GIVEN TO HYDRAULIC (REFER TO
SECTION 4) AND ELECTRICAL (REFER TO SECTION 5) CONNECTIONS PRIOR TO
INSTALLATION FOR WIRING CENTRE POSITIONING.
 Loading...