Appendix A: Wired ThermostatPage 42
A.1 GENERAL
The Grant Wired thermostat is designed to provide individual
circuit control via the Grant Aerona Smart Controller.
The thermostat is installed in a suitable location to monitor the
circuit, e.g., Ground oor hallway, and is designed to maintain a
target temperature.
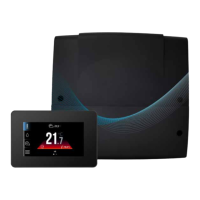
The thermostat on the backlit LCD display shows information
about the circuit temperature value, selected operating mode,
current time with simultaneous clock synchronization with the
main controller.
A.2 INSTALLATION
The thermostat is intended for installation only in a dry, habitable
location and should be mounted to the wall. After choosing the
place of installation, make sure that:
• The selected location is free of excessive humidity and the
ambient temperature of the thermostat should be within the
range of 0 to 40
o
C,
• The chosen location should ensure free air circulation and
should be located away from heat-emitting sources, e.g.,
electronic equipment, replace, heater and direct sunlight.
• The thermostat should be mounted at a height enabling
convenient operation, typically 1.5m above the oor. (Refer to
Figure 3-1)
The thermostat should be screwed to the wall with mounting
screws. Access to the screw holes is obtained by opening and
removing the back cover of the thermostat. A at screwdriver can
be used to open the cover.
Figure A-1: Wired thermostat back access
The cover is screwed to the selected location of the wall with the
appropriate position (UP), as shown in the Figure below. The hole
spacing can be determined by attaching the cover to the wall.
UP
Figure A-2: Wired thermostat wall xing
Appendix A
Wired Thermostat
Before reattaching the cover, lead the wire connecting the
thermostat with the wiring centre through the hole. The cable must
be recessed into the wall. The cable can not be routed together
with the electrical cables of the building. The cable should not run
in the vicinity of devices emitting strong electromagnetic elds.
Then attach the thermostat to the mounting frame using the clips.
The VCC, GND, D+, D- terminals of the thermostat should be
connected to the transmission socket of the main controller. Refer
to Figure A-3.
! NOTE !
A 4-core cable with a cross-Section of min. 0.5 mm2.
Figure A-3: Wired Thermostat Wiring
! NOTE !
Close attention must be paid to the 4 connections for
Voltage, Ground and Polarity. Ensure they match to
corresponding wires from touchscreen panel
A.3 THERMOSTAT PANEL
21
.5
°c
12:00
Figure A-4:Wired (& Wireless) thermostat panel LCD
 Loading...