5 – 3
(7) If the specified setting is satisfactory, press the ENTER key. The “COPY” message appears and
the plotter makes only the specified number of copies.
The copy data will be saved even if you replace the medium, so you can make as many copies as
necessary as long as that data is not cleared from the plotter’s internal buffer memory. You can repeat
the COPY operation by simply pressing the COPY key.
(8) If the plotter’s effective cutting area is smaller than the area required for the copy data, the
“CANNOT_COPY!” message appears as shown below.
If this happens, either use the , , , POSITION keys to change the starting point for
cutting the copy and try again, or replace the medium with a larger sheet that can accommodate the
entire image to be cut.
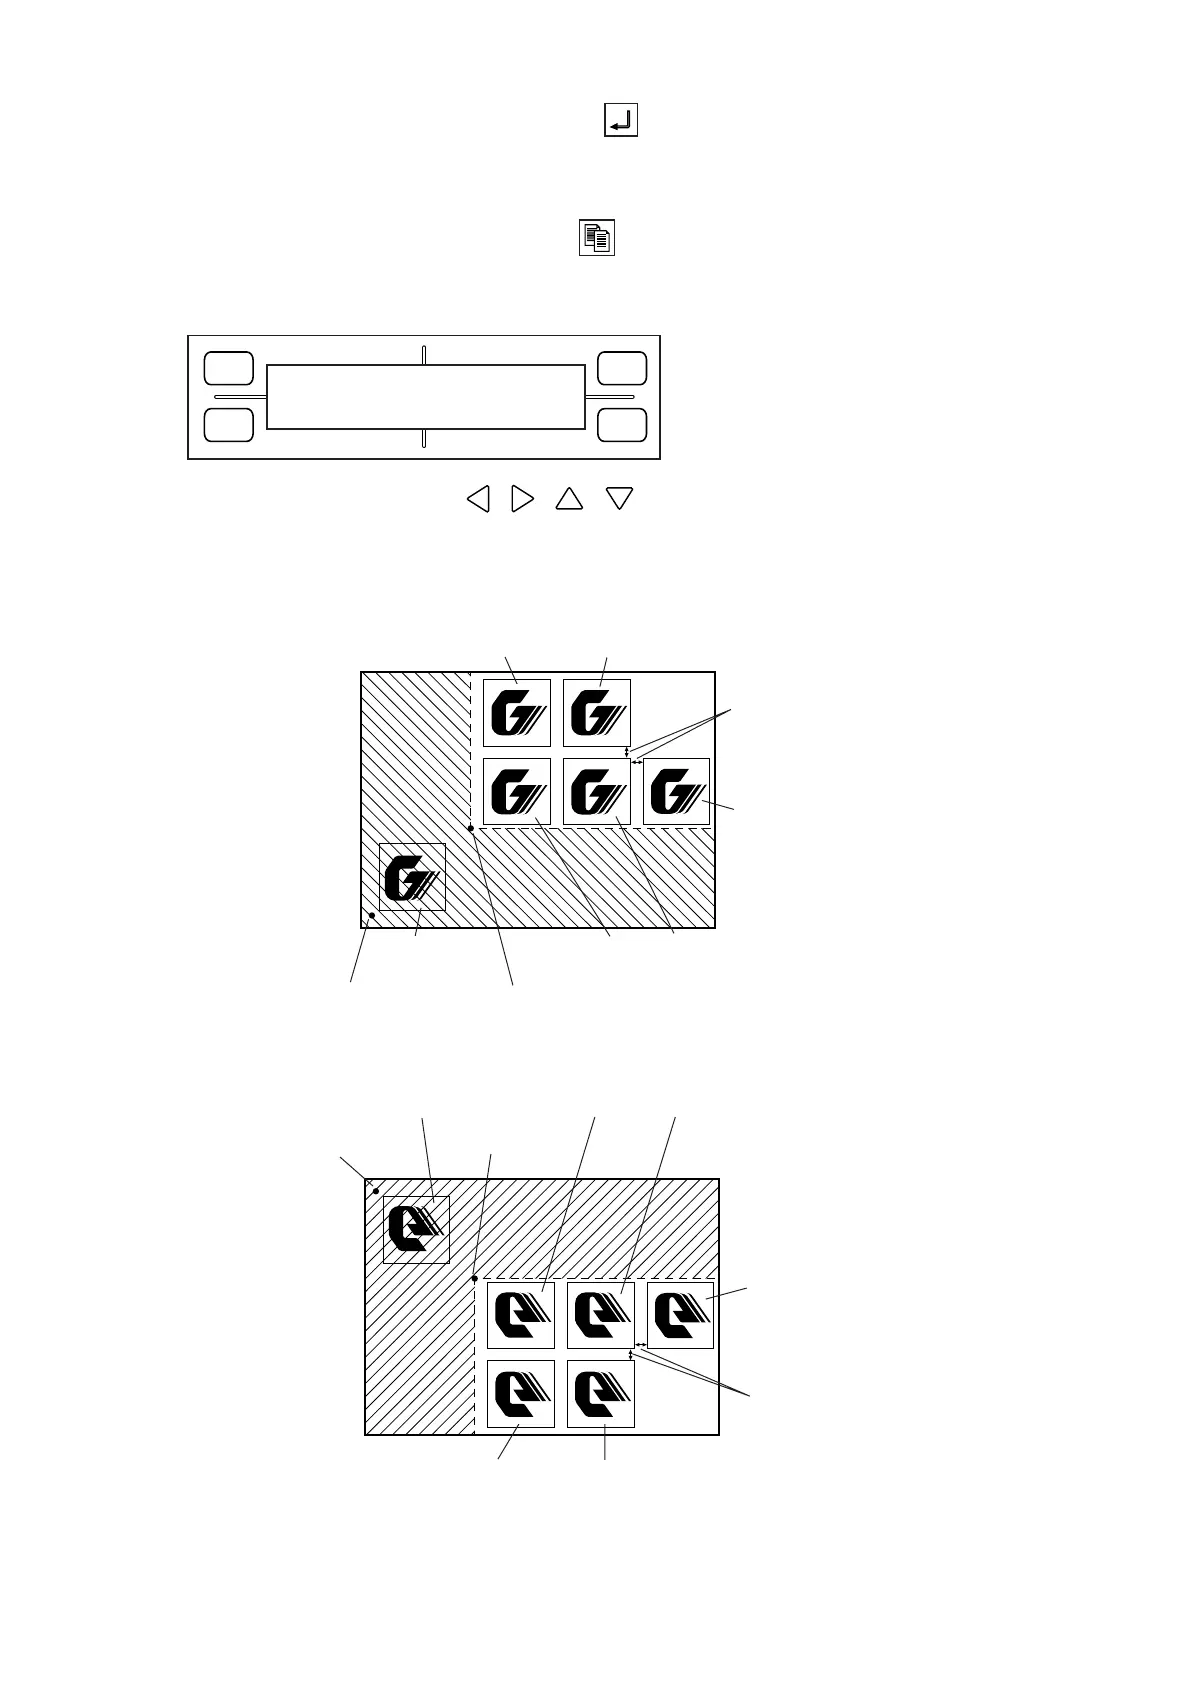
Normally, copies will be cut as illustrated in the following example.
When the MIRROR MODE setting is ON, copies will be cut as illustrated in the following example.
FORCE
SPEED
OFFSET
QUALITY
F1 F3
F4
F2
CANNOT COPY!
Origin point
Initially cut
image (original)
COPY origin point
1st copy
2nd copy 4th copy
3rd copy
5th copy
Space between copies
Origin point
Initially cut image (original)
COPY origin point
2nd copy
1st copy 3rd copy
4th copy
5th copy
Space between copies