32
Assuming that you have already entered one or more CONV objects (which
we recommend you do prior to attempting the entry of the slightly more
complicated TGRP object), you should press the PROG key to place your
scanner into Program Mode, then press the
NEW
softkey, then press the
TGRP
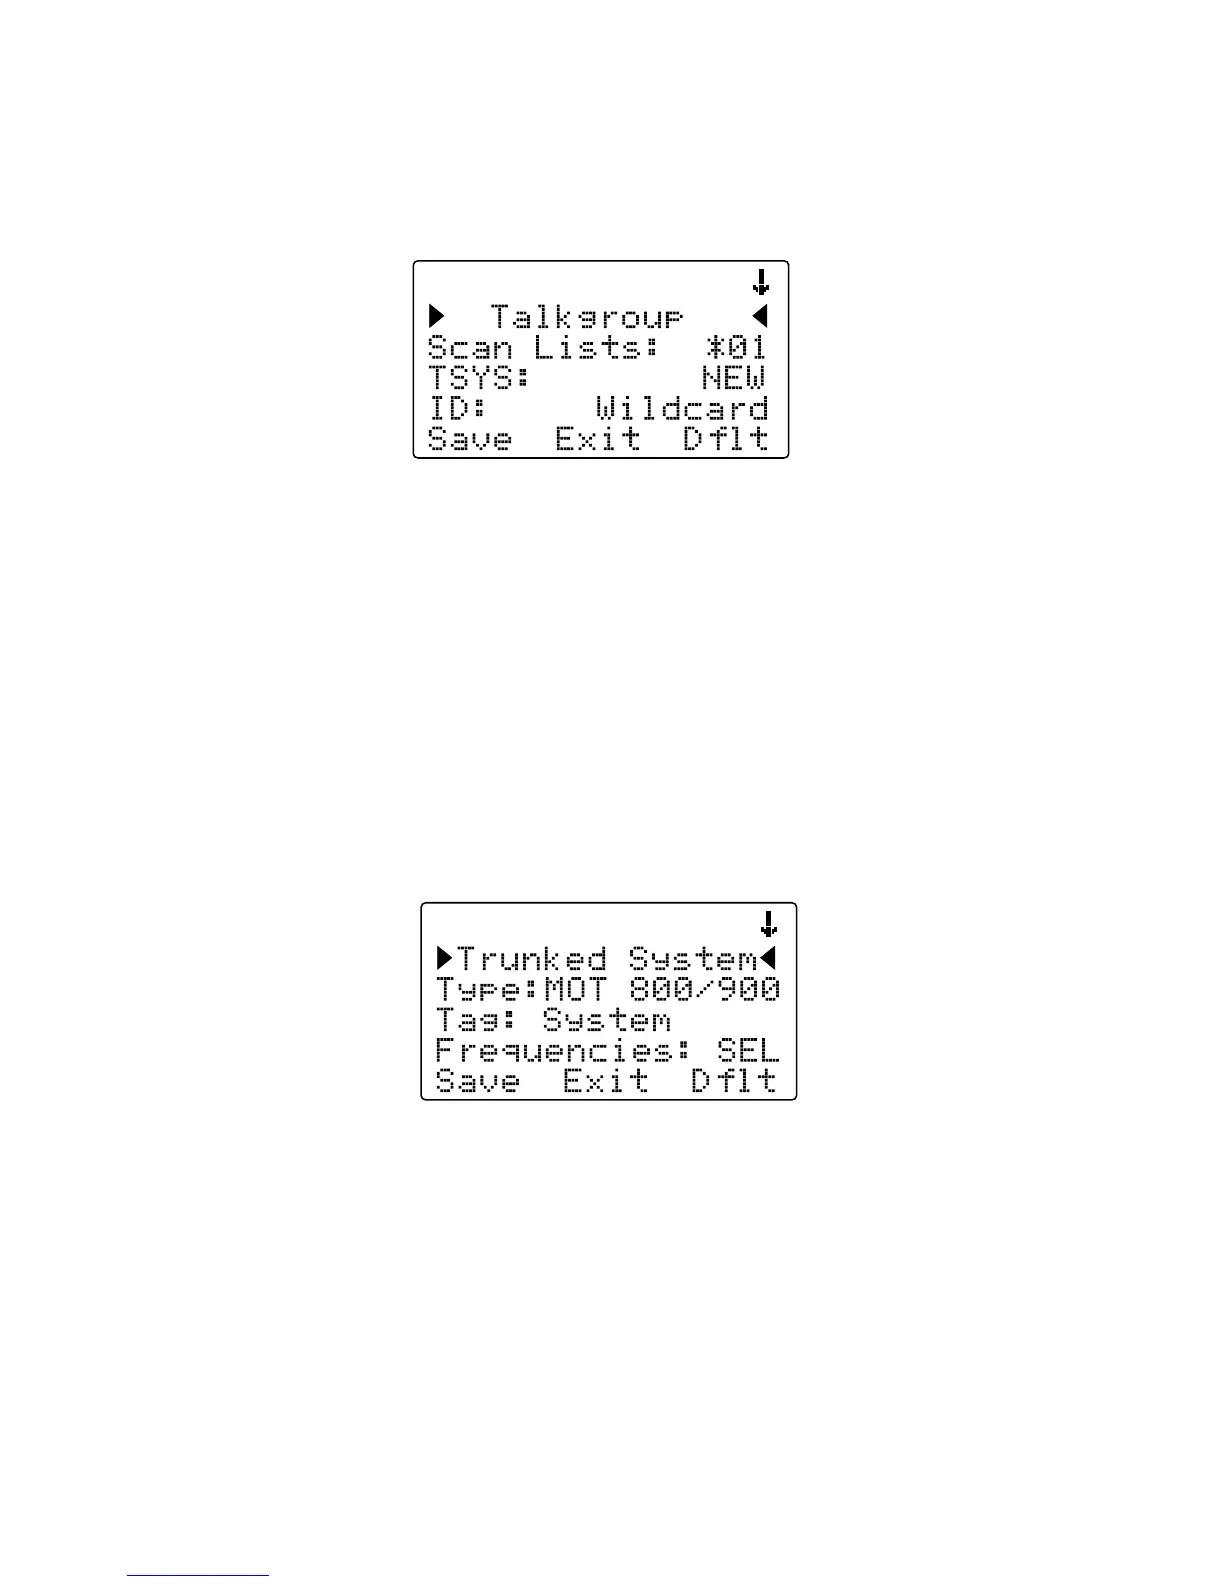
softkey. Your radio display should appear as follows:
In the same way as with the CONV object, this menu of TGRP parameters
can be scrolled up and down to access and enter or change the various
parameters associated with a trunking talkgroup.
For the purpose of this example, we will assume that you wish to create a
TGRP object for a Motorola Type II 800 MHz trunked radio system, which
is one of the more common types of trunked radio systems in use. (If this
is not the case, we encourage you to refer to the Detailed Menu Reference
section of this manual for more information that applies to the type of TSYS
you wish to monitor.)
Scroll the display by pressing the down arrow once so that the flashing
cursor is highlighting the TSYS field, then press the SEL key in the center of
the 5-way pushbutton pad. Your radio's display should appear as follows:
We are entering a new Motorola Type II 800 MHz system, so we can leave
the
Type:
field as-is. It's a good idea (in fact, a REALLY good idea, for
reasons you will see as you proceed) to give your TSYS a unique name.
Press the down arrow key once to scroll to the
Tag:
field, then press the
SEL key and enter a name for the system using the methods previously
described for naming your CONV object. We will use the tag My System for
this particular example in the documentation: