GREENWORKSTOOLS.COM GREENWORKSCOMMERCIAL.COM
24
2021-03-18
Note: Remove the old silicone and add new silicone on the
cable glands.
6 Connect the charging connector cable to the main board.
7 Secure the charging connector cable to the lower chassis using
0 type 4 fasteners (see section 3).
8 Assemble the chassis (see section 4.20).
9 Assemble the body (see section 4.21).
10 Silicone around charging connector.
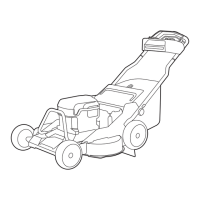
4.18. REPLACING THE CHARGING CONNECTOR ASSY
1 Disassemble the body (see section 4.2).
2 Disassemble the chassis (see section 4.9).
3 Disconnect the cable from main board.
4 Unscrew three fasteners type 1.
5 Lift the old assy from chassis.
6 Fit the new assy in chassis.
7 Screw the three fasteners type 1.
8 Connect the cable to main board.
9 Assemble chassis (see section 4.20).
10 Assemble body (see section 4.21).
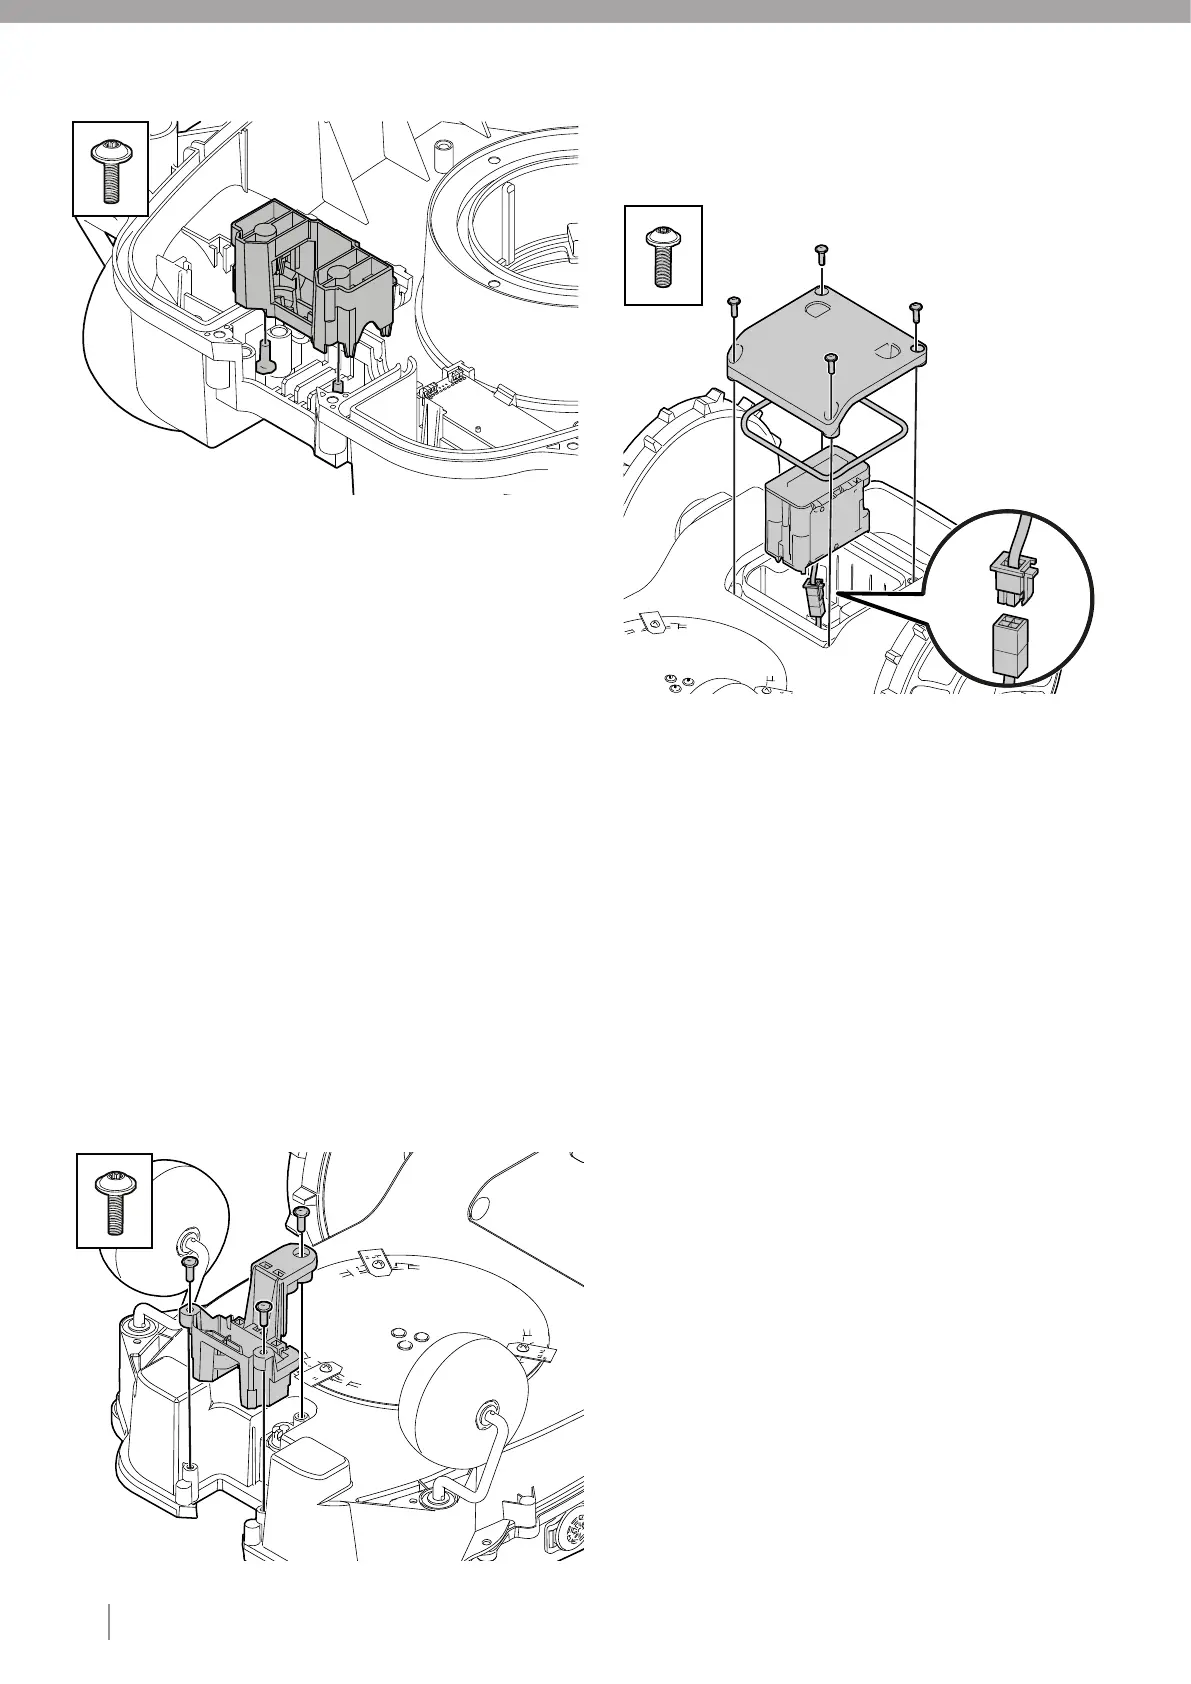
4.19. REPLACING THE BATTERY
1 Disassemble the body (see section 4.3).
2 Turn the mower upside down and unscrew four type 1 fasteners
0 that secure the battery cover to the lower chassis.
3 Remove the battery cover and disconnect the battery terminal
0 connector.
Note: Always pull the connector and not the cable.
4 Remove and discard the battery cover sealing strip.
5 Lift the battery straight out.
6 Connect the battery terminal connector to the new battery.
7 Insert the new battery cover sealing strip.
Note: Do not stretch the sealing strip.
8 Fit the battery cover and insert the four type 1 fasteners and
0 tighten to the correct torque (see section 3).
9 Assemble the body (see section 4.21).
Note: Discard the old battery in accordance with local
environmental regulations.
X4
X2
X3
2.
– HIGH CUT