GREENWORKSTOOLS.COM GREENWORKSCOMMERCIAL.COM
27
2021-03-18
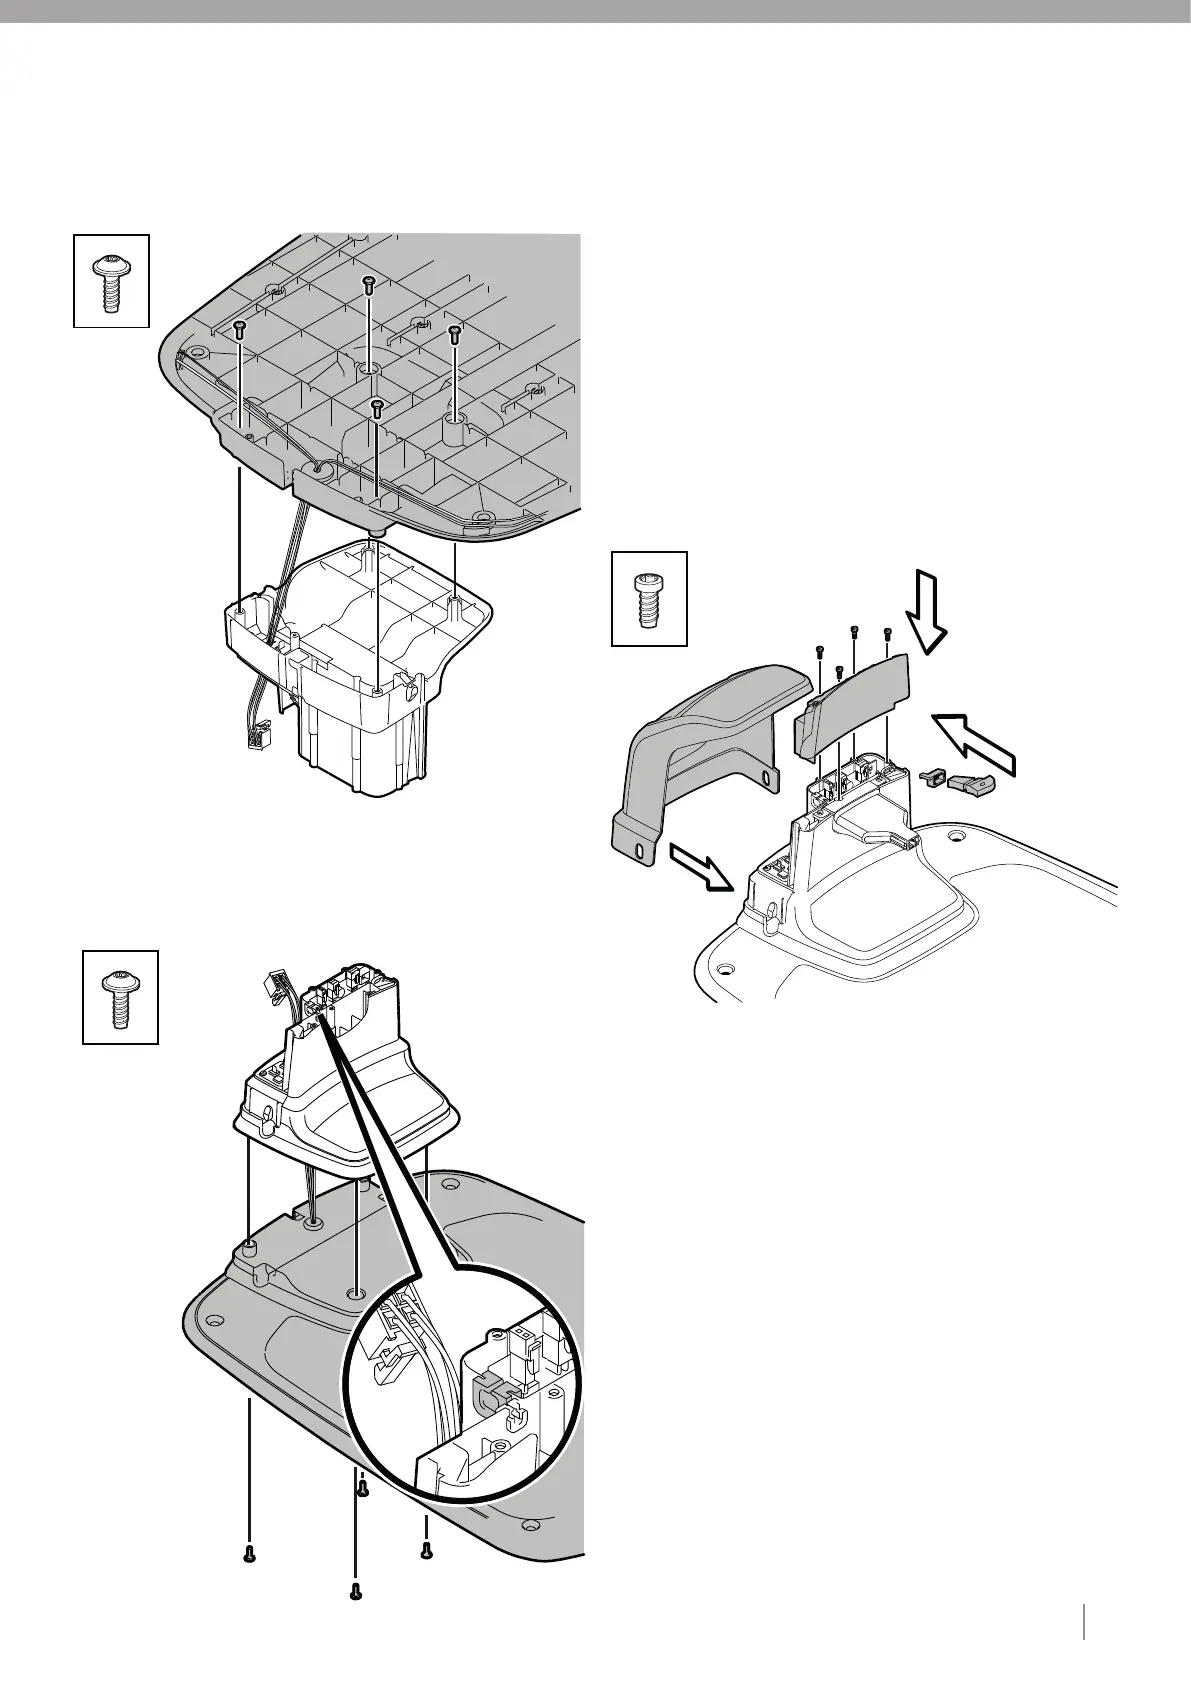
6 Guide the charging station plate cable of the new charging station
0 plate in through the tunnel in the charging tower.
7 Insert four type 1 fasteners and tighten to the correct torque (see
0 section 3).
8 Guide the charging station plate cable through the rubber grommet
0 and connect the charging station plate cable to the charging
0 station board.
9 Assemble the charging station (see section 5.5).
5.5. ASSEMBLE THE CHARGING STATION
Note: Make sure that no cables are pinched and that the rubber
grommets for the cables are in place.
1 Check that all cable connectors are properly connected to the
0 charging station board.
2 Guide all cables through the rubber grommet to the charging
0 station board.
3 Fit the light guide holder and the light guide on the charging
0 station board.
4 Fit the charging tower top onto the charging tower.
5 Insert four type 2 fasteners and tighten to the correct torque (see
0 section 3).
6 Connect all cables to the charging station (low voltage cable,
0 boundary wire, and guide wires).
7 Connect the power supply.
8 Fit the charging station hood onto the charging station by sliding
0 onto the charging tower until the tabs at the base and clicking it
0 into place.
5.4. REPLACING CHARGING STATION PLATE
1 Disassemble the charging station (see section 5.1).
2 Turn the charging station upside down.
3 Unscrew four type 1 fasteners that secure the charging station
4 plate to the charging tower.
4 Disconnect the charging station plate cable from the charging
0 station board.
5 Guide the charging station plate cable out through the tunnel in
0 the charging tower and separate the old charging station plate
0 from the charging tower.
X4
X4
X4